Plastering is one of the most crucial steps in home renovation, transforming rough, uneven walls and ceilings into smooth, durable surfaces ready for painting or decoration. Whether you’re tackling a small patch repair or plastering an entire room, the process can be a rewarding DIY project if done correctly. However, it requires the right tools, techniques, and a good understanding of the materials involved. In this residential plastering essentials guide, I’ll walk you through the essential plastering basics—from surface preparation to applying the final finish—so you can achieve professional-looking results in your own home.
Step-by-Step Plastering Process for Beginners
Alright, this is where the magic starts. If you don’t prep the wall properly, even the best plaster won’t stick. I’ve been there, rushing through surface prep and paying the price with cracking, peeling, and more headaches down the road. Let me walk you through it:
Your Surface Prep Checklist:
- Clear the Room: Move everything out, or at least cover it. Don’t be lazy here—you’ll regret it if plaster gets on your new couch or hardwood floors.
- Scrape Loose Material: Remove old paint, wallpaper, and flaking plaster with a scraper or a wire brush. If you try plastering over that stuff, it’ll just peel off.
- Clean the Surface: Once it’s all scraped down, vacuum up the dust or use a brush to clear debris. You don’t want dust interfering with the plaster bond.
- Fix Cracks and Holes:
- Small cracks: Fill them with patching compound.
- Larger cracks: Clean them up and apply fiberglass mesh tape for reinforcement.
- Loose plaster: Drill small holes, apply plaster adhesive, and temporarily clamp it back into place.
- Small cracks: Fill them with patching compound.
- Electrical Safety: Switch off the power and remove faceplates from power points and light switches. You don’t want to end up plastering over something that could cause an electrical hazard.
- Apply Bonding Agent: For really dry or absorbent surfaces (like brick or plasterboard), a primer or bonding agent (like PVA glue or Blue Grit) will help the plaster adhere better. I can’t stress this enough—don’t skip this step! Melbourne’s humidity can make adhesion tricky, so you need that extra grip.
Mixing Plaster Correctly
Mixing plaster can be a bit tricky, but once you get it right, you’ll be on your way to a smooth finish. I’ve seen too many people throw the plaster in the bucket and add water willy-nilly—don’t do that. It’s all about the right consistency.
Step-by-Step Plaster Mixing:
- Clean Tools and Containers: Make sure your mixing bucket is clean. Any leftover dust or debris will mess with the consistency.
- Add Water First: Always pour water into the bucket first—about 11 to 11.5 liters for one bag of multi-finish plaster.
- Gradually Add Plaster: Slowly sprinkle the plaster into the water while stirring—this helps avoid lumps. Adding water to plaster creates a mess!
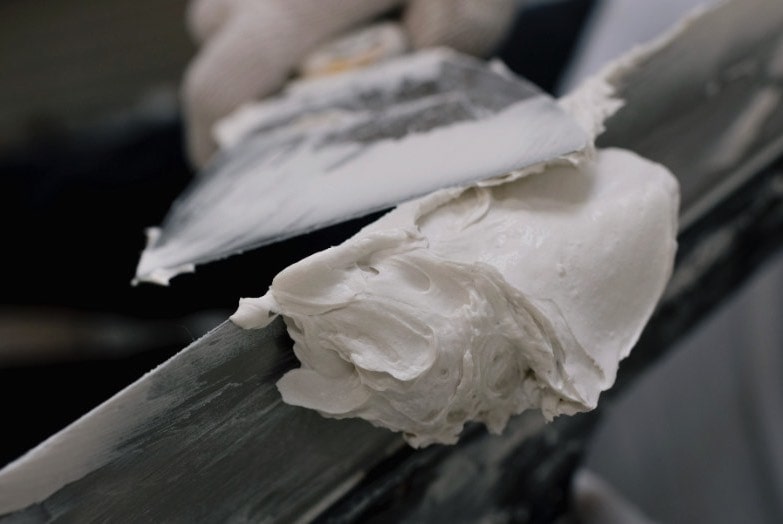
- Mix Thoroughly: Use a paddle mixer or a drill attachment for a smooth, lump-free consistency. You want the mix to be like thick custard or peanut butter—not too runny, but not too thick either.
- Let It Sit: After mixing, let the plaster sit for 2 minutes. It helps release air bubbles and ensures the consistency is spot on.
- Mix in Small Batches: Plaster sets fast, so only mix what you can use in about 30–40 minutes. Trust me, once it starts setting, you’re stuck with it.
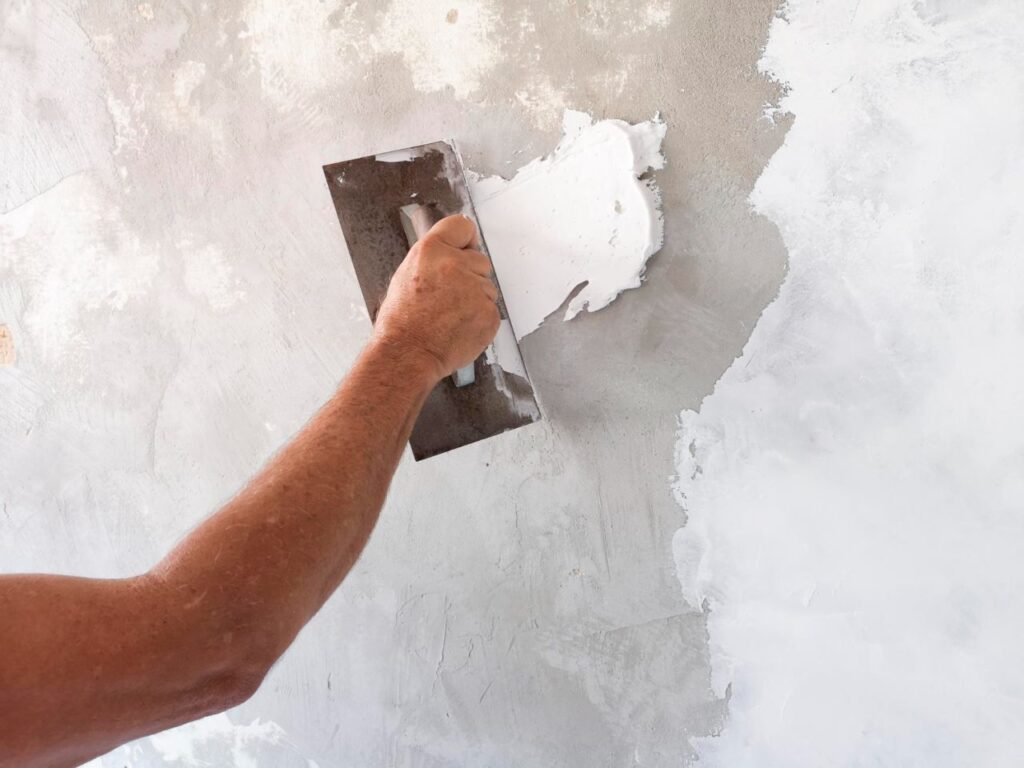
Applying the Plaster: Mastering the Layers
Now that you’ve got your plaster mixed and your walls prepped, it’s time to apply it. This is where a lot of beginners can get overwhelmed. You’ll need to build up the plaster in thin layers and smooth each layer out properly.
Here’s a breakdown of the application process:
- Scratch Coat (Base Coat):
- Apply a thin base layer to the wall—roughly 3/8 to 1/2 inch thick. This is your foundation.
- Roughen the base coat slightly with a cross-hatch pattern to help the second layer stick.
- Apply a thin base layer to the wall—roughly 3/8 to 1/2 inch thick. This is your foundation.
- Smooth and Level:
- After the scratch coat firms up (but isn’t fully dry), use a spirit level to check for any bumps or imperfections.
- You want a flat base—this is where the pro finish comes from. It might take a bit of effort, but it’ll be worth it.
- After the scratch coat firms up (but isn’t fully dry), use a spirit level to check for any bumps or imperfections.
- Finish Coat (Top Layer):
- Once the scratch coat is firm, apply your finish coat—a thinner layer around 1mm thick.
- Use a flexible finishing trowel for this stage to ensure a smooth, polished finish.
- Feather the edges of the finish coat into the surrounding wall to blend seamlessly.
- Once the scratch coat is firm, apply your finish coat—a thinner layer around 1mm thick.
- Polish the Surface:
- After 15–20 minutes, the second coat should be firm enough to polish. Use a wet trowel or water brush to smooth the surface. Keep it damp but not soaking wet.
- Repeat the polishing step a few times to get that ultra-smooth, flawless finish.
- After 15–20 minutes, the second coat should be firm enough to polish. Use a wet trowel or water brush to smooth the surface. Keep it damp but not soaking wet.
Drying and Finishing: The Final Touches
Drying is where things can go wrong if you’re not careful. I’ve seen it all—from plaster that cracks because of uneven drying to finishes that end up pitted because of rushed drying. Here’s how you get it right:
- Ventilate the room: Open windows for airflow to help plaster dry evenly.
- Don’t use direct heat: Never speed up the drying process with space heaters or direct heat—it can lead to surface cracking.
- Check for even drying: Dry plaster should be pale and feel firm. Dark patches or spots mean it’s not fully dry yet.
- Wait patiently: Let each coat dry before you apply the next one—rushing this stage can ruin all your hard work.
Applying the Mist Coat and Final Paint
Once your plaster is dry and ready to go, it’s time to seal it with a mist coat—this is crucial for making sure the paint goes on smoothly and lasts longer.
How to Apply a Mist Coat:
- Water down your paint (3 parts paint to 1 part water) for the mist coat.
- Apply the mist coat with a roller for a smooth, even layer.
- Allow it to dry completely—about 24 hours—before applying the topcoat.
Polishing for a Perfect Finish
Sanding the plaster for a perfect finish is the last step in the process. Once the final coat is fully dry, grab your sandpaper and lightly go over the surface.
- Start with medium-grit sandpaper (120-grit) to smooth out any larger imperfections.
- Finish with fine-grit sandpaper (220-grit) for a polished surface.
- After sanding, wipe down the walls with a tack cloth to remove dust before painting.
When Hiring a Professional is the Smarter Choice
But let’s not kid ourselves—plastering full rooms, or walls taller than 2 meters, is no small feat. If you’re dealing with high walls or older homes where the walls aren’t straight, plastering can quickly turn into a disaster if you’re not experienced. I’ve worked on countless heritage restorations where walls were so out of whack, just getting the plaster to stick properly was a challenge. And that’s where calling in a professional saves the day.
If you’re preparing a house for sale or need plastering done quickly and to a high standard, it’s best to leave it to a pro. They’ll get the job done quicker, and let’s be honest, you’ll get a much better finish. I’ve seen too many DIY plaster jobs where people thought they could get away with it, only to end up needing professional repairs. And let’s face it, plastering mistakes aren’t easy to fix—once the plaster sets, you’re left with lumps, bumps, and cracking edges that are hard to clean up.
In these cases, it’s about timing and quality. A pro will have the job done faster and cleaner, saving you time in the long run. Plus, when you hire a plasterer, you’re getting a guarantee on the work. That peace of mind is worth it when you’re working to tight deadlines or under pressure.
Types of Plastering You Should Know
Gypsum Plaster (Plaster of Paris): The Fast-Drying Option for Interior Walls
- Ideal for interior walls: Works well in living rooms, bedrooms, and dining areas.
- Quick drying: Allows for faster project completion.
- Fire-resistant: Adds an extra layer of protection to your home.
- Smooth finish: Perfect for painting or applying wallpaper.
- Easy to apply: A great plaster for beginners to practice with.
Downside:
- Not suited for exterior use due to weathering.
- Requires careful mixing to avoid lumps.
Cement Plaster: Durable for Exterior Surfaces
- Best for exteriors: Used for facades, walls, and outdoor spaces exposed to the weather.
- Weather resistance: Stands up to Melbourne’s harsh winters and humidity.
- Durable and hard-wearing: Ideal for areas with high foot traffic or that face the elements.
Downside:
- Can cause moisture problems indoors if not applied properly.
- Not breathable—can lead to issues in damp areas like basements if used improperly.
Lime Plaster: Ideal for Historical Restoration
- Breathable: Perfect for restoring heritage homes where moisture control is critical.
- Flexible: Works well on old surfaces and allows for natural movement in buildings.
- Repairable: Hairline cracks can form due to shrinkage but are easy to fix.
Best used for:
- Restoration projects: Great for old houses with original walls.
- Non-toxic: Ideal for homes that need a natural, eco-friendly plaster solution.
Essential Plastering Tools and Materials
Must-Have Tools for Plastering Like a Pro
|
Tool |
Purpose |
Why It’s Essential |
|
Plastering Trowel |
To apply and smooth plaster on the walls |
The most essential tool for a consistent finish. |
|
Finishing Trowel |
Used for skimming and finishing |
Ideal for a polished, smooth finish with less pressure on joints. |
|
Hawk (Handboard) |
Holds plaster while you apply it |
Helps you control plaster and move it with ease onto walls. |
|
Spirit Level |
Ensures walls are level |
Critical for ensuring your plaster goes on evenly and is applied at the right angles. |
|
Bucket Trowel |
To scoop plaster from the bucket |
Keeps things tidy and prevents wastage during application. |
Key Materials You Need to Get the Job Done Right
- Plaster Mix: Choose the right plaster for the surface. Thistle Multi-Finish is a reliable choice for most jobs.
- Primer/Bonding Agent: To help plaster stick better to different surfaces (e.g., PVA glue or Blue Grit).
- Fiberglass Mesh Tape: Prevents cracks from reappearing, especially at joints and corners.
- Flexible Patching Compound: For filling cracks or holes in the wall.
Common Mistakes to Avoid in Residential Plastering
Mistake #1: Choosing the Wrong Type of Plaster
One thing I’ve seen a lot in my time as a plasterer is people choosing the wrong type of plaster for the wrong job. It’s an easy mistake to make, especially when you’re new to the process.
For instance, using cement plaster on the inside of a house isn’t the best move. Cement plaster is fantastic for exterior walls, as it can withstand the elements, but when used indoors, it traps moisture. This can cause all sorts of problems like mold or damp patches over time, particularly in Melbourne’s wet winters.
If you’re working on interior walls, you’re better off going with gypsum plaster—it’s smoother, quicker to apply, and won’t cause moisture issues. Stick with what suits the environment, and you’ll save yourself some headaches down the track.
Mistake #2: Rushing the Surface Preparation
Trust me—proper surface prep is half the battle. I’ve worked on plenty of homes where the plaster job was fine, but because the surface wasn’t prepped properly, it started to crack or peel not long after. People often skip steps, thinking it’ll save time, but if you rush through surface prep, it’ll cost you more in the long run.
Here’s what you need to do:
- Clear away old paint and loose plaster—nothing sticks to a flaky surface.
- Clean the walls—you’d be surprised how much grime or grease affects adhesion. A quick wash with sugar soap will do the trick.
- Fix any cracks with flexible joint compound or fiberglass mesh. Skipping this can cause cracks to reappear soon after you’ve plastered.
Take your time here. Good preparation = better finish, and it’ll save you from future repairs.
Mistake #3: Overworking the Plaster
I get it—you want the walls to be as smooth as possible. But overworking plaster can actually cause more harm than good. It’s tempting to keep smoothing and refining as you go, but plaster sets pretty quickly. Once it starts to set, don’t keep trying to “fix” it.
If you keep smoothing after it’s begun to firm up, you’ll create air pockets, uneven patches, and even cracks as the plaster pulls away from the surface. The trick is to get the application right, let the plaster firm up a bit, and then do any final smoothing in stages.
Pro Tip: If you’re unsure, just let it sit for a bit. Give it 10–15 minutes after applying the second coat, then use a wet brush or trowel to smooth it out.
Mistake #4: Not Allowing Enough Drying Time
I can’t stress this enough: drying time is crucial. I’ve had clients in the past who were so eager to get the job done quickly that they painted over plaster that wasn’t fully dry. The result? Cracks, peeling paint, and a whole lot of regret.
Here’s the deal:
- For gypsum plaster, it takes about 4–7 days to fully dry before you can paint. If it’s cement plaster, you’re looking at a longer drying time—at least 7–10 days, depending on the thickness.
- Signs the plaster is dry: It will change colour from dark to pale, and if you press it lightly, it should feel firm, not tacky.
Rushing the drying process will cost you, so take your time and let the plaster cure properly.
Safety Tips Every Plasterer Should Know
Safety should always come first—no one wants to deal with health problems down the track because they didn’t wear gloves or a mask. Trust me, I’ve worked in dusty conditions where I could feel the plaster particles in my lungs after a long day. It’s no joke.
What you’ll need:
- Dust mask: A good quality mask will protect you from inhaling plaster dust.
- Gloves: Protect your hands from the harsh chemicals and rough surfaces.
- Safety goggles: A small piece of plaster in the eye is no fun, especially if it’s dried!
- Long sleeves and pants: Keep your skin protected from chemicals and dust.
Before you even start, think about the space you’re working in. If you’re like me and work in Melbourne homes, especially older homes, make sure there’s enough airflow, and that your workspace is clear of any hazards.
Things to consider:
- Clear the room: Get all furniture out of the way or cover it properly. You don’t want to get plaster on your best lounge chair!
- Floor protection: Use plastic sheeting or drop cloths to protect floors from spills and drips.
- Electrical safety: Turn off power and remove any electrical fittings, like faceplates, from the walls. Safety first!
Waste Disposal and Cleaning Up
When you’re done, cleaning up is important—especially when you’re dealing with plaster, as it can clog up pipes if not disposed of properly.
- Don’t pour plaster slurry down the drain. It will harden and block your pipes.
- Clean tools immediately after use, especially trowels and hawks. Dried plaster is a pain to remove, and leaving it will affect your tools over time.
