Repairing plaster walls can be a rewarding DIY project, but it’s easy to make mistakes that lead to more damage or costly repairs. Plaster issues can indicate anything from needing a new coat to severe structural problems.
Let’s look into common DIY plastering mistakes and how to avoid them, ensuring a smoother and more effective repair process.
Let’s get straight to the point.
Avoiding DIY plastering mistakes involves careful inspection, preparation, and technique. Before beginning repairs, check for underlying issues like structural damage or moisture.
Common errors include improper surface prep, overlooking cracks, and using the wrong materials. To ensure a seamless finish, ensure proper blending, sanding, and curing times.
Handle older plaster and structural elements carefully to avoid further damage. When applying plaster, follow the correct methods, including primers and matching mixes.
If the problem is beyond your expertise, consult a professional for advice. Properly addressing these factors ensures long-lasting, high-quality plaster repairs.
1. Inspect Before You Begin
Check For Underlying Issues
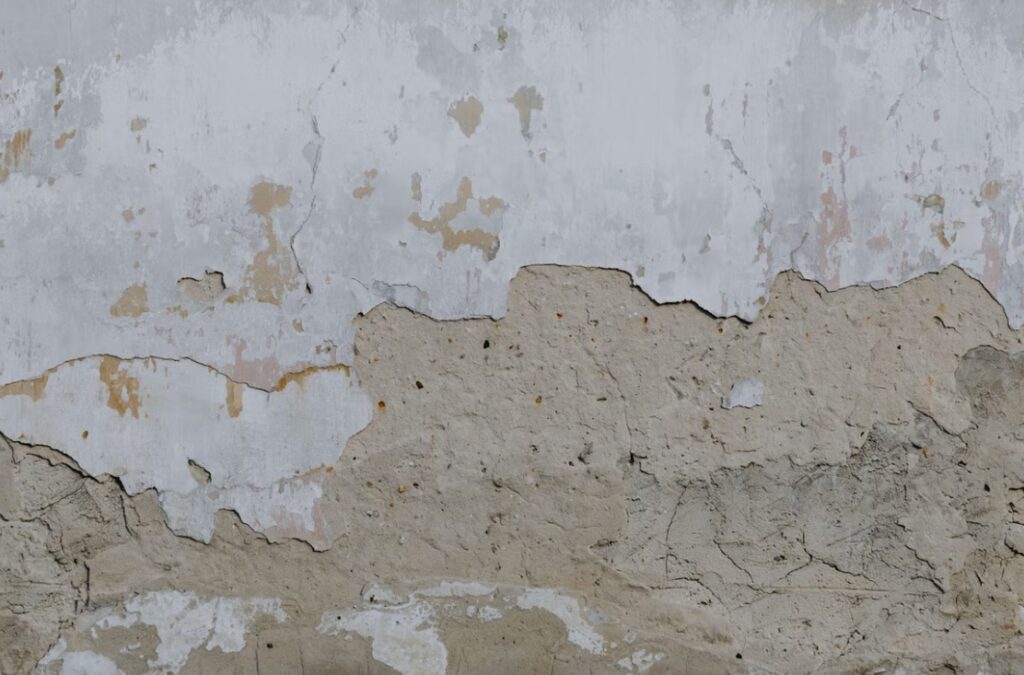
It is vital to inspect the damaged area before starting any plaster repair. Broken plaster could indicate a bigger issue with the building’s structure or moisture problems.
Before proceeding with your DIY repair, consult an expert to rule out significant damage. Addressing the root cause of the damage can save time and money in the long run.
Avoiding Careless Demolition
Removing old plaster requires careful attention. Ripping out the damaged plaster without understanding its connection to the substrate can create more issues.
Always scrape away the loose plaster methodically to expose a solid base for your new patch.
2. Common DIY Mistakes In Plaster Repairs
Not Preparing The Area Properly
- Mistake: Please prepare the surface before applying the new plaster.
- Consequences: Dust, grease, or loose particles can prevent plaster from adhering properly, leading to peeling or cracking later on.
Solution:
- Always clean the area with a damp cloth to remove dust, dirt, and debris.
- Use a mild detergent or a specialist cleaner for stubborn stains or old adhesives.
- Ensure the area is fully dry before applying the plaster.
Tip: Proper surface preparation ensures better adhesion and a longer-lasting
repair.
Overlooking Cracks And Their Causes
- Mistake: Ignoring the root cause of cracks and simply covering them up.
- Consequences: Cracks may reappear if underlying issues, such as structural shifts or moisture, aren’t addressed.
Solution:
- Inspect the area around the crack for signs of water damage, structural movement, or settling.
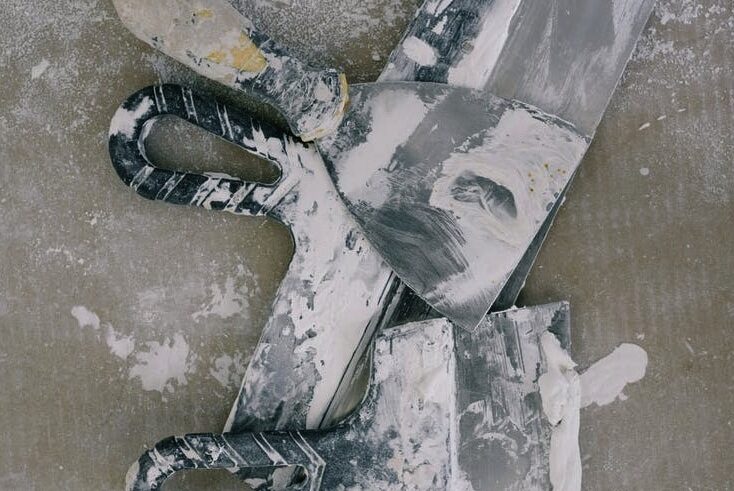
- Widen the crack slightly with a putty knife, allowing the joint compound to bond more securely.
- Address any underlying problems before repairing the plaster.
Tip: Tackling the crack and its cause will help prevent future failures and increase the durability of the repair.
3. Techniques For Successful Plastering
Blending is important for achieving a smooth, seamless finish that makes the repair invisible. Here are a few important steps:
- Use Drywall Tape: Apply drywall tape over the patch’s edges to prevent cracks from forming where the old and new plaster meet.
- Apply Drywall Compound Evenly: Use a wide putty knife to apply the compound in thin layers, feathering the edges to blend with the surrounding wall.
- Sand Gently: After the compound dries, sand the area gently using fine-grit sandpaper to match the texture of the existing surface. Be careful not to overspend, as this can create uneven areas.
- Final Touch: Once smooth, apply primer and paint to blend the patch further into the wall. Use matching paint to make the repair less noticeable.
Consecutive Plastering Without Structural Repair
Plastering over existing damage without addressing structural problems is a common DIY mistake. To avoid repeated repairs:
- Check for Underlying Issues: Sagging plaster may indicate moisture damage, foundation settling, or weak lath.
- Reinforce or Replace: If the lath behind the plaster is deteriorating or damaged, reinforce or replace it before applying new plaster.
- Address Water Damage: Resolve any water leaks or damage before re-plastering to prevent future issues.
Fixing structural problems first ensures the plaster repair lasts longer and remains crack-free.
4. Choosing The Right Materials
Matching Plaster And Stucco Mixes
Different plaster and stucco mixes have specific purposes. Ensure you choose the right material for your project—some mixes are designed for outdoor use, while others are suitable for indoor applications.
When in doubt, consult a professional or a knowledgeable store employee to confirm you’re using the right product.
Avoiding Improper Timing In Stucco Painting
Painting stucco before it fully cures is a common error that leads to cracking and instability. Follow the manufacturer’s curing guidelines to allow the stucco to dry and harden correctly.
Applying paint too soon can trap moisture, causing long-term damage to the wall.
5. Repairing Plaster In Older Homes
Understanding The Needs Of Old Plaster
Older plaster often bonds strongly to the substrate. Therefore, handling it carefully during removal is important to avoid damaging the underlying structure.
If the plaster has crumbled due to moisture or age, stabilise the area before applying the new plaster.
Repairing With Precision
Apply the patch material smoothly when fixing plaster and sand it to match the surrounding texture. If you’re dealing with a large area, consider using lathing to reinforce the repair.
This approach is more effective than covering the damage with a thick layer of plaster.
6. Handling Structural Elements
Checking Lath And Wiring Stability
DIY plastering often overlooks the importance of checking the underlying framework. The new plaster will only adhere properly if the lath or wiring is maintained or wet.
Ensure these components are dry and in good condition before starting your repair.
Installing Drywall Correctly
Consider installing drywall over the affected area if a plaster repair isn’t feasible. Ensure that the drywall is secured tightly with screws and that the seams are well-blended to create a seamless look.
This method provides a durable alternative to traditional plaster repairs.
7. Preventing Common Plastering Errors
Avoiding Poor Venetian Plaster Techniques
Venetian plaster can add a luxurious finish to walls, but applying it requires skill. Mistakes in this process can ruin the look of the wall.
Prepare the surface thoroughly, apply multiple coats, and polish each layer to achieve the desired effect. If you need more experience, practise a spare drywall.
A frequent DIY error is skipping the primer step before painting over plaster. Primer helps the paint adhere better and ensures a smoother finish.
With it, the paint may peel or cover evenly. Always use a primer that matches your paint type for the best results.
8. When To Call A Professional
Knowing When To Seek Help
DIY plaster repairs can be challenging, especially if you encounter structural problems or persistent cracks. If you need help handling a situation., consult a professional plasterer.
They can guide the best materials to use and the correct techniques to achieve a high-quality finish.
Affordable Consultations
Professional consultations can be affordable and offer peace of mind, especially when dealing with significant damage. While a contractor might recommend a specific solution, you’re not obligated to hire them.
Use their advice to decide whether to tackle the project yourself or bring in the experts.
Conclusion
DIY plaster repair is a great way to learn new skills, but it’s essential to avoid common mistakes that can lead to more damage or increased costs.
You can achieve a lasting, professional-looking result by carefully inspecting the damage, using the right materials, and employing proper techniques.
When in doubt, don’t hesitate to seek professional advice to ensure your plaster repairs are done right.
Frequently Asked Questions About Repairing Plaster
Is It Worth It to Repair Plaster Walls?
Since plaster is considered a higher quality material than drywall anyway, it should not be replaced with drywall in most situations. The one exception is if you’re pulling down the walls to replace the plumbing and electrical systems anyway. In that case, it makes sense to replace it with drywall.
Is Plaster Difficult to Fix?
Repairing them isn’t difficult if you have holes or cracks in your plaster walls or ceilings. It can, however, require a bit more extra time and skill than patching a hole in drywall.
How Do You Fix Uneven Plaster Walls?
You want to have a bristle brush paintbrush but we suggest you use a natural bristle brush instead of a synthetic brush because you know natural bristles that hold the water.
When Should I Be Concerned About Cracks in Plaster?
If the cracks are jagged, at 45-degree angles, or look like a flight of stairs going up your wall, you probably need to check them out. They are probably harmless but could be a sign of structural issues that will need addressing, so it is worth ensuring.
How Much Does It Cost to Repair a Plaster Wall?
Plaster Repair Cost Per Square Foot
Some professionals charge by the type of repair, such as $20 per crack. Small holes cost less to repair $10 to $80 per square foot) while larger holes are more expensive ($70 to $100 per square foot. Overall, it costs most homeowners $750 to repair plaster.

