Not every rough wall calls for a full replaster. In fact, I’ve walked into more Melbourne homes than I can count where the walls looked rough as guts, and the owner was already bracing for a big bill—only to find out later that a simpler fix would’ve done the trick.
Whether it’s peeling paint in a Brunswick weatherboard, dents from years of wear in a Carlton terrace, or outdated textures in a Bayside unit, there are practical ways to smooth walls without plastering. With the right prep, a bit of patience, and a steady hand, you can get a clean, paint-ready finish without dragging in the big guns.
Why You Don’t Always Need to Replaster Walls
Surface Problems vs Structural Damage
Here’s the thing: most wall issues are only skin-deep. They look bad, no doubt about it, but the structure underneath is often perfectly fine.
Common surface-level problems include:
- Peeling or flaking paint
- Small dents from furniture knocks
- Hairline cracks from minor movement
- Uneven patches from old patch jobs
I remember a job in Fitzroy where the walls looked like they’d seen better days—layers of paint peeling, patches everywhere. The owner thought the whole place needed replastering. Once we scraped it back, though, the base was solid. A bit of filler, a skim, and some sanding later, it came up a treat.
When Smoothing Works Best
Smoothing without plastering is the right call when:
- The wall feels solid when tapped
- There’s no ongoing moisture problem
- Damage is shallow and localised
“If the bones are good, don’t rip the whole thing apart—just fix what’s on the surface.”
The Step Most People Skip: Proper Wall Preparation
Cleaning the Wall Before Any Work
If there’s one thing I’ve learned the hard way, it’s this: prep is everything. Skip it, and you’ll be chasing your tail later.
Walls—especially in kitchens—collect grease, dust, and grime over the years. If you try to apply filler or paint over that, it simply won’t stick.
Simple cleaning process:
- Mix sugar soap with warm water
- Wipe walls from top to bottom
- Rinse with clean water
- Let dry completely
I once had a job in a Richmond kitchen where the previous painter skipped cleaning. Within weeks, the paint started peeling. We had to strip it all back and start again. Lesson learned.
Safety Checks for Older Homes
Melbourne’s full of older homes, and with that comes a few risks. Lead paint is one of them.
Safety checklist before sanding:
- Test for lead paint
- Wear a P2 dust mask
- Use safety goggles
- Keep windows open for airflow
In suburbs like Carlton or Brunswick, where heritage homes are common, it’s worth being cautious. Better safe than sorry.
Method 1 – Using Filler to Smooth Small Imperfections
Fixing Holes, Dents, and Minor Cracks
For small jobs, filler is your best mate. It’s quick, affordable, and gets the job done.
Step-by-step:
- Apply filler with a putty knife
- Press it firmly into the hole or crack
- Smooth off excess
- Let it dry
- Sand until flush with the wall
I’ve fixed everything from picture hook holes to door handle dents this way. You’d never know they were there once it’s painted.
Choosing the Right Filler
|
Type of Damage |
Recommended Product |
|
Hairline cracks |
Flexible filler |
|
Small dents |
Lightweight filler |
|
Deep gouges |
Patching compound |
Don’t use the wrong product—it’ll either shrink, crack, or not hold properly.
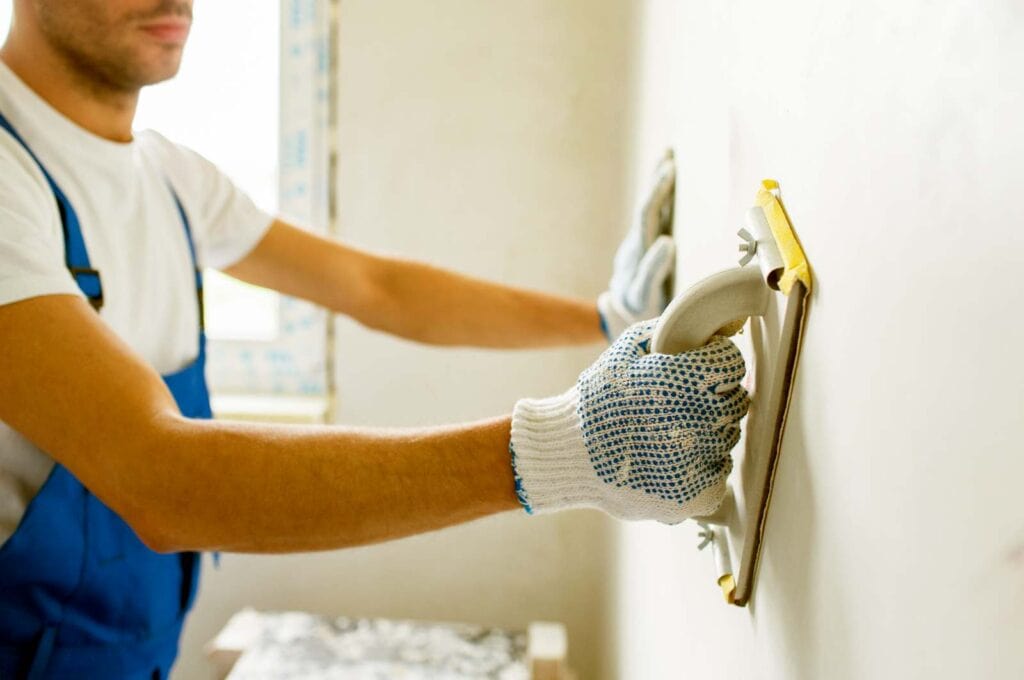
Method 2 – Skim Coating Without Full Plastering
When to Use a Skim Coat
If your wall looks uneven across a larger area, skim coating is the go. It’s not full plastering—it’s a thin layer of compound that smooths everything out.
Best for:
- Old plaster walls
- Patchy surfaces
- Walls with visible joints
Basic Skim Coating Process
Here’s how I usually tackle it:
- Lightly sand the wall
- Apply a thin coat of joint compound
- Spread evenly with a trowel
- Let it dry (usually overnight in Melbourne conditions)
- Sand smooth
- Repeat if needed
In winter, drying times can stretch out thanks to Melbourne’s damp chill. Don’t rush it—if it’s not dry, you’ll tear it up when sanding.
Method 3 – Sanding to Create a Smooth Finish
Why Sanding Makes the Biggest Difference
Sanding is where the magic happens. It blends everything together and gets rid of those high spots that stand out under paint.
I’ve seen plenty of DIY jobs where people did everything right—except sanding. The result? Walls that look fine from a distance but rough up close.
Sandpaper Guide for Better Results
|
Task |
Grit |
|
Removing rough spots |
80–120 |
|
General smoothing |
120–180 |
|
Final finish |
180–220 |
Always feather the edges. That’s what stops patches from showing through paint.
Method 4 – Using Wall Lining Paper for Fast Results
When Lining Paper Is the Better Option
Sometimes, you just want a quick fix. That’s where lining paper comes in.
Ideal for:
- Slightly uneven walls
- Rental properties
- Quick renovations before sale
Benefits of Lining Paper
- Covers minor imperfections
- Reduces sanding time
- Creates a uniform base for paint
I’ve used this method in a St Kilda unit where time was tight. It wasn’t perfect, but it looked clean and presentable—and that’s what mattered for the client.
Common Wall Problems and How to Smooth Them
Peeling or Flaky Paint
Never paint over flaky paint. It’s like building on sand.
Fix:
- Scrape off loose paint
- Sand the area
- Clean thoroughly
- Apply filler if needed
Cracks and Dents
These are part and parcel of most homes.
Fix checklist:
- Fill the crack fully
- Let it dry
- Sand smooth
- Feather edges
Outdated Textured Walls
Old textures can date a home instantly.
Options:
- Sand down high points
- Apply a skim coat
- Use lining paper
Tools You Need to Smooth Walls Without Plastering
Basic Tools Checklist
- Sandpaper (various grits)
- Filling knives
- Joint compound or filler
- Sugar soap
- Dust mask and goggles
Optional Tools for Better Results
- Electric sander
- Work light
- Drop sheets
A good work light is underrated. It shows imperfections you’d otherwise miss.
Real-World Example: Fixing a Rough Wall Without Plastering
Melbourne Home Scenario
A client in Toorak wanted a dark feature wall. The problem? The surface looked fine—until the paint went on.
We had to:
- Sand back the wall
- Fill dents and uneven areas
- Apply a skim coat
- Sand again for a smooth finish
Timeline of the Job
|
Day |
Task |
|
Day 1 |
Prep and cleaning |
|
Day 2 |
Filling and first skim |
|
Day 3 |
Sanding and second coat |
|
Day 4 |
Final sanding and paint |
Result
A smooth, clean wall that handled dark paint without showing imperfections.

Mistakes That Lead to Rough Results
Skipping Preparation
This is the biggest one. Dirty walls lead to peeling and poor finishes.
Using Too Much Compound
Thick layers crack and take forever to dry.
Not Sanding Enough
If you rush sanding, it’ll show. Every time.
“Take your time with sanding—it’s the difference between a tidy job and a standout one.”
When You Should Call a Professional
Signs DIY Isn’t Enough
- Large structural cracks
- Sagging plaster
- Water damage
Cost vs Effort
DIY works well for surface fixes. But if the wall’s failing underneath, you’re better off getting a professional in early.
You don’t need to overthink it. Start with a clean surface, fix the obvious issues, and take your time with the finish.
I’ve seen plenty of jobs where a bit of patience turned a rough wall into something that looked spot-on. No shortcuts, no fancy tricks—just solid prep and steady work.
