Plaster walls have long been celebrated for their elegance, durability, and sound-dampening qualities, making them a staple in home construction for centuries. Whether in older homes or newly constructed buildings, plaster adds a timeless beauty and sophistication to any space.
However, while they offer substantial aesthetic and functional benefits, repairing plaster walls presents a unique set of challenges. Understanding the nuances of how to repair plaster walls correctly is essential, whether you’re a seasoned DIY enthusiast or a novice.
This blog will explore the common plaster wall repair mistakes, provide actionable insights on repairing plaster with joint compound, and guide you through proper plaster wall repair techniques for a seamless repair.
Common Mistakes in Plaster Wall Repairs
Repairing plaster walls can seem like a simple task, but several mistakes when repairing plaster walls can compromise the repair process. These plaster wall damage causes can lead to cracks, poor adhesion, and the need for additional repairs in the future. Here’s a look at some of the common plaster wall repair mistakes:
1. Ignoring the Root Cause of the Damage
Mistake: One of the biggest errors homeowners make when repairing plaster walls is neglecting to address the underlying issue causing the damage. Cracks, holes, or damaged plaster often point to deeper issues like water infiltration, humidity changes, or structural problems.
Solution: Before repairing plaster, identify and fix the root cause of the problem. This could involve addressing leaks, humidity control, or stabilizing the foundation to prevent recurring issues.
2. Skipping Surface Preparation
Mistake: Failing to properly prepare the surface before applying new plaster can lead to weak adhesion and poor bonding. Dust, debris, and loose plaster prevent the new material from sticking, resulting in an unstable repair.
Solution: Always prepare plaster walls for repair by cleaning the damaged area thoroughly. For surfaces that are painted or sealed, use a bonding agent or primer to ensure proper adhesion.
3. Using Incorrect Materials
Mistake: Many DIYers mistakenly use joint compound, which is designed for drywall, to fix plaster. However, joint compound is less durable and does not match the texture or strength of plaster.
Solution: Always use plaster products that match the original material of your walls. For older homes, lime-based plaster might be necessary, while modern homes may use gypsum-based plaster. Choosing materials for plaster repair carefully is essential for a seamless result.
4. Applying Plaster Too Thickly
Mistake: Applying plaster in thick layers to speed up the process is a common mistake. Thick layers can crack, shrink, and fail to adhere properly to the surface.
Solution: Apply plaster in thin, even layers. Correct plaster application involves allowing each layer to dry completely before adding the next. This ensures strong adhesion and a durable finish.
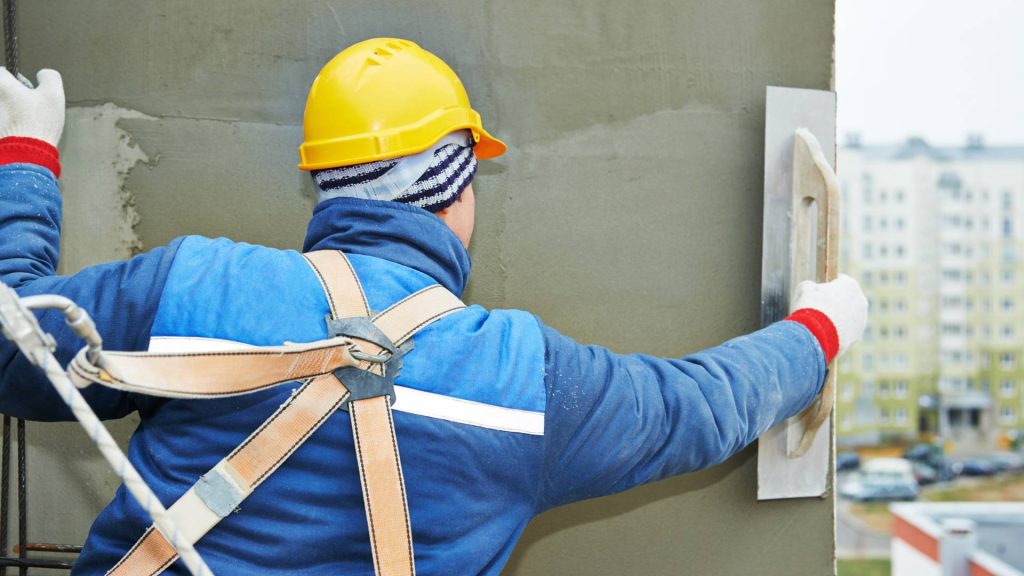
5. Neglecting Safety Precautions
Mistake: Many people overlook the importance of using protective gear when working with plaster. Exposure to dust and chemicals can be harmful to your health.
Solution: Always wear a mask, gloves, and goggles to protect yourself from dust, chemicals, and debris. Ensure the workspace is well-ventilated to reduce inhalation of harmful particles. Safety in plaster wall repairs should always be a top priority.
6. Rushing the Drying Process
Mistake: Impatience can lead to rushing the drying process, which is one of the most critical steps in plaster repair curing time. This mistake can result in cracks, weak bonds, or discoloration.
Solution: Be patient and allow each layer of plaster sufficient time to dry and cure. Why plaster repairs fail often comes down to rushing the drying time. The drying time will depend on humidity and temperature.
7. Failing to Match the Original Texture
Mistake: Replicating the original texture of plaster can be one of the most challenging aspects of repair. A poor texture match makes the repair stand out, affecting the aesthetic cohesion of the room.
Solution: Matching plaster wall texture requires practice. Use tools like sponges, trowels, or brushes to mimic the existing finish, whether smooth, stippled, or ornate. Practice on scrap materials before attempting the repair.
Best Practices for Successful Plaster Wall Repairs
To avoid these patching plaster wall errors and achieve a high-quality repair, follow these repairing plaster walls tips:
1. Assess The Damage Thoroughly
Step: Carefully inspect the damaged area to assess how much plaster needs to be removed. If the plaster is loose or crumbling, you may need to remove it down to the lath (the wooden framework behind the plaster). This provides a more stable foundation for the new plaster.
Tip: Tap the damaged area gently to see if other sections are loose and require removal.
2. Prepare The Surface
Step: After removing any damaged plaster, thoroughly clean the exposed surface. This will help the new plaster bond securely to the existing wall.
Tip: Use a stiff brush to remove dust and debris, and roughen smooth or glossy areas with sandpaper for better adhesion.
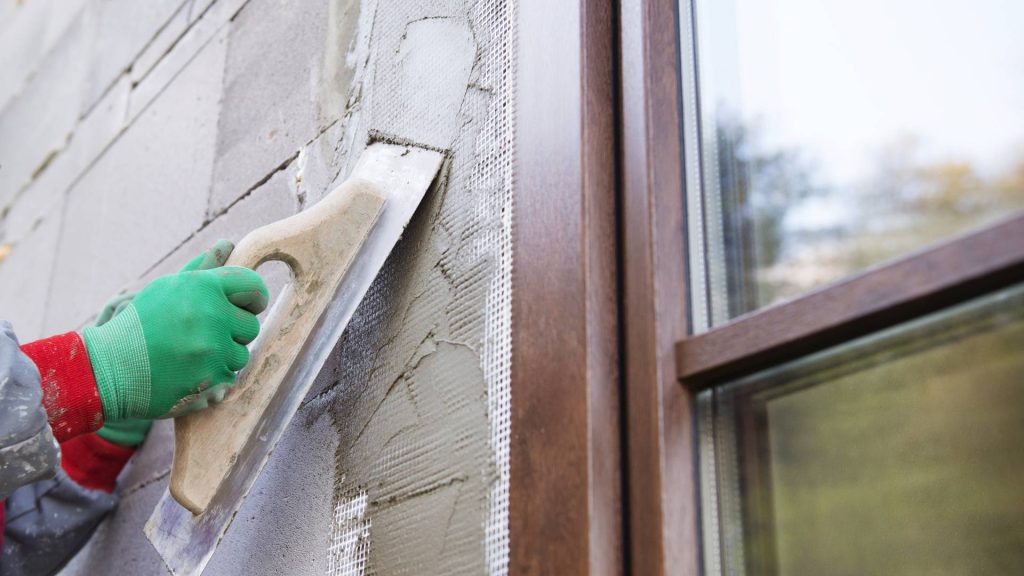
3. Apply A Bonding Agent
Step: To help the new plaster adhere to the surface, apply a bonding agent, especially when working over sealed or painted surfaces.
Tip: Follow the manufacturer’s instructions when applying the bonding agent and allow it to dry completely before applying plaster. Plaster wall repair bonding agents are crucial for a strong repair.
4. Layer The Plaster
Step: Plastering is a multi-step process. Start with a scratch coat (the first layer, which provides a rough surface for the next layer), followed by a brown coat (for thickness), and finish with a topcoat (a smooth final layer). Allow each layer to dry thoroughly before proceeding.
Tip: Avoid applying thick layers of plaster to prevent cracking and poor adhesion.
5. Match The Texture
Step: Replicating the original texture is vital for achieving a seamless finish. Use various tools such as sponges, brushes, or trowels to replicate the pattern, whether it is smooth, stippled, or ornate.
Tip: Practice on a scrap piece of drywall or wood before applying the texture to the repair area.
6. Sand And Paint
Step: Once the final layer of plaster has dried completely, gently sand the surface to smooth out any imperfections. Be careful not to remove too much material.
Final Step: Apply a primer specifically designed for plaster surfaces, then paint to match the existing color for a flawless finish.
7. Monitor The Repair
Step: After completing the repair, monitor the area for any signs of cracking or other issues over the next few months. Promptly address any new issues to prevent more extensive damage.
Tip: If moisture was a factor in the original damage, consider using a dehumidifier in the room.
Preventing Future Plaster Wall Damage
To ensure that your plaster walls remain in good condition, it’s essential to prevent future plaster wall damage. Regularly inspect your walls for cracks, leaks, or signs of moisture damage. Ensure proper ventilation and humidity control in areas like bathrooms and basements, where moisture is most likely to cause damage.
Conclusion
Repairing plaster walls requires a blend of knowledge, skill, and patience. By understanding the common plaster wall repair mistakes, following the proper plaster wall repair techniques, and using the right materials, you can restore your plaster walls to their original beauty and structural integrity. Whether you’re fixing cracks in plaster walls or handling major damage, each step— from preparing plaster walls for repair to applying the final coat of paint— plays a pivotal role in ensuring a durable, seamless repair.
By taking the time to follow the correct procedures and using the right materials, you not only restore the aesthetic appeal of your plaster walls but also contribute to the preservation of your home’s history and craftsmanship. The key to successful plaster wall repairs lies in preparation, technique, and patience.
Frequently Asked Questions
What Are The Most Common Causes Of Plaster Wall Damage?
Plaster walls can be damaged by a variety of factors, including water infiltration, structural movement, impact damage, and the natural aging process. Water damage from leaks is particularly problematic as it can weaken the plaster’s structure, leading to cracks and crumbling. Identifying and addressing the root cause of the damage is crucial before undertaking any repairs.
How Can I Tell If A Crack In My Plaster Wall Is Serious?
While small hairline cracks can often be a cosmetic issue, larger cracks or those that appear suddenly could indicate structural problems. Look for signs like widening cracks, cracks that run across multiple walls, or those accompanied by sagging or bulging. In such cases, it’s advisable to consult a professional to assess the structural integrity of your home.
Can I Use Drywall Joint Compound To Repair Plaster Walls?
While it might be tempting to use drywall joint compound due to its availability and ease of use, it’s not recommended for repairing plaster walls. Plaster and joint compound have different properties and behaviours. For a durable repair that matches the existing texture and strength of plaster walls, use a plaster mix designed for repairs.
How Long Does It Take For Plaster Repairs To Dry?
The drying time for plaster repairs can vary significantly based on the thickness of the application, the type of plaster used, and environmental conditions like humidity and temperature. As a general rule, it’s best to allow at least 24-48 hours for thin layers to set and dry before sanding or painting. Thicker repairs, or those done in humid conditions, may require longer.
Is It Necessary To Use A Bonding Agent For Plaster Repairs?
Using a bonding agent is highly recommended, especially when repairing over a smooth, painted, or otherwise non-porous surface. A bonding agent helps to ensure the new plaster adheres properly to the existing wall, reducing the risk of the repair peeling or flaking off over time. It’s a crucial step for achieving a durable and long-lasting repair.
