Plaster Wall Repair gives a home real character—solid, quiet, and built to last. But when cracks show up or chunks start falling out, it can be bloody frustrating. The good news? Most minor plaster damage is easier to fix than you think, and you don’t need to be a tradie to do it. Whether you’re patching a hole from an old picture hook, fixing cracks from a shifting frame, or restoring a tired corner after years of knocks, this guide will walk you through every step using the tools, techniques, and trade-tested tips I’ve picked up on jobs all over Melbourne. No fluff, just the right way to get it done.
Step-by-Step: How to Fix Plaster Walls (The Right Way)
This is where the rubber hits the road. If you prep properly and follow each step without rushing it, you’ll end up with a clean, strong finish that paints up beautifully. Skip steps—or slap it on too thick—and you’ll be chasing cracks again in six months.
I’ll walk you through the whole process, from prep to painting, based on how we do it onsite. Whether you’re fixing a tennis ball dent in the kids’ bedroom or sorting out the aftermath of a plumber’s “creative” pipework, this will get you sorted.
Step 1 – Prep Like a Pro
Don’t pick up a trowel until the area’s prepped. I’ve had clients ask why their filler didn’t stick—then I find they plastered straight over a dusty wall with peeling paint. Waste of time and materials.
Here’s how to start right:
- Clear the space – Move furniture away, or at least cover it. Plaster dust gets everywhere. Use drop sheets for the floor.
- Inspect the damage – Tap around the crack or hole with your knuckles. If it sounds hollow or feels spongy, you’re dealing with blown plaster.
- Scrape and trim – Use a utility knife or scraper to remove loose or crumbly edges. Go back to solid, stable plaster. Don’t be shy—better to remove a bit more than not enough.
- Clean the surface – Wipe it down with a damp sponge. No dust, no grease. If it’s a painted surface, scuff it lightly with sandpaper to help adhesion.
- Dampen the wall or apply bonding agent – On dry or painted walls, a misting of water helps stop the plaster drying too fast. For shiny or sealed surfaces, use diluted PVA or a proper bonding primer. Let it go tacky before you start plastering.
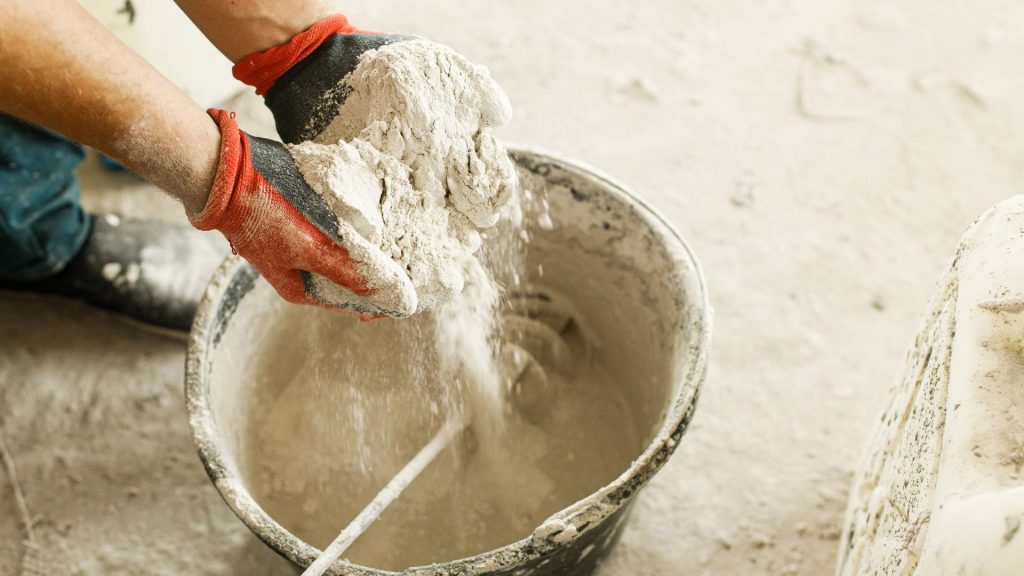
Step 2 – Mix Your Plaster or Filler
I’ve seen people pour powder into a bucket of water and end up with a lumpy mess that sets before they can even trowel it on. You’ve got a small window with plaster — use it wisely.
Steps to mix it right:
- Fill a clean bucket with water first – Always water first. Add plaster to water, not the other way around.
- Add plaster slowly while stirring – Use a clean stick or drill with paddle attachment. Stir as you add to prevent lumps.
- Aim for peanut butter consistency – Not too runny, not too stiff. It should hold to the trowel without dripping.
Let it rest for a couple of minutes – Gives bubbles time to rise. Stir again before applying.
Step 3 – Apply and Build in Layers
Now we’re plastering. This part separates a tidy DIY job from a dodgy patch-up. You’ve done the prep, your mix is ready — now it’s all about applying it properly and knowing when to stop.
I’ve seen more beginner mistakes here than anywhere else. Either someone slaps it on like icing a cake, or they try to do it all in one thick go and wonder why it cracked.
Let’s break it down by job type.
Small Cracks and Nail Holes
Best for: hairline cracks, picture hook holes, chips near light switches.
Tools: small filling knife, ready-mix filler or joint compound.
Process:
- Press the filler into the crack or hole using a putty knife. Don’t just skim the surface — push it in so it binds properly.
- Slightly overfill. You want a bit of excess because it’ll shrink as it dries.
- Smooth it flat with the knife, feathering the edges.
- Let it dry fully (usually overnight).
- Don’t sand yet — we’ll get to that in Step 4.
Medium Holes (e.g., Doorknob Impacts, Old Fixings)
Best for: thumb-sized holes, old curtain rod fixings, dents from careless furniture movers.
Tools: mesh tape, joint compound or powder filler, taping knife.
Process:
- Prep the hole — clean edges, no loose plaster.
- Apply mesh tape over the hole, sticking it slightly wider than the damage.
- Spread a thin coat of compound over the mesh, feathering it out 50–70mm past the edge.
- Let it dry fully. You might need two or three layers depending on depth.
- Lightly sand between coats if needed.
- Finish with a final thin coat that’s as smooth as possible.
Large Holes and Structural Repairs
Best for: holes bigger than a 50c coin, areas with missing plaster, or places where someone’s foot went through the wall (don’t laugh — it happens more than you’d think).
Tools: utility knife, backing board or timber, screws or adhesive, mesh tape, joint compound, plastering trowel.
Process:
- Cut Clean Edges – Square up the hole using a utility knife. This helps the patch sit flush and stops feathering out over jagged bits.
- Install Backing Support – Insert a piece of timber or backing board behind the hole. Fix it in place with screws or strong adhesive. It gives your patch something to stick to.
- Apply Mesh Tape – Run it over the patch for reinforcement. Make sure it’s flat and tight.
- Apply Plaster in Layers – First coat fills the hole and bonds to the tape. Let that dry completely. Add more layers if needed, each one thinner and wider than the last.
- Use Scratch/Brown/Finish Coat Method (for bigger areas):
- Scratch coat: the first rough layer, gives the next coat grip.
- Brown coat: fills the bulk of the repair and gets you level.
- Finish coat / Skim coat: makes it smooth and ready for sanding.
Step 4 – Sanding and Smoothing
Here’s where patience pays off. Sanding’s not glamorous, but if you rush it or skimp on it, your wall will show every lump and ridge under the paint. And I promise—no one wants to repaint a wall just because they were too lazy to run some sandpaper over a patch.
I’ve seen beautiful skim coats ruined by aggressive sanding or skipped steps. One job in Richmond springs to mind—young couple did a solid patch on a hallway ding, but used coarse 80-grit paper and left gouges everywhere. Under downlights, it looked like someone had been at the wall with a rake.
How to Sand for a Seamless Finish
Tools:
- 120–180 grit sandpaper to start
- 220 grit to finish
- Sanding block, sponge sander, or electric detail sander (for large areas)
- A clean, dry sponge or cloth for dusting
- Torch or work light for surface inspection
Process:
- Start with a medium grit (120–180) – Use gentle, circular motions or long sweeps if sanding a wide patch. Don’t press hard.
- Feather the edges – You’re aiming to blend the patch into the surrounding wall. The repair should taper off smoothly without a visible edge.
- Switch to a finer grit (220) – This gives you a polished surface ready for primer.
- Check with your hand and your eyes – Run your fingers over the surface. If you feel a bump, it’ll show under paint. Use a torch at a low angle to catch imperfections.
- Clean the dust properly – Wipe the area with a damp sponge or microfibre cloth. Don’t skip this—it’s crucial for paint adhesion.
Step 5 – Priming and Painting
This is where most DIY jobs fall over—right at the finish line. Either they paint too soon, skip the primer, or use the wrong type of paint. I’ve been called in more times than I can count to fix patches that looked fine… until someone rolled on paint and watched it bubble, discolour, or flash under lights.
Preventing Future Damage
A clean repair is one thing — keeping it that way is another. Plaster can last over a hundred years if you treat it right. But it’s also sensitive to moisture, movement, and bad habits. I’ve patched walls in homes that had been repainted five times in ten years because the underlying issue was never dealt with.
Here’s how you can keep your walls solid, clean, and crack-free long after the paint dries.
1. Fix the Cause — Not Just the Symptom
Before you patch, ask yourself: why did this crack, dent, or bubble happen in the first place?
Because if you don’t fix that, you’re just painting over the problem.
Common culprits:
- Water leaks from the roof, bathroom, laundry, or cracked external render.
- Poor ventilation, especially in older homes around Melbourne’s inner north.
- Structural movement, often in homes built on reactive clay soils (common in outer-west suburbs like Werribee or Hoppers Crossing).
- Temperature changes, which cause expansion and contraction. Brick veneer homes are notorious for this.
If there’s any doubt, get a builder or structural inspector in to take a look.
2. Maintain Breathability in Older Homes
This is one that’s often ignored — especially in Federation or Edwardian-era homes around areas like Yarraville or East Melbourne.
Lime plaster needs to breathe. If you cover it with vinyl paint or trap it behind impermeable insulation, moisture builds up and eventually causes:
- Blistering
- Mould
- Efflorescence (that white, chalky residue)
Best practice:
- Use breathable paints like clay-based, limewash, or low-sheen acrylics.
- Don’t use acrylic gap fillers or silicone in lime-plastered walls.
- If you insulate internally, make sure it’s vapour-permeable.
3. Protect High-Traffic Areas from Impact
Prevention is easier than patching every school holidays. These spots cop the most abuse:
- Behind doors – Fit rubber door stops or wall buffers.
- Hallway corners – Kids, pets, or trolleys will always clip them.
- Skirting near furniture – Use felt pads or wall bumpers.
- Entryways – Bag corners or high-traffic plasterboard is worth protecting with a corner guard.
I did a job in a rental in Footscray where the same corner had been patched four times. In the end, we fitted a metal corner bead and skimmed over it — no issues since.
4. Inspect Seasonally
Make it a habit to give your walls a once-over:
Every 6 months:
- Look for new cracks, bulges, or damp spots.
- Use a torch to inspect corners, cornices, and around windows.
- Check skirtings and architraves for water damage after heavy rain.
After plumbing or roof repairs:
- Inspect ceilings and walls below the affected area.
- Look for signs of fresh movement or moisture.
5. Ventilate and Dehumidify
Especially in winter or in older weatherboard homes with poor subfloor ventilation, moisture builds up fast.
Simple moves that help:
- Run extractor fans during and after showers.
- Open windows on dry days to flush out stale air.
- Use a dehumidifier in damp rooms (basements, laundries).
- Clear gutters and stormwater drains so moisture isn’t backing up into brickwork or render.
