When it comes to plaster repairs, the key to achieving a flawless finish lies in the details—particularly in paint matching plaster patch work. Whether you’re patching up a small crack or repairing larger areas, getting the paint right can make all the difference between a professional-looking result and a noticeable repair job. Matching paint for plaster repairs isn’t just about choosing the right colour; it involves blending the sheen, texture, and depth to make sure the patch seamlessly integrates with the existing wall. From dealing with fading paint and varying textures to using the right primer and finish, this guide will walk you through the essential steps, tips, and expert tricks for ensuring your plaster repair looks as if it was never needed.
Why Paint Matching is Crucial for Plaster Repairs
Nothing makes a plaster repair job stand out more than mismatched paint. You’ve probably seen it yourself – a freshly patched wall with a coat of paint that just doesn’t blend in. It’s like trying to hide a scar with a band-aid that’s way too bright. Trust me, I’ve been there, especially when working on older homes around Melbourne, where the walls have a history of fading and ageing.
Let’s take an example from a job in St Kilda. The customer had a patch repaired in their living room, but after painting, the difference between the new patch and the rest of the wall was obvious. That mismatch can make the rest of your hard work look rushed or sloppy. Achieving a perfect match is more than just the right colour – it’s about making sure the texture, sheen, and depth are spot on. This seamless blending is what makes a plaster repair look like it’s always been part of the wall.
Factors That Affect Paint Matching Success
There’s more to paint matching than meets the eye. And it’s not always as easy as it sounds. I’ve run into all sorts of issues with matching plaster repairs, and if you’re not careful, you might end up with a patch that sticks out like a sore thumb. Here are the top factors to consider when matching paint for plaster repairs:
- Color Aging and Fading
Over time, your paint will fade, especially in homes that get a lot of natural sunlight. I’ve worked in areas like Elwood where the afternoon sun can make a wall look completely different after a couple of years. - Batch Variations
Even if you’re using the same brand of paint, slight differences in batches can affect the final result. Paint manufacturers don’t always get their formulations spot on every time, and that can cause discrepancies between wall colours and new repairs. - Finish Variations
Paint finishes like matte, satin, and gloss reflect light in different ways. If your wall’s finish has dulled with age, matching a new glossy patch with a matte wall might create a noticeable difference in sheen. - Lighting and Environmental Factors
Have you ever noticed how paint looks different under different lighting? That’s because of the way light changes throughout the day, and artificial lighting can make colours look warmer or cooler. If you’ve ever been in a job where the lighting changes drastically – like in Melbourne’s inner-city apartments where lighting can vary – you know how tricky it is to get the paint just right. - Patch Absorption
Fresh plaster absorbs paint differently to older surfaces, which can result in a patchy finish. For instance, plaster from a fresh patch is often more porous than the surrounding walls. If you’ve ever had to repaint a patch after a few hours and seen the paint absorb unevenly, you’ll know exactly what I mean.
Factors Affecting Paint Matching Success
|
Factor |
Impact on Paint Matching |
|
Color Aging and Fading |
Can change the paint tone over time, creating discrepancies. |
|
Batch Variations |
Minor differences between paint batches can lead to colour mismatch. |
|
Finish Variations |
Glossy finishes reflect more light, making them appear different from matte walls. |
|
Lighting and Environmental Factors |
Natural and artificial lighting can significantly alter how paint looks. |
|
Patch Absorption |
Fresh plaster absorbs paint differently, leading to uneven finishes. |
Challenges in Matching Paint for Plaster Repairs
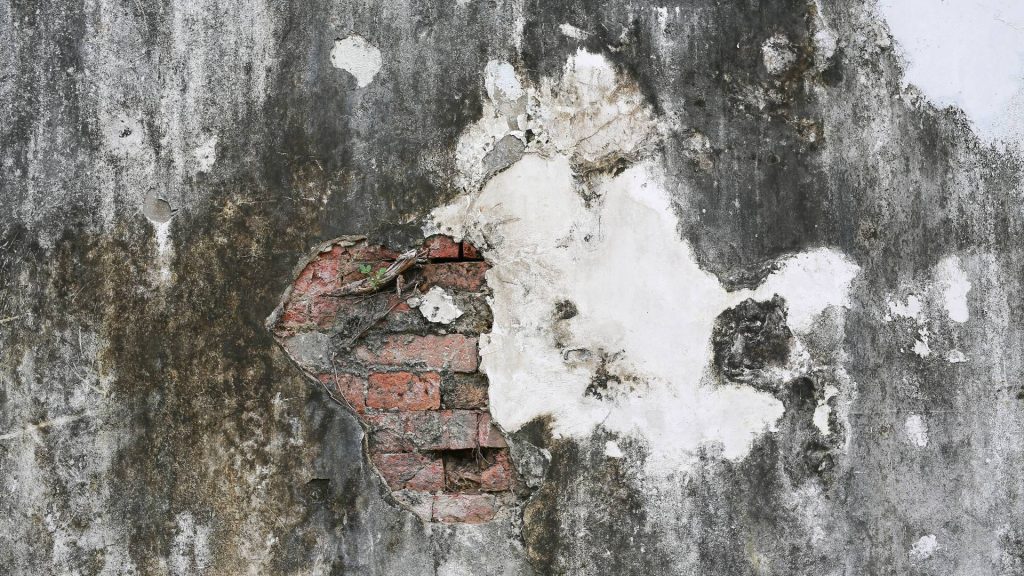
I’ve been on enough Melbourne job sites to know that matching paint to old plaster can be a real headache, especially when the existing paint has aged. In a recent job in Hawthorn, I had to deal with a wall that had faded over time due to heavy sunlight exposure. The original colour had shifted significantly, making it tough to get a perfect match. We had to mix a custom colour just to match the faded tones, and even then, it was a bit of a struggle.
Overcoming Batch and Finish Variations
One of the most frustrating parts of any paint job is batch variations. Even if you’re using the same brand and product, there’s no guarantee that every batch will be identical. This happened to me on a job in Northcote, where two cans of the same paint (from the same manufacturer) were slightly different shades. This is a common issue in larger renovation projects where you’re buying multiple cans of the same colour.
The Complexity of White Paint
White paint is a whole different ball game. In a recent project in Fitzroy, I had to deal with matching a pristine white plaster patch to an existing wall that had yellowed slightly over time. White paints are so finicky because they have so little pigment. A small variation in the mix can make the new patch stand out.
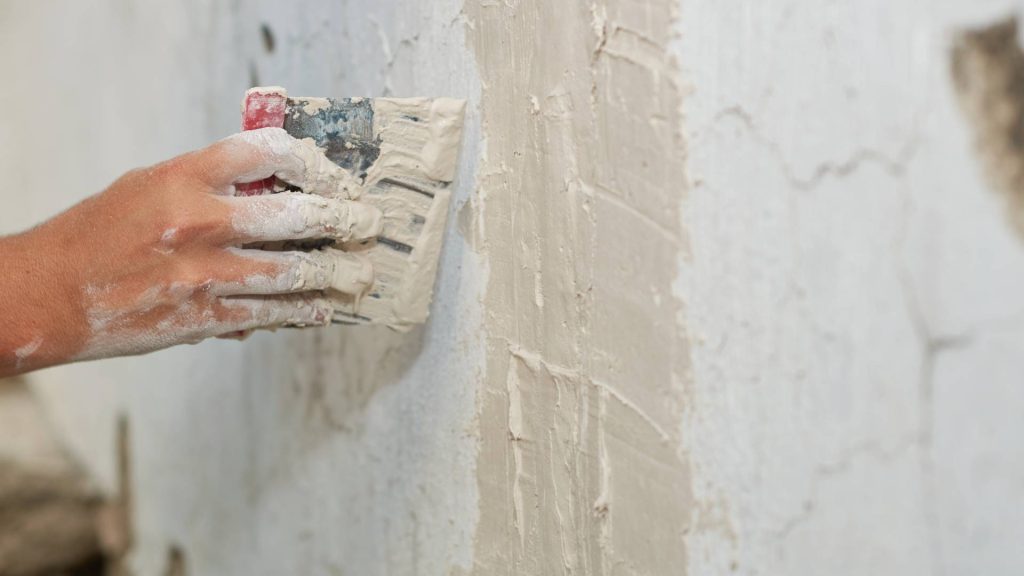
Essential Steps for Preparing Plaster Repairs Before Painting
Before you even think about matching the paint, the first step is making sure the plaster is properly repaired. I’ve been on plenty of jobs where quick fixes just don’t cut it. For instance, if you’ve got a crack, you need to assess the damage and fill it properly. For smaller cracks, I use joint compound, but for larger ones, I rely on Plaster of Paris, which I’ve found gives a smoother finish.
Surface Cleaning and Sanding for a Smooth Finish
One of the biggest mistakes I’ve seen (and done!) is skipping the cleaning and sanding steps before applying paint. You’ve got to clean the wall thoroughly to remove any dust, dirt, or grease, otherwise, your paint won’t adhere properly. I can’t stress enough how important it is to give the wall a good scrub before you start. I’ve had instances where a little grease or dust caused the paint to bubble up or peel later on.
Sanding and Smoothing for a Seamless Finish
When it comes to plaster repairs, the key to blending that patch into the wall is all about the sanding. I’ve worked with clients in areas like Richmond and Malvern where the walls have an older, textured finish. In these cases, I had to make sure the plaster patch was smooth enough to blend but also had enough texture to match the surrounding wall. Too much sanding, and you’ll make the patch too smooth; too little, and it’ll stand out like a sore thumb.
I’ve got a simple rule of thumb: Always start with medium-grit sandpaper (around 120-150 grit) and finish with finer grit (220-grit) to ensure a smooth, even surface. Feathering the edges is a must to avoid any visible lines once the paint’s on. I’ve worked on a lot of renovations, and when you feather the edges right, the repair will blend seamlessly with the rest of the wall. If you leave a harsh edge, the paint will catch the light differently, and it will stick out.
Ensure Complete Dryness Before Painting
One thing I can’t stress enough is to never rush the drying process. I’ve been in a few situations where I’ve tried to speed things up and ended up with a disaster. If the plaster or filler isn’t completely dry, the paint won’t adhere properly, and you’ll end up with bubbles, peeling, or flaking paint.
I usually give it at least 24 hours for plaster to dry, especially if it’s been freshly applied. A lot of plaster fillers, like DAP Plaster of Paris, suggest waiting for at least 24 hours for a good dry time. I also use a moisture meter on bigger jobs to ensure the wall is dry enough before painting. If the moisture content is more than 12%, it’s best to let it air dry a bit longer. I remember a job in Brunswick where the client rushed the drying, and after a few days, the patches started bubbling. We had to strip the paint off and redo the whole job, which added unnecessary time and costs.
Apply Primer/Sealer for Better Adhesion
Primer might seem like an extra step, but it’s one I never skip. Trust me, I’ve seen the difference it makes when you skip this part – the paint just won’t go on as smoothly. New plaster absorbs paint in different ways compared to the existing wall, so a good primer will create an even surface and help the paint stick. Plus, if you’re working with a more alkaline surface (like lime-based plaster), you’ll need an alkali-resistant primer. Otherwise, you might end up with peeling or discolouration later on.
In Melbourne, with its fluctuating weather, the primer helps keep the paint from reacting with moisture in the air, especially if you’re working in a damp area like a bathroom or basement. I always recommend using an oil-based primer for surfaces that might be more prone to stains. It might take a bit longer to dry, but it’s worth it for long-lasting results.
Methods for Accurate Paint Matching
If you’re lucky enough to have some leftover paint from the original job, it’s the best option for matching your repair. I’ve been in situations where the client had a small amount of original paint left in the garage, and it was a real lifesaver. The key here is to check the paint can for any labels, batch numbers, or codes – because once you’re out of the original paint, you’ve got to work with what’s available.
Now, if you don’t have the original paint, don’t panic. I’ve often used wall chips to get a perfect match. Cut a small piece (about the size of a coin, roughly 1 inch) from an inconspicuous area of the wall, like behind a switch plate or inside a closet. Take it to the paint store, where they can run it through a spectrophotometer – a fancy gadget that will analyse the paint and match the colour accurately. This is especially useful when you’re working with homes that have older or faded colours.
Paint Matching Apps and Professional Services
These days, paint matching apps can be pretty handy, and I’ve used them a few times in a pinch. Apps like Sherwin-Williams’ ColorSnap or Behr’s colour-matching tool let you scan your wall and get a recommended hue. While they’re super convenient, I’ve learned to double-check their recommendations because lighting can throw off the results. The phone’s camera isn’t always the best at catching subtle undertones, so if you use an app, make sure to test the results in different light conditions.
If you’re really stuck and want to ensure perfection, don’t hesitate to bring in the professionals. A local Melbourne paint store can custom mix the exact colour match for you. This service is especially useful when you’ve got a particularly tough job, like matching faded whites or offbeat colours. I’ve had clients in Carlton opt for this service, and it made a huge difference in the final result.
Tips for Painting Over Plaster Repairs and Achieving a Seamless Look
It’s always a good idea to test the paint on a small patch before you commit. A lot of the time, I’ll apply a 1×1 foot square of paint in an inconspicuous area. This gives you a chance to see how the paint looks when it’s dry and to check for colour differences. I’ve worked on homes where the paint looked perfect when wet, but once it dried, the difference in tone was glaring. Allow the paint to dry fully before you make any final calls.
Test Paint Tip:
- Apply the paint to a 1×1-foot patch in an area that’s not easily visible.
- Let it dry completely (can take 24 hours).
- Observe the patch under different light – natural and artificial.
Feathering the Paint for a Professional Blend
The feathering technique is something I swear by when it comes to plaster patching. You’ve got to blend the new paint into the existing paint without creating harsh lines. For small patches (less than 5×5 inches), I use a stippling motion with the brush, daubing the paint from the centre outwards. This irregular application ensures that the patch blends smoothly with the surrounding wall. I’ve done this on multiple occasions, especially in older homes where the texture and paint sheen vary across the wall.
For larger patches, I recommend using a dry mini-roller after brushing the paint on. This helps maintain the texture and finish of the wall while blending the new paint into the old. I’ve found this technique particularly helpful when working with walls that have a slight texture, like the “orange peel” finish often found in Melbourne homes.
