Replacing plaster with drywall is one of those renovation jobs that looks straightforward on paper but quickly turns into a proper hands-on challenge. I’ve worked on everything from old Melbourne terraces to coastal homes that have copped years of salt air, and I can tell you—no two plaster removal jobs are ever the same. Some walls come off clean as a whistle. Others fight you every step of the way.
Still, when it’s done right, the result speaks for itself. Clean lines, smooth finishes, and walls that are far easier to maintain. This guide walks you through the entire process, step by step, with practical advice, real-world insights, and a few lessons learned the hard way.
Why Replacing Plaster With Drywall Can Save You Time, Money, and Headaches
When Old Plaster Becomes More Trouble Than It’s Worth
Plaster has its charm, no doubt about it. I’ve seen century-old walls still standing solid in heritage homes around Carlton. But charm only goes so far when cracks keep coming back or sections start sagging.
There was a job in the Blue Mountains where the homeowner had patched the same wall three times. Each repair looked fine for a few months, then the cracks reappeared like clockwork. In the end, we ripped it all out and replaced it with drywall. What took years of patching was solved in a week.
Here are clear signs it’s time to replace plaster:
- Large or spreading cracks
- Bulging or sagging sections
- Hollow sounds when tapped
- Water damage or mould
- Repeated repair failures
Sometimes, you’ve got to stop throwing good money after bad.
Plaster vs Drywall: A Practical Comparison
|
Feature |
Plaster |
Drywall |
|
Installation Time |
Slow, multi-layer process |
Fast, often done in a day |
|
Cost |
Labour-intensive, more expensive |
More affordable overall |
|
Repairs |
Difficult and messy |
Simple patch jobs |
|
Durability |
Very strong |
Moderate |
|
Flexibility |
Hard to modify |
Easy to cut and adjust |
Drywall is not perfect, but for most modern renovations, it’s the more practical option.
Critical Safety Checks Before You Start Demolition
Checking for Asbestos and Lead Before You Touch a Wall
This is not the step to skip. In Australia, especially in homes built before the 1980s, asbestos is a real concern. I’ve come across it more times than I’d like—particularly in older Sydney homes.
If your home was built:
- Before 1978 → possible lead paint
- Between 1920s–1980s → possible asbestos
Checklist before starting:
- Get materials tested
- Contact licensed removalists if needed
- Follow state regulations (SafeWork NSW, WorkSafe VIC)
- Never disturb suspected asbestos yourself
One homeowner I worked with ignored this step and ended up shutting down their renovation halfway through. Cost them double in the end.
Safety Gear You Actually Need (Not Optional)
Demolition is messy and risky. Proper gear is non-negotiable.
Essential PPE:
- P2 or N100 respirator
- Safety goggles
- Heavy-duty gloves
- Disposable coveralls
- Steel-cap boots
A simple rule I follow:
If you wouldn’t wear it on a demolition site, don’t wear it at all.
Tools and Materials You’ll Need Before You Begin
Demolition Tools That Save Time and Effort
You don’t need a full toolbox, but you do need the right gear:
- Crowbar
- Sledgehammer
- Oscillating tool
- Hammer and scraper
- Shovel for debris
The oscillating tool is worth its weight in gold. It gives you clean cuts without sending dust everywhere.
Drywall Installation Materials Checklist
Before installing drywall, make sure everything is ready:
- Drywall sheets (standard or 5/8” fire-rated)
- Drywall screws
- Joint compound
- Drywall tape
- Sanding tools
- Level and measuring tape
Quick prep checklist:
- Studs exposed and clean
- Debris removed
- Utilities checked
- Surface levelled
How to Remove Plaster and Lath Step by Step
Step 1 – Score the Area for a Clean Start
Start by marking the section you want to remove. Scoring prevents cracks from spreading into areas you want to keep.
I once skipped this step on a rush job—big mistake. Ended up damaging part of the ceiling and creating more work than necessary.
Step 2 – Break and Remove the Plaster
This is the messy part. No way around it.
Steps:
- Create a small opening
- Use a crowbar to loosen sections
- Scrape plaster off carefully
- Work steadily, not aggressively
Take your time here. Rushing leads to damaged framing.
Step 3 – Remove the Lath
Once plaster is gone, the timber lath comes next.
- Use a pry bar
- Remove nails as you go
- Watch for wiring behind the wall
It’s not difficult, but it’s repetitive. Put some music on—it helps.
Step 4 – Clean Up and Dispose Properly
Plaster is heavier than it looks. That’s something you realise quickly.
Tips:
- Use contractor-grade bags
- Don’t overfill them
- Consider hiring a skip bin
On one Inner West job, we filled a skip in half a day. It adds up fast.
Inspecting and Preparing the Wall Frame
Check for Structural Issues
Now that the wall is open, inspect everything:
- Rot or moisture damage
- Warped studs
- Loose framing
- Old wiring
Fixing these now saves headaches later.
How to Fix Uneven Studs
|
Issue |
Solution |
|
High spots |
Plane them down |
|
Low spots |
Add drywall shims |
|
Warped studs |
Replace or reinforce |
A flat surface is key. Even small misalignments show up once drywall is installed.
Installing Drywall Like a Professional
H3: Measuring, Cutting, and Hanging
Steps:
- Measure carefully
- Cut sheets to size
- Position horizontally
- Screw into studs
Spacing matters:
- Screws every 300mm
- Keep edges aligned
- Don’t overdrive screws
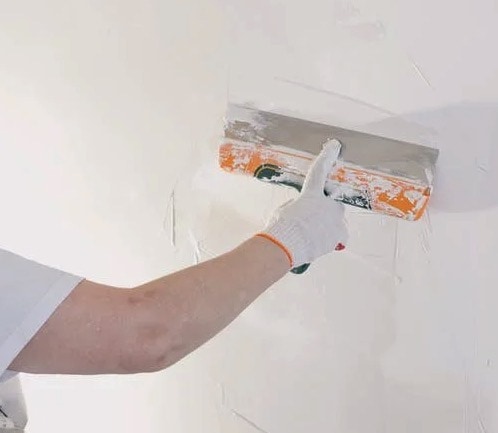
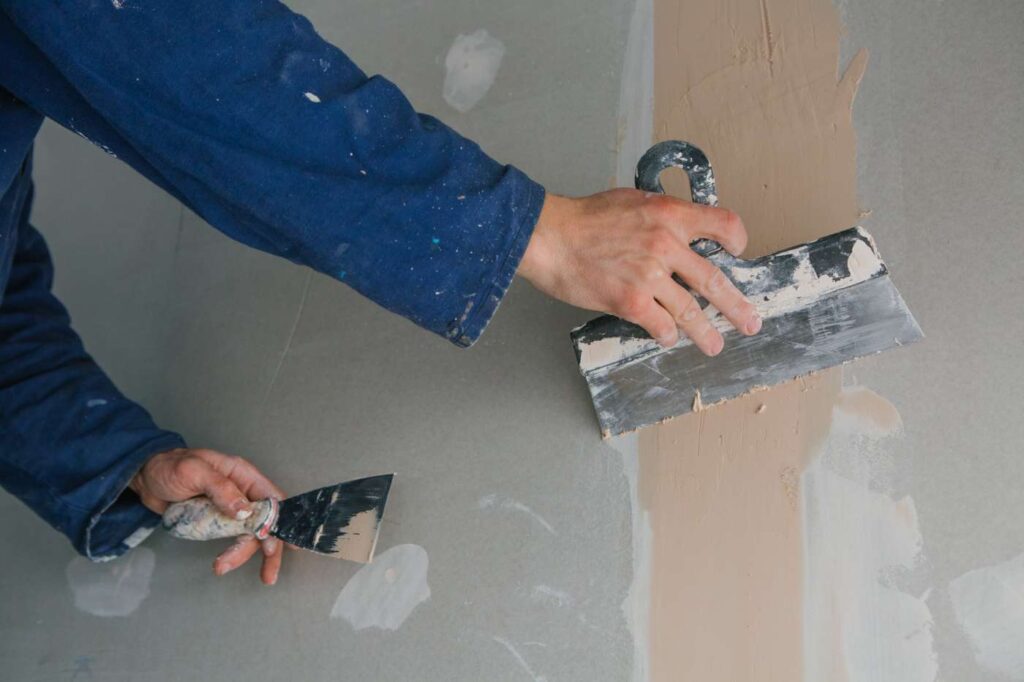
Taping and Finishing for a Smooth Surface
This is where the finish comes together.
Process:
- Apply tape to joints
- Add first coat of compound
- Let dry and sand
- Repeat for 2–3 coats
It’s a bit of an art. Take your time.
Common Mistakes That Can Ruin the Job
What to Avoid
- Skipping hazard checks
- Poor dust control
- Uneven framing
- Rushing the finishing stage
- Incorrect screw placement
One rushed job can undo everything.
Practical Tips From Real Jobs
- Work in sections
- Keep tools organised
- Allow drying time between coats
- Clean as you go
As we say on-site, “measure twice, fix once.”
Timeline for a Typical Room Renovation
|
Stage |
Estimated Time |
|
Preparation & Safety |
1 day |
|
Demolition |
1–2 days |
|
Framing Repairs |
1 day |
|
Drywall Installation |
1 day |
|
Finishing (compound) |
2–3 days |
Total: Around 5–7 days depending on complexity.
Should You DIY or Hire a Professional?
When DIY Makes Sense
DIY is suitable if:
- No hazardous materials
- Small to medium space
- Basic tools available
It’s a rewarding job if done properly.
When to Call a Professional
Consider hiring a pro if:
- Asbestos or lead is present
- Structural repairs are needed
- You want a flawless finish
Sometimes it’s better to leave it to someone who’s done it a hundred times.
Removing plaster and replacing it with drywall is not a small job, but it’s one that delivers real results. With proper preparation, the right tools, and a steady approach, it becomes far more manageable than it first appears.
From demolition to the final coat of compound, every step plays a role in the final outcome. Take your time, follow the process, and don’t cut corners—because when it’s done properly, the difference is night and day.
