Removing plaster from walls can feel like stepping into the unknown. One minute you’re staring at cracked, tired walls, and the next you’re knee-deep in dust wondering if you’ve bitten off more than you can chew. I’ve been there. The first time I tackled plaster removal in an old Queenslander, I thought it would be a quick weekend job. It turned into a proper workout—but also one of the most satisfying renovations I’ve ever done.
Done right, removing plaster opens the door to a fresh start. Whether you’re chasing exposed brick, fixing structural issues, or preparing for a modern finish, the key is to work smart, not just hard. This guide walks you through the process step by step, with real-world advice that actually holds up on site.
Why Removing Plaster Can Completely Transform Your Space
The Hidden Potential Behind Old Plaster Walls
Older Australian homes are full of surprises. Behind those worn plaster walls, you might find solid brick, beautiful timber framing, or even original stonework. I once worked on a terrace in Melbourne where the owner was convinced the walls were beyond saving. Once we stripped the plaster back, we uncovered stunning red brick that became the centrepiece of the entire home.
That’s the thing with plaster—it often hides more than it protects. Removing it gives you a chance to rediscover what’s underneath and make design decisions with a clean slate.
When Plaster Removal Is the Smart Choice
There are times when plaster simply has to go. Here are the most common situations:
- Cracked or sagging walls that signal structural movement
- Water damage from leaks or rising damp
- Renovations requiring rewiring or reconfiguration
- Desire to expose original materials
Quick Checklist: Should You Remove Plaster?
- Walls are bulging or loose
- Visible mould or damp patches
- You’re planning a full renovation
- You want exposed brick or timber
If you tick more than one of these, it’s usually worth rolling up your sleeves.
Step 1 – Prepare Properly or Pay the Price Later
Setting Up Your Workspace to Avoid a Dust Nightmare
Here’s a hard truth: plaster removal is messy. Not just a bit dusty—properly messy. The kind that creeps into cupboards and settles on surfaces you didn’t even think about.
The first time I skipped sealing a doorway, I ended up cleaning dust out of the hallway wardrobes for days. Lesson learned.
Preparation Checklist:
- Seal doorways with plastic sheeting
- Cover floors with drop sheets
- Remove furniture or cover it completely
- Turn off electricity in the work area
Taking an extra hour here can save you a full day of cleaning later.
Essential Safety Gear You Should Never Skip
You might be tempted to “just get started,” but this is where things can go pear-shaped quickly.
Safety Gear Table
|
Gear |
Why You Need It |
Real Risk |
|
Respirator |
Filters fine dust |
Lung damage from silica |
|
Goggles |
Protects eyes |
Flying debris injuries |
|
Gloves |
Prevents cuts |
Sharp plaster edges |
|
Ear protection |
Reduces noise |
Hearing damage |
|
Steel-toe boots |
Foot protection |
Nails and debris |
I once skipped proper gloves and ended up with cuts all over my hands from jagged plaster. Not worth it.
The Real Danger Most DIYers Ignore – Plaster Dust and Asbestos
Why Plaster Dust Is More Than Just a Mess
Plaster dust isn’t just annoying—it’s dangerous. Fine silica particles can get deep into your lungs. Over time, that can lead to serious conditions like silicosis.
In hot, dry Australian climates—especially in places like inland NSW or Queensland—the dust becomes even more airborne. It hangs around longer and spreads further.
How to Check for Asbestos Before You Start
If your home was built before the 1980s, you need to stop and think before swinging a hammer.
Signs to Watch For:
- Old fibrous plaster sheets
- Unusual backing materials
- No renovation history
Important Rule:
If in doubt, get it tested. Full stop.
Hiring a professional for asbestos removal might cost more upfront, but it’s far cheaper than dealing with long-term health issues.
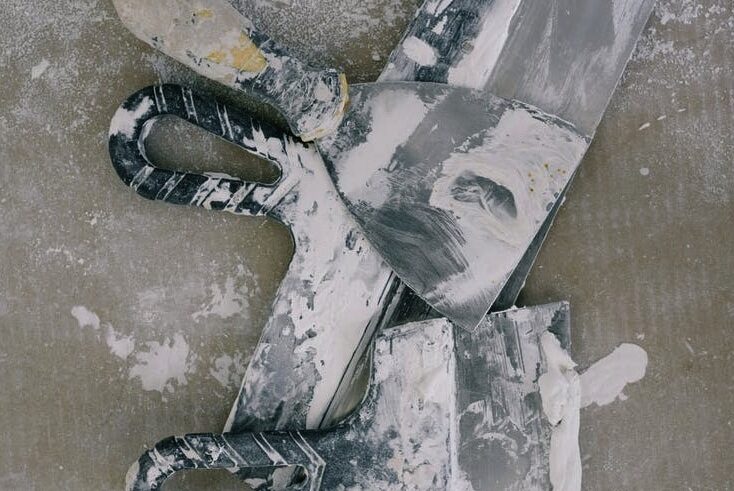
Step 2 – Choosing the Right Tools Makes or Breaks the Job
Manual Tools for Small or Controlled Work
For smaller jobs, simple tools still do the trick:
- Hammer and chisel
- Pry bar
- Utility knife
These give you control, especially when working near delicate areas like window frames or cornices.
Power Tools That Save Hours of Work
When you’re dealing with a full room, manual tools alone won’t cut it.
Tool Comparison Table
|
Tool |
Best Use |
Advantage |
Drawback |
|
SDS drill |
Large areas |
Fast removal |
Dust and noise |
|
Oscillating tool |
Edges/corners |
Precision |
Slower |
|
Grinder |
Metal lath |
Cuts quickly |
Heavy dust |
I remember using an SDS drill on a stubborn wall in a coastal home in Victoria—it turned a half-day job into under an hour. Absolute game changer.
Step 3 – How to Remove Plaster From Walls Step by Step
Start Small and Work Methodically
The biggest mistake beginners make? Going in too hard, too fast.
Instead:
- Start at a weak point
- Work in small sections
- Let the tools do the work
Removing Plaster Without Damaging the Structure
Be mindful of what’s behind the plaster—wiring, pipes, and framing.
Step-by-Step Process
- Score edges and corners
- Break the surface gently
- Pry off sections
- Remove lath backing
- Clear debris regularly
Take your time. Slow and steady wins the race here.
Controlling Dust Like a Professional (Not a Rookie Mistake)
Simple Dust Control That Actually Works
Dust control isn’t optional—it’s essential.
Basic Setup:
- Shop vacuum with fine filter
- Clean every 15–20 minutes
- Keep windows open
Advanced Dust Control Setup
On bigger jobs, step it up:
- Use a box fan to push air outside
- Create negative pressure in the room
- Use HEPA air scrubbers if possible
Dust Control Essentials:
- Plastic barriers
- Shop vac
- Fan ventilation
- Damp cloths
I once worked on a heritage home in Brisbane where dust got everywhere. After switching to a proper airflow setup, the difference was night and day.
Step 4 – Dealing With the Aftermath (Disposal Done Right)
Local Council Rules You Need to Follow
In Australia, disposal rules vary by council. Some require waste separation, while others provide designated drop-off points.
Ignoring these rules can land you with fines.
Safe Disposal Methods
- Use skip bins for large jobs
- Bag smaller debris
- Separate hazardous materials
Example:
In parts of Victoria, construction waste must be sorted before disposal. Skipping this step can delay your project.
Step 5 – Cleaning Up Without Losing Your Weekend
Tools That Make Cleanup Easier
- Shop vacuum
- Broom and dustpan
- Microfibre cloth
A Simple Cleanup Routine That Works
- Remove large debris
- Vacuum thoroughly
- Wipe surfaces
- Repeat next day
Fine dust settles over time. Always do a second clean—it makes a big difference.
Step 6 – What Comes Next After Removing Plaster
Your Options After Stripping Back Walls
Once the plaster is gone, you’ve got options:
- Re-plaster for a smooth finish
- Install plasterboard
- Leave brick or timber exposed
Real-World Example
In a Queenslander renovation, removing plaster revealed beautiful brickwork. Instead of covering it, the owner sealed it and turned it into a feature wall. It added character and value instantly.
Health and Safety Tips That Experienced Tradies Swear By
How to Protect Yourself During the Job
- Wear a proper respirator
- Take regular breaks
- Stay hydrated
When You Should Call a Professional
- Suspected asbestos
- Structural issues
- Large-scale demolition
A good tradie knows when to call it. There’s no shame in bringing in help when it’s needed.
Key Takeaways Before You Start Removing Plaster
What Most People Get Wrong
- Underestimating dust
- Skipping safety gear
- Rushing the job
Quick Action Plan
- Prepare your space
- Use proper gear
- Choose the right tools
- Work in stages
- Clean as you go
Removing plaster from walls isn’t glamorous work, but it’s one of those jobs where the payoff makes it all worthwhile. There’s something satisfying about stripping things back and seeing the bones of a home—especially in older Australian properties with a bit of history behind them.
If you take your time, use the right tools, and respect the safety side of things, you’ll end up with a result you can be proud of. Whether you’re chasing a modern finish or uncovering something hidden beneath the surface, this is where transformation begins.
