Lime plaster isn’t merely a historical material; it has an array of benefits that modern alternatives just can’t match. I remember working on a restoration project in Melbourne, where we applied lime plaster to a century-old heritage building. The process felt deeply rewarding, especially knowing that I was using a material as old as the building itself.
Unlike cement-based plaster, which is rigid and fast-drying, lime plaster allows walls to breathe. This breathability helps to control moisture, making lime plaster ideal for the fluctuating Australian climate, especially in coastal areas or places with high humidity.
Key Benefits of Internal Lime Plastering
Lime plastering offers many advantages for both aesthetic and practical purposes. Below, we’ve highlighted the key benefits:
Breathability and Moisture Regulation
Lime plaster’s ability to breathe means it allows moisture to escape from the walls, which is crucial in preventing the issues that modern, non-breathable plaster finishes create, like dampness and mould. This is especially beneficial in areas with high humidity or in coastal regions where salt and moisture can damage traditional building materials.
Improved Indoor Air Quality
Since lime plaster regulates moisture, it creates a healthier indoor environment. This is particularly important in older homes that may suffer from issues like damp or poor air circulation. On a recent project in Tasmania, the lime plaster significantly reduced dampness, which not only improved the indoor air quality but also created a more comfortable living space for the family.
Aesthetic Appeal and Durability
Lime plaster offers a smooth, polished finish that is timeless. Whether you’re restoring a Victorian home or building a contemporary space, lime plaster provides an elegant and durable finish. It hardens over time through carbonation—a process where lime absorbs CO2 from the air and turns into calcium carbonate, the same material that forms limestone. Over time, this makes lime plaster stronger and more durable, which is a feature that modern cement-based plasters lack.
Essential Steps for a Successful Lime Plastering Project
Lime plastering isn’t a quick job. It requires skill and patience to apply properly. Here’s a detailed breakdown of the essential steps, including some of my personal tips for ensuring a flawless finish.
Step 1: Preparation of the Wall Surface
Proper surface preparation is critical to ensure the plaster adheres properly. If this step is skipped, you’ll face issues like cracking or poor adhesion. On a heritage project in Carlton, we had to remove several layers of old cement render before we could apply the lime plaster. It was time-consuming, but it was the only way to ensure the new plaster adhered correctly and looked great.
Here are the key preparation tasks:
- Clean the surface: Remove dirt, old paint, and grime from the wall.
- Check for cracks: Fill any holes or gaps with lime mortar to create a solid foundation.
- Level the wall: Use lime mortar to level any uneven areas to prevent uneven plaster thickness.
- Treat mould: For damp regions, treat any existing mould with an anti-mould solution.
Step 2: Controlling Suction and Bonding
This step is essential for achieving a smooth and durable finish. If you don’t control suction, the wall may absorb moisture from the plaster too quickly, causing it to dry out too fast and crack. To prevent this:
- Mist the surface with water before applying the plaster to control suction.
- If necessary, apply a skud coat—a thin, rough layer of lime plaster that helps create a key for the next layers.
In my experience, I’ve found that for older brick or stone walls, spraying the surface the night before helps the plaster bond better the next day.
Step 3: Mixing Lime Plaster
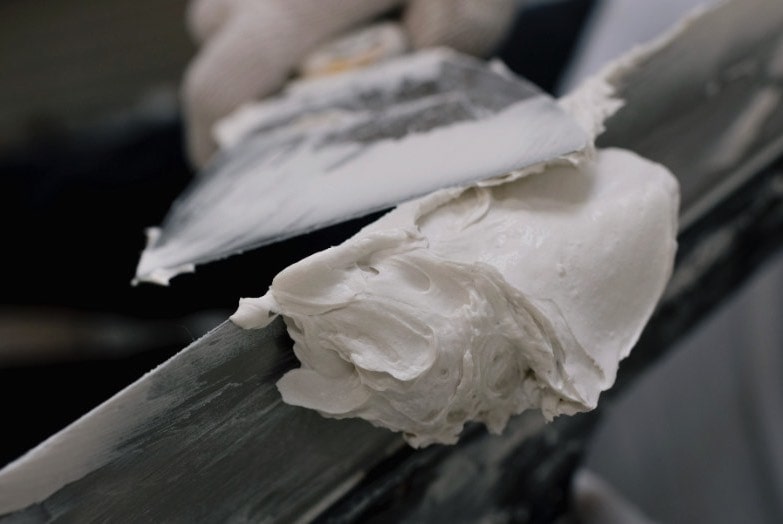
Getting the consistency right is crucial for a smooth finish. The mix should have a creamy consistency, not too thick or too runny. Here are some basic guidelines for mixing lime plaster:
|
Mixing Ratio |
Plaster Type |
Application |
|
1 part lime: 2.5 parts sand |
Backing Coat |
Provides a strong foundation for the plaster layers. |
|
1 part lime: 1 part sand |
Finish Coat |
Gives a smoother, polished finish for the top layer. |
Always allow the plaster to rest for about 5 minutes after mixing. This process, called slaking, ensures a workable consistency and prevents the plaster from drying out too fast.
Step 4: The Three-Coat System: Scratch, Floating, and Setting Coats
The three-coat system is an essential aspect of lime plastering. Each layer serves a specific purpose and should be applied in sequence.
|
Coat |
Thickness |
Purpose |
Drying Time |
|
Scratch Coat |
10mm |
Provides the first layer and creates a solid base. |
72 hours |
|
Floating Coat |
8mm |
Levels the surface and smooths out imperfections. |
72 hours |
|
Setting Coat |
2mm (first layer) + 2mm (second layer) |
Creates a polished, smooth finish. |
4 days |
Scratch Coat (First Coat): This layer forms the foundation. It’s critical to apply it correctly, as it will set the stage for everything that follows. Once it firms up, but before it fully hardens, create a rough pattern on the surface with a lath scratcher. This allows the next coat to bond properly.
Floating Coat (Second Coat): This coat smooths out the surface and prepares it for the final finish. It should be applied with a polyurethane float for an even surface.
Setting Coat (Final Coat): The final layer gives the plaster its polished look. Apply the first layer thinly (about 2mm) and let it sit for 20 minutes before applying the second 2mm layer. This layer will give you that smooth, polished finish you’re after. Use a trowel or a sponge float in figure-eight motions to smooth out any lines or bumps, and be patient—this layer requires precision.
After each coat, allow it to dry properly. The scratch coat needs at least 72 hours to set, the floating coat needs another 72 hours, and the setting coat should set for up to four days before it’s fully cured.
Step 5: Curing and Protection
Curing lime plaster is a vital step that many overlook. Lime plaster needs moisture to cure correctly, so it’s essential to keep the plaster damp during the curing process.
|
Curing Task |
Description |
|
Mist the plaster |
Use a spray bottle to keep the plaster damp, especially in hot weather. |
|
Cover the plaster |
Protect it from dry winds or excessive heat by covering it with hessian sheeting or tarpaulin. |
|
Monitor weather |
Avoid applying lime plaster on days with strong winds or extreme heat. |
During a project in Queensland, we encountered a few days with high winds, which dried the plaster too quickly. We protected the plaster with damp hessian sheets to slow the drying process and ensure it set properly.
Applying Lime Plaster on Heritage Homes
Heritage Restoration in Melbourne’s Bayside Area
In Melbourne’s coastal suburbs, we recently worked on restoring a historic home that had suffered from dampness caused by salt-laden winds. We applied lime plaster to prevent further damage to the structure and enhance its durability. The plaster’s breathability played a crucial role in regulating the moisture levels inside, which protected the home from further deterioration and mould.
Coastal Conditions and Salt Exposure in Sydney
In Sydney’s waterfront areas, where salt contamination is a constant challenge, we applied hydraulic lime plaster to combat the effects of moisture and salt exposure. This quick-setting lime plaster allowed us to restore the property efficiently while ensuring the walls remained protected from future damage.
Why Lime Plastering is Perfect for Modern Homes
Lime plastering isn’t just for heritage homes—it’s also a fantastic choice for modern builds. Here’s why:
Energy-Efficiency and Indoor Comfort
Lime plaster’s ability to regulate humidity helps maintain optimal indoor temperatures, reducing reliance on air conditioning or heating systems. This not only enhances comfort but also helps save on energy bills, particularly in areas with extreme temperature variations, like Melbourne.
Sustainable and Eco-Friendly Building Material
Choosing lime plaster means choosing a material with minimal environmental impact. Unlike cement-based plaster, lime plaster has a lower carbon footprint because its production requires less energy. By choosing lime plaster, you’re investing in a building material that’s not only good for your home but also better for the environment.
Lime plastering offers a range of benefits that can transform your home into a healthier, more comfortable space while preserving the environment. With the right preparation, application, and care, lime plaster can provide lasting beauty, improve indoor air quality, and regulate moisture—all while being kind to the planet. Whether you’re restoring a heritage property or building a modern, sustainable home, lime plaster offers both aesthetic and practical advantages.
