What Are Plaster and Plastering? A Complete Guide to Types, Benefits, and Techniques
Plaster’s been around for centuries, long before we ever thought about the mass-produced materials we use today. I’ve had the pleasure of working on all sorts of plaster projects, and there’s always something humbling about knowing that a technique as old as plastering is still the go-to for achieving a flawless finish on walls.
If you head back 5,000 years, plaster was already being used in the Middle East and Egypt. Back then, they were mixing up gypsum, water, and lime to coat the walls of temples and tombs. Fast forward to the Romans, and plaster became a major feature of their architecture—used to smooth over uneven brickwork and even create detailed decorative mouldings.
But let’s fast forward to today. We’re using the same principles as those ancient builders, just with a bit more science and modern tools behind us. Gypsum plaster, lime plaster, and cement render have all evolved, but at the heart of it, they’re still doing the job of smoothing and protecting walls like they’ve done for thousands of years.
Key Benefits and Purposes of Plastering
Now, you might be wondering: why do we still plaster? After all, there are quicker ways to cover walls with things like drywall or plasterboard. But trust me, plaster is still the gold standard for a number of reasons—especially in areas like Melbourne, where our climate can be pretty unforgiving on materials.
Aesthetic Enhancement
Let’s face it: plaster creates that smooth, seamless finish that modern paints and wallpapers just can’t match. When we’re talking about a pristine look, nothing beats a well-applied plaster finish. I’ve seen plenty of jobs where homeowners have opted for plastering because they wanted a smooth surface to really make their paint pop. It hides all the imperfections—cracks, holes, or mismatched materials underneath. And in older homes, where the walls are a bit out of plumb, plaster is the magic that can level things out.
Increased Durability and Protection
Plaster does more than just look good. It provides a protective layer for walls, which is a big deal in our unpredictable weather here in Melbourne. I can’t tell you how many times I’ve repaired damaged plaster on external walls after a wild storm. When you plaster your walls, you’re protecting the underlying brick or block from all sorts of damage—from the heat of summer to the cold, wet winters. And let’s not forget the fire-resistant properties of plaster, especially gypsum plaster. It’s not something you want to overlook if you’re looking for peace of mind.
Fire Resistance
One thing I always tell clients is that plaster adds a layer of safety to your home. It’s naturally fire-resistant, which makes it one of the best choices for internal walls and ceilings. For example, when you’re plastering a ceiling in a Melbourne home—especially in high-rises where fire safety is paramount—you’re not just going for looks. You’re adding that extra layer of protection against a potential disaster.
Thermal and Acoustic Insulation
In places like Melbourne’s inner suburbs, where homes are tightly packed, plaster can help with insulation. I’ve had clients who’ve opted for plasterboard over timber frames because of the acoustic benefits—it keeps the noise down between rooms. And plaster has natural thermal properties that help regulate indoor temperatures, meaning it can keep your house warmer in winter and cooler in summer. We’re always recommending plaster for areas that need to be quiet, like media rooms or bedrooms.

Types of Plaster and Their Compositions
When it comes to plastering, not all plasters are created equal. As a plasterer, knowing the right type of plaster for a job can make all the difference in the world. I’ve learned the hard way that not using the right type of plaster for the right environment can lead to cracks, mould, or worse—damaged structures. Here’s the lowdown on the most commonly used plasters.
Cement Plastering (Cement Rendering)
This type of plaster is tough, durable, and resistant to weathering, which is why we use it so much in Melbourne’s exterior walls. Cement plaster works wonders on brick, concrete, or stone surfaces. I’ve worked on many render jobs where we used a 1:6 ratio of cement to sand for interior plastering, but when it’s for the outside, you might go a bit stronger—1:4 for moisture-prone areas like bathrooms or foundations. Cement render gives a sturdy finish that’s perfect for areas exposed to the elements, though it can be a bit rough to the touch.
Gypsum Plastering (Plaster of Paris)
If you’ve ever had a smooth, flawless wall finish, there’s a good chance it was done with gypsum plaster. Gypsum plaster is lightweight, sets quickly, and provides a fine finish, making it ideal for indoor use. You’ll often see it in Melbourne homes for smooth, glossy interior walls, especially in kitchens and living rooms. It’s also highly fire-resistant, so it’s great for areas where fire safety is a concern. Just be careful—it’s not great with moisture, so stick to dry areas.
Lime Plastering
Lime plaster has been around forever and is often the go-to for restoration work in heritage buildings. I’ve had the privilege of working on several older homes in Melbourne where lime plaster was used to match the original finishes. It’s breathable and flexible, making it perfect for buildings that need to adjust to temperature and humidity changes. Lime plaster also prevents moisture build-up, which means fewer issues with mould or mildew in damp environments. It’s still the best option when working on a period property, especially in heritage-listed areas.
Waterproof Plaster
When you’re working on spaces like bathrooms, basements, or kitchens, waterproof plaster is the only way to go. Waterproof plaster is specifically designed to resist moisture, which is crucial in Melbourne where humidity can cause significant damage to standard plaster. I’ve done plenty of basement walls in older homes, where we use a waterproof plaster mix to ensure the surface remains dry, even when the walls are under constant exposure to water.
Stucco Plaster (Render)
Often used for exterior applications, stucco plaster is a variation of cement plaster but typically includes lime and other additives to give it texture and flexibility. In Melbourne, you’ll often see this used on commercial buildings or homes aiming for a Mediterranean or Spanish-style aesthetic. It’s great for regions with harsh weather because it’s incredibly durable and can withstand the Australian sun.
The Plastering Process: A Step-by-Step Guide
Preparation is everything when it comes to plastering. If you don’t get this part right, the rest of the job is going to be a nightmare.
First off, make sure you’ve got your work area cleared. I’ve worked on countless renovation jobs where clients think they can leave furniture in the room and just throw a drop sheet over it. Trust me—it never works. You need to move everything out and cover the floor with protective sheeting. Even a few splashes of plaster can ruin a carpet or wooden flooring, and no one wants to have to deal with that clean-up afterward.
Next, the tools. Clean tools make for a cleaner job. It’s tempting to use that old trowel you’ve had lying around, but a clean one will help the plaster bond better. After all, if you’re going to spend hours plastering, you want that finish to be perfect.
The walls need to be inspected too. In Melbourne, you’ll find older homes with cracked or crumbly plaster. Before applying the new plaster, I always give the wall a light tap to check for loose plaster, holes, or cracks. If you find any, you need to scrape it off and repair it. A little extra effort in prepping the wall now will save a lot of hassle later when you notice the cracks showing through.
Mixing the Plaster: Ensuring the Right Consistency
One of the most common mistakes I see in DIY plastering is mixing the plaster incorrectly. Trust me, getting the right consistency can make or break your finish.
First thing’s first: always use clean, cool water. I’ve been on job sites where clients tried using water straight from the tap that had been sitting in a bucket overnight. That water’s got all sorts of impurities that can mess with the plaster mix. Use fresh water to get the best result. And make sure your mixing container is clean. I once had a mix ruined because a little bit of old plaster from a previous job stuck to the bucket. It sounds silly, but it happens!
When you’re adding plaster to the water, make sure you do it gradually. Pour a bit of plaster into the water and stir continuously. This helps avoid lumps that’ll ruin your plaster’s smooth finish. The goal here is to get a smooth, creamy texture—think thick peanut butter or double cream. If the mixture’s too runny, it won’t adhere to the walls properly, and if it’s too thick, you’ll struggle to apply it evenly. I always give it a quick stir and let it rest for a minute, letting any air bubbles rise before stirring again. It’s these little steps that make a big difference when you’re working with plaster.
Applying the Plaster (Coats)
Here’s where the magic happens. A lot of tradies have their own ways of applying plaster, but after years on the job, I’ve found the following method to be the most efficient, especially when working on large surfaces.
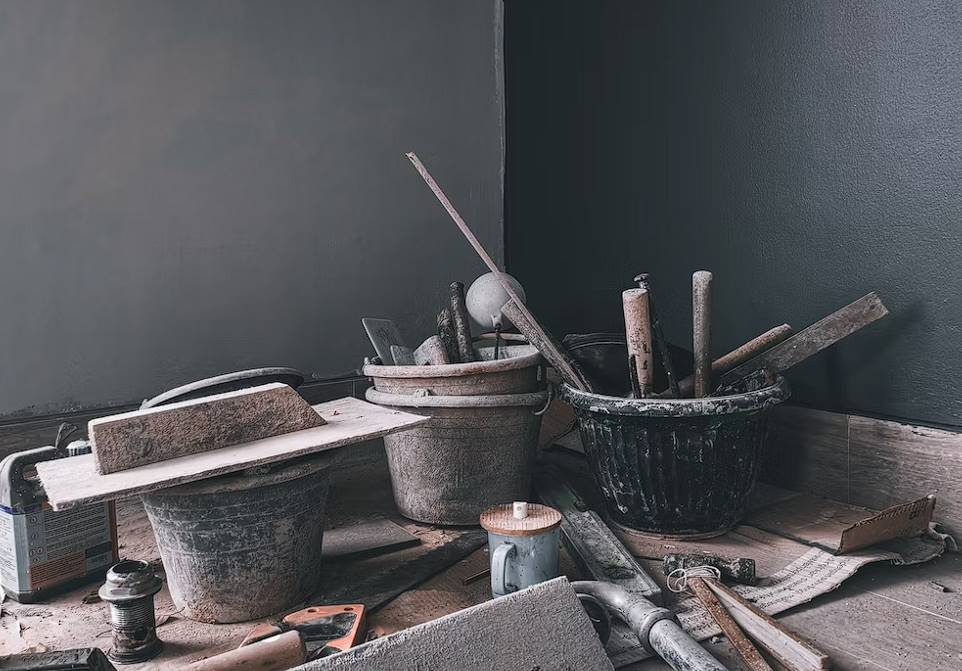
Base Coat (Scratch Coat)
The first step is applying the base coat, also known as the scratch coat. The idea here is to lay down a solid foundation for the following layers. For this coat, I always recommend working from the bottom up. I’ve had a few occasions where I’ve started from the top, and the plaster tends to drip down, making a mess and wasting time. With a large trowel, scoop a generous amount of plaster and apply it evenly, making sure you’re pressing it into the wall to get good adhesion. It should be about 3/8 to 1/2 inch thick. After you’ve applied the first layer, grab your scratch tool (or even the edge of your trowel) and create grooves in the plaster. This texture helps the next coat stick better. You don’t need to go overboard, just a light scratch pattern will do.
Floating Coat (Brown Coat)
Once the base coat is set but still a little damp (don’t let it fully dry), it’s time to apply the floating coat. This is the thicker coat that builds up the surface, and this is where you’ll start to notice your wall getting levelled. I usually apply this around 9-10mm thick. Smooth it out with your plastering float, working from bottom to top once again. Don’t rush this stage—take your time and keep it consistent. At this stage, you may need to use a plastering darby for larger walls to ensure the surface is flat. On jobs where I’ve had to work in large spaces, using the darby has made all the difference in achieving that smooth, level surface.
Finish Coat
The final coat is the one that makes your plaster shine. It’s where you’ll get that perfect smooth finish, so it’s important to go light and even. I use a smaller trowel for this layer, applying just a thin amount—around 1/8 inch or 2mm thick. The trick is to smooth it out without overworking it, using light, long strokes. Keep your trowel slightly wet, but not dripping, so it glides across the surface without pulling up the plaster underneath. Feather the edges to blend it with the existing wall so it looks seamless.
Curing and Drying: The Key to a Durable Finish
One thing I always stress to clients is that plaster needs time to set. I’ve seen a lot of homeowners rush the process, thinking that the job is done after the final coat, only to be disappointed when the plaster cracks or doesn’t bond properly. Plaster needs to cure at its own pace to achieve maximum strength and durability.
Curing is all about keeping the plaster moist for a while after it’s applied. The heat and sun here in Melbourne can dry plaster too quickly, which can lead to cracking or an uneven finish. I’ve learned over the years that the best way to cure plaster is to keep the room at a consistent temperature, free from drafts or extreme heat. I recommend covering fresh plaster with damp cloths or even misting it lightly with water for the first 24 hours. You’ll want to avoid direct sunlight, as it can dry out the plaster too fast, especially in summer when the sun here is intense.
Drying time will vary depending on the thickness and type of plaster, but generally, you can expect it to take around 2-5 days for it to harden completely. Cement-based plaster takes a bit longer to cure properly, while gypsum plaster dries faster. When I’ve worked on jobs where the plaster is thicker, I always give it a solid week to fully set before starting any painting or decorating work. The last thing you want is to paint over wet plaster and have it peel away later.
Tools of the Trade: Essential Plastering Tools
Every plasterer’s toolkit is unique, but after decades of plastering, I’ve found that a good set of tools is the foundation of any successful job. Whether you’re a seasoned pro or a DIY enthusiast, having the right tools can make a huge difference.
- Trowel: This is your main weapon. A trowel is perfect for applying and smoothing plaster. I’ve got a few in my toolkit—small ones for detailed work and larger ones for bigger surfaces. A quality trowel can make the plaster glide onto the surface with ease and gives that smooth finish everyone wants.
- Hawk: A simple tool, but essential. The hawk is where you scoop your plaster from before applying it to the wall. I’ve used everything from metal hawks to plastic ones, but I always go for something sturdy—something that won’t flex too much, especially when I’m dealing with heavier mixes like cement.
- Plastering Float: For those of you working on the final layers, a float is the best way to level out the plaster and give it that smooth finish. I swear by my float for achieving a seamless texture, especially when I’m doing textured finishes or rough casts on exterior walls.
- Plastering Darby: For larger areas, a darby is essential. It’s a long, straight-edged tool that helps smooth the plaster over big surfaces. It’s perfect for ensuring that the wall is completely level, especially when you’ve applied thicker coats of plaster.
Finishing Plaster: The Final Touch
When it comes to plastering, the finish is where you truly see the difference between a DIY job and a professional one. I’ve worked on countless projects over the years, and trust me—getting that finish just right takes time, patience, and the right technique.
Smooth vs. Textured Finishes: Choosing the Right Look
First up, let’s talk about the two main categories of plaster finishes: smooth and textured. Which one you choose largely depends on the style of the room and your personal taste.
For smooth finishes, the process involves multiple thin layers of plaster applied meticulously, each one smoothed out to create that perfect, polished look. This is ideal for modern, sleek interiors. For example, when I’ve worked on high-end homes in Melbourne’s inner suburbs, clients often request a smooth plaster finish for their living rooms and bedrooms. It’s perfect for a minimalist look—no seams, no bumps—just a flawless surface that feels luxurious when painted.
Textured plaster finishes come in all shapes and sizes. One of the most common is sand-faced plaster, where the final coat of plaster is mixed with sand to create a gritty texture that’s both practical and visually appealing. This type of finish is often used in commercial properties, but I’ve also applied it to residential homes with a more rustic design in areas like kitchens or feature walls.
Then there’s Venetian plaster. This is one of those finishes that really makes a statement. It’s a luxury finish, highly polished, and gives the appearance of marble. It’s a multi-layered application, where each layer is trowelled and burnished to achieve a glossy, marble-like effect. I’ve used Venetian plaster on several high-end projects—like a stunning feature wall in a modern Melbourne home that had all the guests talking. It’s a beautiful, timeless finish that adds an element of grandeur to any room.