Plastering a ceiling is much like painting a canvas, where the quality of the final masterpiece heavily depends on the preparation of your surface. It's a task that might seem daunting to the uninitiated, yet with the right guidance, transforming your ceiling from drab to fab can be a rewarding DIY project.
In this blog, we will dive deep into the preparatory stages crucial for a smooth, flawless finish. Whether you're looking to give your living space a fresh makeover or simply want to repair a few unsightly cracks, understanding the groundwork required for plastering will ensure your efforts are worthwhile.
From the essential tools and materials to the step-by-step process of getting your ceiling ready for its new coat, we've got you covered.
Understanding The Basics Of Plastering
What Is Plastering?
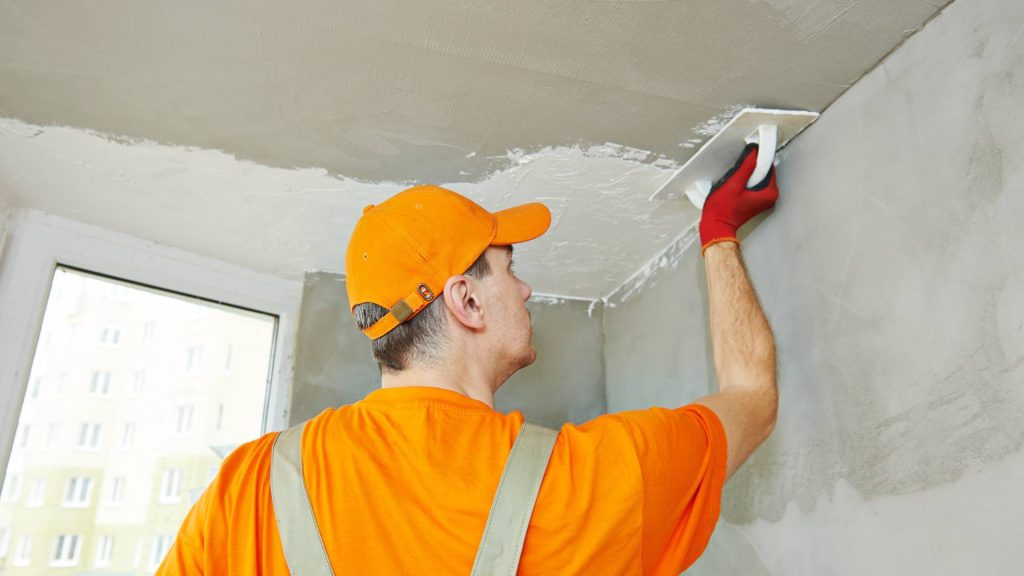
Plastering involves applying a layer or multiple layers of a mixture, primarily composed of water, sand, and a binder like cement or lime, over surfaces such as walls and ceilings. This process not only prepares the surface for painting or decorating but also provides a smooth finish, enhancing the overall appearance and longevity of the structure.
The Importance Of Plastering
Plastering serves two main functions: protection and aesthetics. It acts as a barrier against water penetration, safeguarding the structural integrity of the building. Aesthetically, plastering creates a smooth base for decorative finishes, contributing to the visual appeal of interior spaces.
Techniques And Materials
Plastering has evolved, incorporating various techniques and materials to suit different needs and preferences. Traditional methods involve applying plaster in three coats:
- A scratch coat to even out the surface.
- A brown coat to provide a smooth base.
- A finish coat for a fine, polished surface.
Modern advancements have introduced plasterboard and drywall techniques, offering efficient alternatives to traditional plastering.
Choosing The Right Plaster
Selecting the appropriate plaster depends on the specific requirements of the project. Lime plasters, known for their breathability, are ideal for older buildings with potential dampness issues. Gypsum plasters, on the other hand, offer a quicker setting time, suitable for dry interiors. For external applications, cement-based plasters provide durability and resistance to weathering.
The Role Of A Professional Plasterer
A skilled plasterer is crucial for achieving a high-quality finish. They possess the expertise to select the right materials, prepare the mixture consistently, and apply it precisely. Their knowledge extends to understanding the underlying surfaces and the best practices for applying plaster to ensure durability and an aesthetically pleasing result.

The Essential Toolkit For Plastering
Plastering is both an art and a science, requiring precision, patience, and tools. Whether you're a seasoned professional or a DIY enthusiast eager to tackle your next project, understanding the tools and materials needed for plastering is crucial.
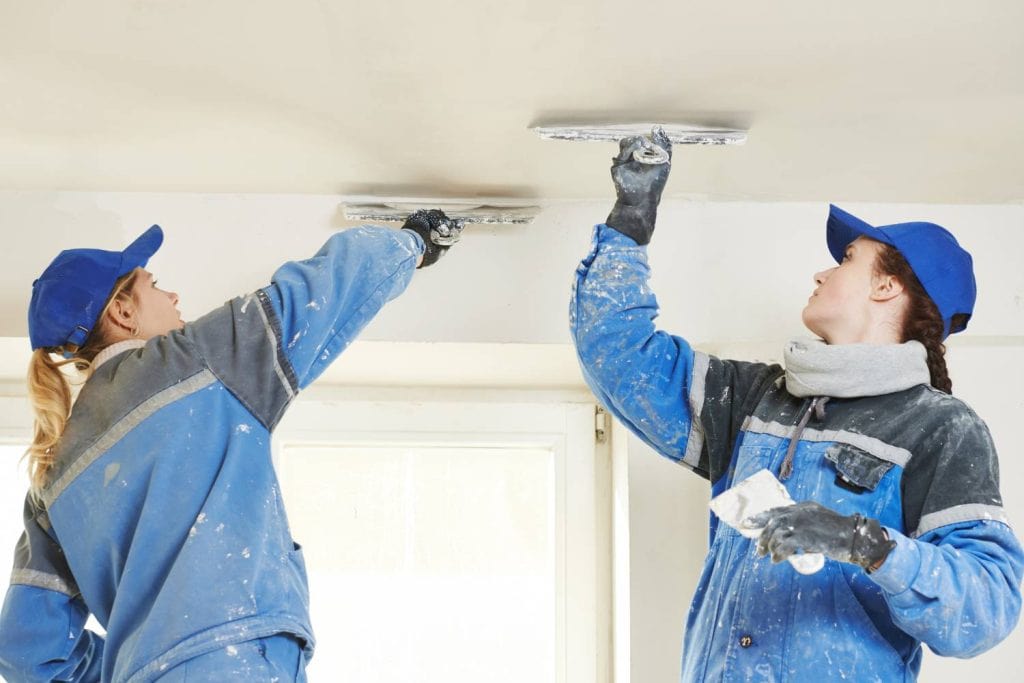
The Basics: Trowels And Hawks
- Plastering Trowel: The cornerstone of any plasterer's toolkit, a good quality trowel is indispensable. It's used to apply smooth plaster to walls and ceilings. A stainless steel, pre-worn trowel with a comfortable grip is recommended for beginners and professionals.
- Hawk: A hawk holds the plaster, allowing you to load your trowel easily. Opt for a lightweight, durable hawk with an ergonomic handle to reduce fatigue during long plastering sessions.
Mixing Essentials
- Electric Mixer: Gone are the days of manual mixing. An electric mixer ensures a consistent, lump-free mix, saving time and effort. A robust mixer with variable speeds can handle different types of plaster and render, making it a versatile addition to your toolkit.
- Buckets: You'll need several sturdy buckets for mixing plaster and carrying water. Choose durable, easy-to-clean buckets to simplify your workflow.
Precision Tools
- Spirit Level and Straight Edge: A spirit level and a straight edge are essential for perfectly level and smooth surfaces. They help ensure your plaster application is even and uniform across the entire surface.
- Plumb Bob: A plumb bob is your go-to tool to check vertical alignments. It's simple yet effective for ensuring walls and corners are perfectly straight.
Finishing Touches
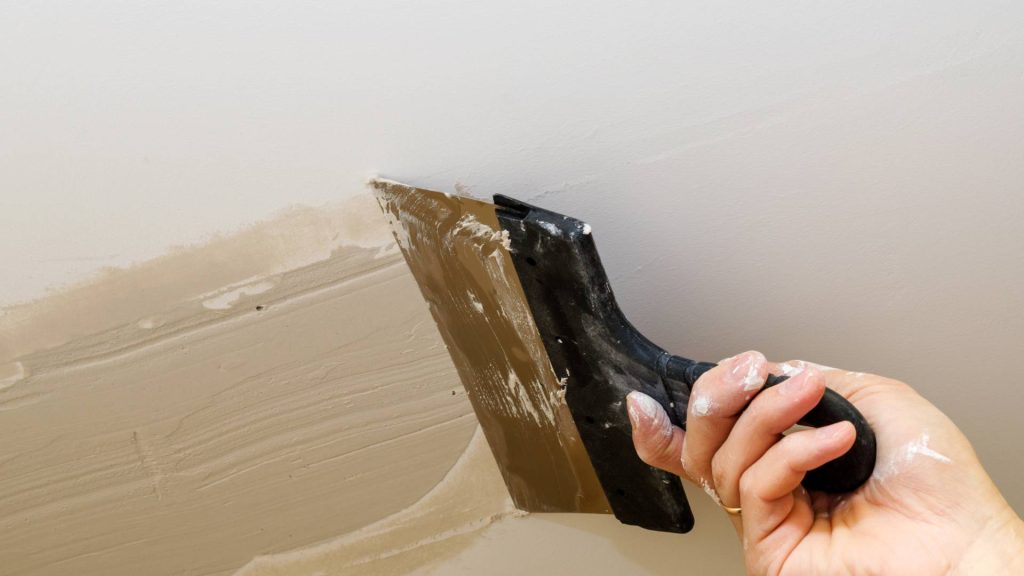
- Floats: Available in wood or metal, floats smoothly and finishes the plaster before it sets completely. Each type has unique benefits, with wooden floats ideal for a final, smooth finish and metal floats for initial flattening.
- Water Brush: A water brush dampens the plaster during the final stages of application, helping achieve a smooth, flawless finish.
Additional Handy Tools
- Bucket Trowel: A sturdy bucket trowel is necessary for scooping plaster out of the bucket and onto your hawk.
- Sponge and Water Brush: These tools are invaluable for achieving the desired texture and cleanliness on your plastered surfaces.
- Paddle Mixer: A paddle mixer can save time and ensure a consistent texture for larger jobs requiring significant amounts of mix.
Safety Gear
- Gloves and Masks: Plastering can be messy and sometimes hazardous. Protect your hands with gloves and your lungs with a dust mask, especially when sanding dried plaster.
Preparing The Ceiling For Plastering: A Step-By-Step Guide
Plastering a ceiling is a challenging yet rewarding DIY project that can significantly improve the appearance of any room. However, the key to a successful plaster job lies in thorough preparation. This guide will walk you through the essential steps to prepare your ceiling for plastering, ensuring a smooth and professional finish.
Understand The Scope Of Work
Before you begin, it's crucial to understand the full scope of the plastering work. Are you working on a new ceiling, repairing an old one, or installing a plasterboard? Each scenario requires a different approach to preparation. For instance, if you're dealing with an old ceiling, you may need to remove existing plaster or fix any damage before proceeding.
Clear The Room
Start by removing as much furniture and items from the room as possible. This creates a safer working environment and protects your belongings from dust and damage. For items that can't be moved, cover them with dust sheets or plastic coverings.
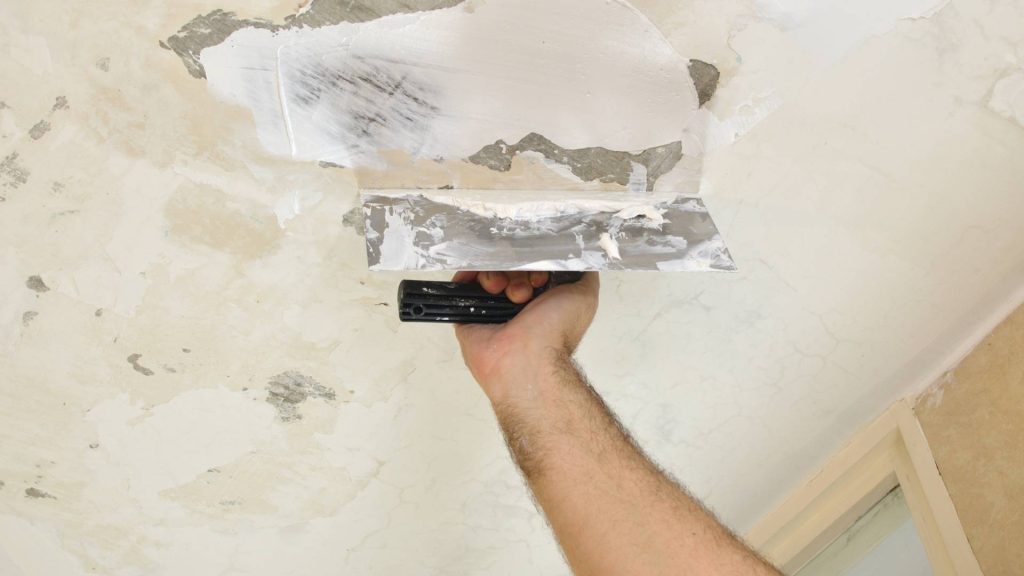
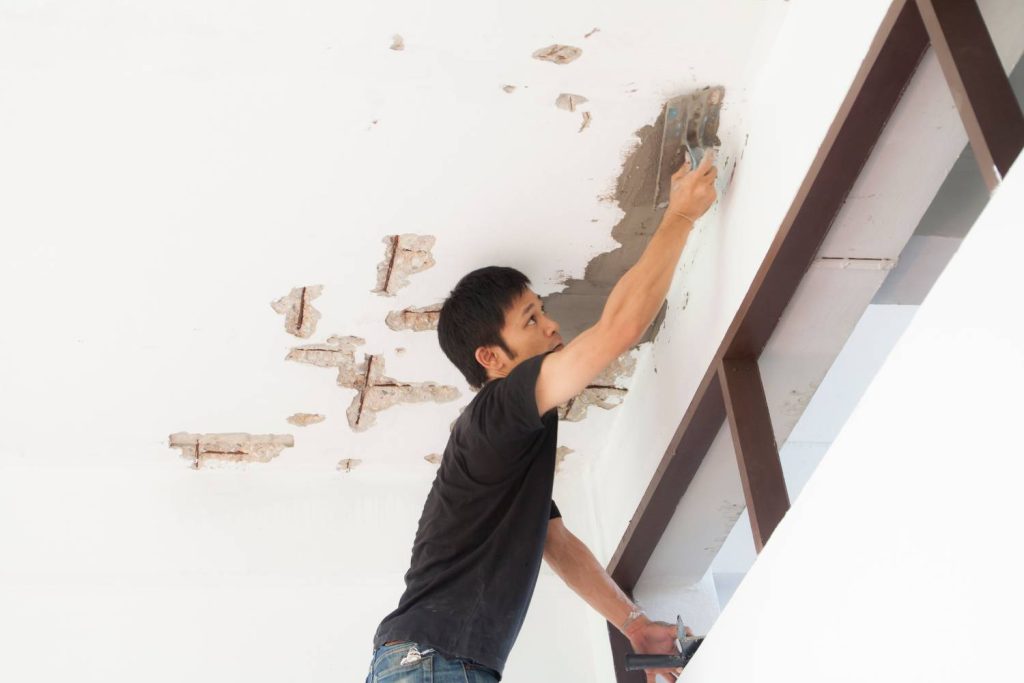
Remove Old Plaster
If your ceiling has old, damaged plaster, removing it before applying new plaster is essential. This task can be messy and time-consuming, so ensure you have the appropriate tools and protective gear. Remember to turn off the power at the mains to avoid any accidents with electrical wiring.
Prepare The Surface
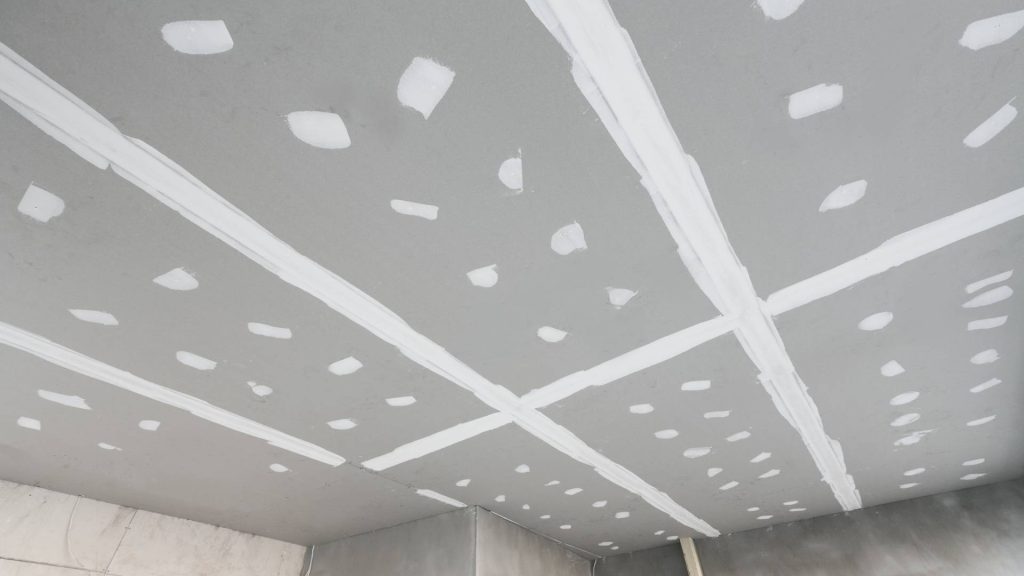
A clean, smooth surface is critical for the plaster to adhere correctly. Clean the ceiling thoroughly, removing any dust, dirt, or grease. If you're plastering over the plasterboard, ensure the boards are securely fixed to the ceiling joists. Any gaps or cracks should be filled and sanded smooth.
Apply A Primer Or Sealer
Applying a primer or sealer can improve the adhesion of the plaster to the ceiling. This step is particularly important for working with porous surfaces or plasterboards. Let the primer dry completely before moving on to plastering.
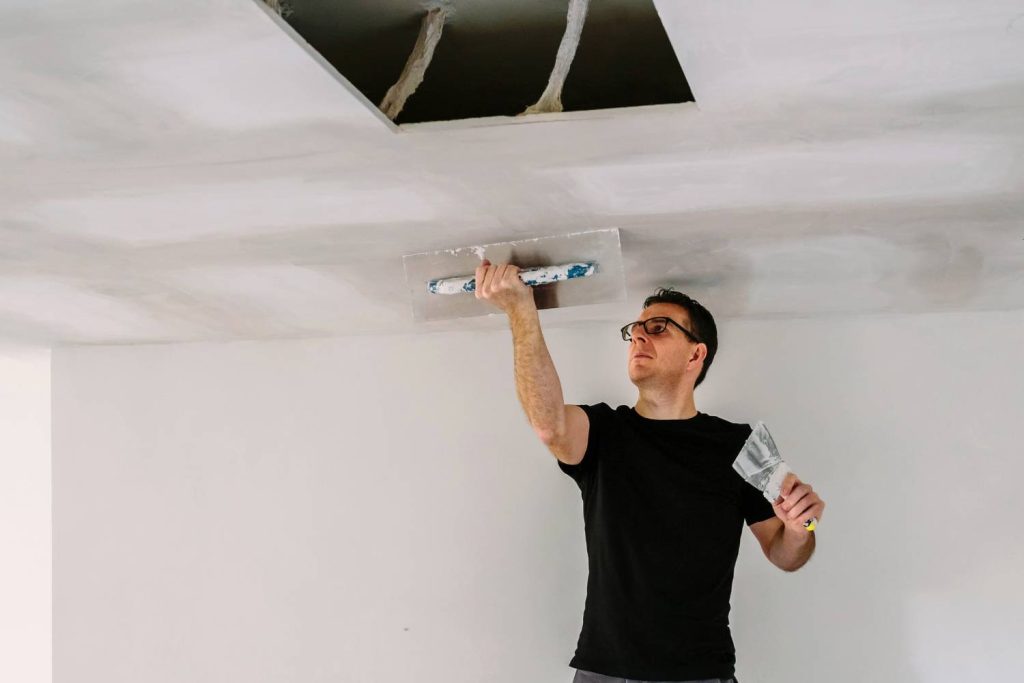
Set Up Your Work Area
Plastering can be messy, so protecting your floors and furniture with drop cloths or plastic sheeting is important. Set up a sturdy ladder or scaffolding to reach the ceiling safely. Ensure all your tools and materials, such as the plaster mix, hawk, trowel, and mixing bucket, are ready and within reach.
Plan For Electrical Fixtures And Fittings
If your ceiling has light fixtures, fans, or other fittings, decide how you'll handle these areas. Removing the fixtures and covering the wiring with protective covers is often best. If removing fixtures isn't possible, ensure they're well-protected and avoid getting plaster on them.
Practice Your Technique
If you're new to plastering, practising your technique on a spare piece of drywall or a hidden section of the ceiling can be helpful. This lets you get a feel for the tools and materials before tackling the entire ceiling.
Safety First
Always prioritise safety when working on ceilings. Wear protective gear, including goggles, gloves, and a dust mask, to protect yourself from plaster dust and debris. Ensure your ladder or scaffolding is stable and secure before starting your work.
Aftercare And Final Touches Of Plaster Ceiling: Ensuring Longevity And Aesthetic Appeal
Once your plaster ceiling is in place, it's not just about admiring its beauty; it's also about ensuring it remains in pristine condition for years to come. Proper aftercare and attention to final touches are crucial in maintaining the structural integrity and visual appeal of your plaster ceiling. Here's how you can keep your plaster ceiling looking its best, with a focus on Australian homes.
Regular Cleaning And Dusting
A simple yet effective way to maintain your plaster ceiling is through regular cleaning and dusting. Over time, dust and cobwebs can accumulate, dulling the appearance of your ceiling. Use a soft brush or a vacuum cleaner with a brush attachment to remove dust and cobwebs gently. This routine maintenance helps preserve the ceiling's aesthetic and prevents the buildup of dirt that can lead to long-term damage.
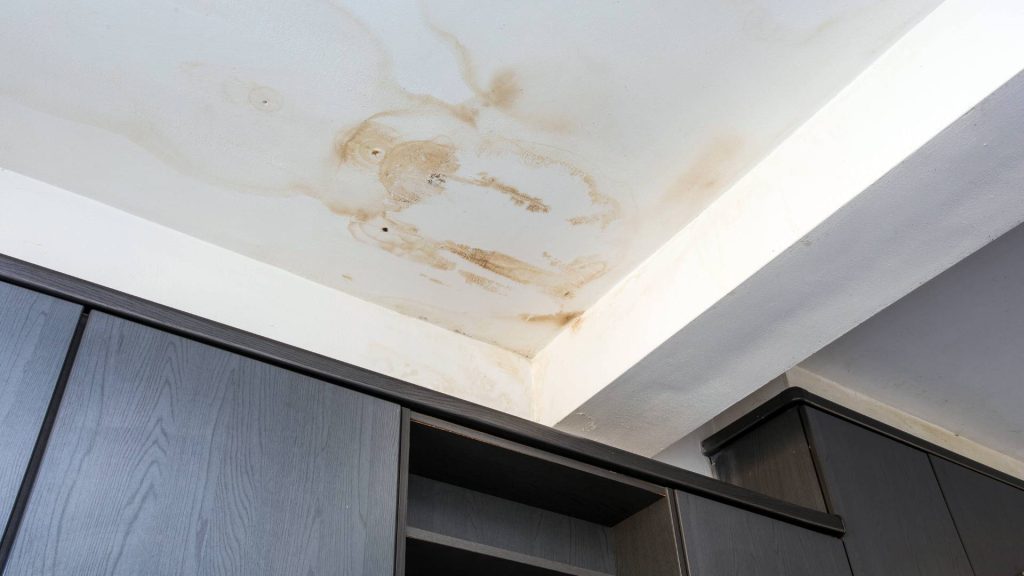
Addressing Cracks And Damage Promptly
It's not uncommon for plaster ceilings to develop cracks or small areas of damage over time due to house settling or temperature fluctuations. Address these issues promptly to prevent further deterioration. Small cracks can often be filled with plaster filler, sanded down, and repainted for a seamless finish. For more significant damage, consulting a professional may be necessary to ensure a proper repair that maintains the ceiling's integrity.
Humidity Control
Plaster ceilings can be sensitive to changes in humidity levels. Excess moisture can lead to softening and sagging of the plaster. To maintain ideal humidity levels in your home, consider using a dehumidifier in damp areas and ensure proper ventilation. This helps prevent damage to your plaster ceiling and contributes to a healthier living environment.
Avoiding Heavy Objects And Water Contact
Avoid hanging heavy objects directly from it to prevent stress and potential damage to your plaster ceiling. If you must hang something, ensure it's appropriately supported to distribute the weight evenly. Additionally, be vigilant about water contact. Leaks from plumbing or the roof can cause significant water damage, weakening the plaster. Address any leaks promptly and take measures to protect your ceiling from water exposure.

Periodic Inspections
Engage in periodic inspections of your plaster ceiling to identify potential issues early. Look for signs of cracks, bulges, or loose plaster. Early detection allows for timely repairs, preventing minor problems from escalating into major concerns. If you notice anything unusual, don't hesitate to contact professionals for an assessment.
Professional Maintenance And Restoration
For long-term care, consider professional maintenance and restoration services. Specialists in plaster ceilings can offer advice and services tailored to your ceiling's specific needs, from minor touch-ups to comprehensive restorations. Their expertise ensures that your plaster ceiling remains a source of pride and beauty in your home.
Painting And Sealing
A fresh coat of paint can do wonders for revitalising the appearance of your plaster ceiling. Use a sealing primer before painting to enhance paint adhesion and provide additional protection. Choose high-quality paint designed for ceilings to achieve the best results.
Conclusion
Plastering a ceiling is a difficult but satisfying do-it-yourself job that can make any room look much better. Putting one or more coats of a paste made up of water, sand, and a binder like cement or lime on surfaces like walls and ceilings is what it means. This process not only gets the surface ready for painting or decoration but also gives it a smooth finish that makes the structure look better and last longer.
Plastering has two main purposes: to protect and to look nice. It keeps water out and protects the building's structure. For aesthetic reasons, plastering makes a smooth base for artistic finishes, which improves the look of rooms inside. Techniques and materials have changed over time, and new technologies have made effective options for traditional tiling.
How you choose the right plaster relies on the needs of the job. For older buildings that might have problems with dampness, lime plasters work best. For dry spaces, gypsum plasters work better because they dry faster. For outdoor uses, cement-based plasters last a long time and don't break down easily.
It is important to have a skilled plasterer for a good finish. They are skilled enough to pick the right materials, make the mixture regularly, and use it correctly. A plastering trowel, a hawk, an electric mixer, buckets, precision tools like spirit levels and straight edges, finishing touches like floats, water brushes, bucket trowels, sponges, and paddle mixers are some of the most important tools for plastering. Masks and gloves are safety gear.
Finally, plastering a ceiling is a difficult but satisfying do-it-yourself job that needs a lot of planning ahead of time. This guide will show you the steps you need to take to get your ceiling ready for painting so that the finish is smooth and looks professional.
It's important to know what needs to be done and be ready for every possible situation before you start painting. If you have an old ceiling, you should take off the plaster or fix any damage. Take out the furniture and cover things with dust sheets or plastic to make the room look better. Using the right tools and safety gear, take off the old plaster before putting on the new one. Clean the area well and use a base or sealer to help the paint stick. Use drop cloths or plastic sheets to make your work area safe, and make sure all of your tools and supplies are ready to go.
Plan for electrical fixtures and fittings, taking out fixtures and putting protected covers over the wires. Use an extra piece of drywall or a secret part of the ceiling to practice your move. Wear safety gear and make sure the ladder or support is stable and secure to put safety first.
To keep the plaster ceiling's structural integrity and good looks, clean and dust it regularly, fix any cracks or damage right away, keep the humidity level low, keep heavy objects and water away from it, do regular inspections, and get professional maintenance and restoration services when needed. A fresh coat of paint can make the ceiling look brand new again. Use a finishing primer before painting to help the paint stick better and give it more protection. For the best effects, use high-quality paint made for ceilings.
Content Summary
- Plastering a ceiling transforms it from drab to fab, akin to painting a canvas.
- With proper guidance, a daunting plastering project becomes a rewarding DIY task.
- Preparation is crucial for a smooth, flawless plaster finish on ceilings.
- The blog provides a comprehensive guide on preparing a ceiling for plastering.
- Plastering enhances both the protective and aesthetic aspects of buildings.
- It involves applying a mixture of water, sand, and a binder to surfaces.
- The process prepares surfaces for painting or decorating and provides a smooth finish.
- Plastering serves protective functions and contributes to interior aesthetics.
- Various techniques and materials are used to suit different plastering needs.
- Traditional plastering involves applying plaster in three coats for a polished surface.
- Modern methods include plasterboard and drywall techniques as efficient alternatives.
- Choosing the right plaster depends on the project's specific requirements.
- Lime plasters are suitable for older buildings, while gypsum plasters set quickly.
- Cement-based plasters are ideal for external applications due to their durability.
- A skilled plasterer is essential for achieving a high-quality finish.
- The right tools and materials are crucial for a successful plastering project.
- A plastering trowel and hawk are indispensable tools for applying and smoothing plaster.
- An electric mixer ensures a consistent, lump-free mix, saving time and effort.
- Sturdy buckets are needed for mixing plaster and carrying water.
- A spirit level and straight edge ensure even and uniform plaster application.
- A plumb bob checks vertical alignments, ensuring walls and corners are straight.
- Floats, available in wood or metal, are used for smoothing and finishing plaster.
- A water brush helps achieve a smooth, flawless finish during the final stages.
- Additional tools like a bucket trowel and sponge are handy for specific tasks.
- Safety gear, including gloves and masks, protects against plaster dust and debris.
- Understanding the scope of work is the first step in preparing a ceiling for plastering.
- Clearing the room and covering immovable items protect them from dust and damage.
- Removing old, damaged plaster is essential for applying new plaster.
- A clean, smooth surface is critical for the plaster to adhere correctly.
- Applying a primer or sealer improves plaster adhesion and provides protection.
- Setting up a safe work area and planning for electrical fixtures are important steps.
- Practising the plastering technique on a spare piece ensures readiness for the actual task.
- Prioritising safety when working on ceilings is crucial to avoid accidents.
- Aftercare and final touches maintain the plaster ceiling's integrity and appearance.
- Regular cleaning and dusting prevent dirt buildup and keep the ceiling looking fresh.
- Addressing cracks and damage promptly prevents further deterioration.
- Controlling humidity levels protects the plaster from softening and sagging.
- Avoiding heavy objects and water contact prevents stress and potential damage.
- Periodic inspections identify potential issues early, allowing for timely repairs.
- Professional maintenance and restoration services ensure long-term care.
- Painting and sealing refresh the ceiling's appearance and add protection.
- The blog emphasises the importance of preparation for a successful plastering project.
- It offers insights into the materials and techniques used in plastering.
- The guide provides practical advice for DIY enthusiasts and professionals alike.
- By following the blog's guidance, readers can elevate their home's aesthetic appeal.
- The blog highlights the role of a professional plasterer in achieving quality results.
- It outlines the essential toolkit needed for plastering, from trowels to safety gear.
- The step-by-step guide on preparing a ceiling for plastering is detailed and informative.
- Aftercare tips ensure the plaster ceiling's longevity and aesthetic appeal.
- The blog serves as a comprehensive resource for anyone looking to plaster a ceiling.
Frequently Asked Questions
Preparation is crucial when plastering a ceiling because it ensures the plaster adheres properly and results in a smooth, even finish. Without proper preparation, you risk the plaster not sticking well, leading to cracks, peeling, or an uneven surface. Preparation involves cleaning, repairing any damage, and applying a suitable primer or bonding agent.
To prepare your ceiling for plastering, you'll need a few essential tools and materials, including:
- A ladder or scaffolding to safely reach the ceiling.
- Protective gear such as goggles, gloves, and a dust mask.
- A plastering trowel and hawk are used to apply plaster.
- Sandpaper or a sanding pole to smooth rough areas.
- A clean brush or vacuum for dust removal.
- PVA glue or a specialised primer to improve plaster adhesion.
- Repair materials, such as joint compound or plaster, for fixing cracks and holes.
To repair cracks and holes before plastering, clean out the damaged area to remove any loose material. For small cracks, apply a layer of joint compound or filler using a flexible knife, then smooth it out and let it dry completely. For larger holes, you may need to use a patching plaster or insert a piece of plasterboard as a base before applying the compound. Sand the area smooth once it's dry.
You can plaster over a painted ceiling, but it requires additional preparation. First, ensure the paint is firmly adhered to the ceiling and not flaking off. Lightly sand the painted surface to create a rough texture for better adhesion. Applying a coat of PVA glue diluted with water or a specialised primer can also help the new plaster bond to the painted surface.
After preparing your ceiling, including cleaning, repairing, and priming, it's important to wait until everything is completely dry before plastering. The drying time can vary depending on the conditions but generally ranges from 24 to 48 hours. Ensure the room is well-ventilated to speed up the drying process. Starting to plaster over a damp surface can lead to adhesion problems and negatively affect the finish.