Plastering a ceiling might seem like a straightforward task, but it’s one that can easily overwhelm even the most seasoned DIY enthusiasts. As someone who’s tackled their fair share of ceilings over the years, I can tell you it’s not just about slapping plaster onto the surface—it’s about precision, patience, and the right tools. Whether you’re looking to restore a cracked ceiling in an old home or simply want a smoother, more polished finish, understanding the process and having the right technique can make all the difference. In this guide, I’ll walk you through everything from the preparation stages to applying the perfect plaster finish, sharing my experiences along the way to help you avoid common pitfalls and achieve a ceiling that’s smooth, durable, and ready to impress.
Why Plastering a Ceiling is a Game-Changer
I’ll be honest—plastering a ceiling isn’t something you just jump into unless you’ve got a bit of experience or are prepared to learn the ropes the hard way. I remember my first go at it: the plaster kept sagging, I ended up with more splatters on the floor than on the ceiling, and the finish? Well, it definitely wasn’t “smooth.”
But as anyone who’s tackled this job will tell you, there’s something incredibly rewarding about stepping back and seeing a pristine, smooth plaster ceiling. Not only does it look amazing, but it also enhances the room’s acoustics and even adds a bit of value to your home.
Over the years, I’ve learned a few tricks that have saved me from the heartache of cracking plaster, uneven coats, and tools that just don’t cut it. Plastering a ceiling is a process that requires attention, but with the right materials, preparation, and technique, it’s a job you can absolutely tackle—whether you’re a seasoned DIYer or just starting out.
The Ceiling Plastering Process: From Prep to Finish
Let’s start with the fundamentals: prep work. I’ve learned the hard way that it doesn’t matter how good your plastering skills are if the ceiling isn’t prepped properly. It’s a bit like trying to paint a picture on a dirty canvas.
When I first tried plastering a ceiling, I was in a rush and thought, “How bad can it be? Just a quick clean, and we’re good to go.” Turns out, a lot. Dust, old paint, and grease are all enemies of a good finish. Trust me, prep work is 80% of the battle.
- Clean Thoroughly: Start by scrubbing the ceiling with a stiff broom or dust brush to get rid of cobwebs, dirt, and dust. It’s essential to have a clean surface for plaster to adhere to. I often use a damp cloth for wiping down any grease spots—think of it as a mini pre-wash for your ceiling.
- Fill Cracks and Holes: The ceiling in my first plastering attempt had a few cracks from the house settling. These needed to be filled with a good filler before any plastering could begin. I always use a reliable joint compound and let it dry completely before sanding it down for a smooth finish. I even had to fill in a small hole where a light fitting had been removed!
- Bonding Agent or Primer: This step is essential, particularly if your ceiling has been painted or the surface is non-porous. If you’ve got an old, painted ceiling like mine, a bonding agent or primer helps the plaster stick. For new plasterboard, I recommend a PVA (polyvinyl acetate) solution—three parts water, one part PVA. This ensures the plaster doesn’t dry too quickly and creates a solid bond. Some plasterboards even come with a factory-applied bonding agent, making things easier.
Choosing the Right Plaster Material
I’ve gone through several plastering materials over the years, and let me tell you—choosing the right one is critical. Not all plasters are created equal, and picking the wrong type can mean extra work or poor results.
- Gypsum Plaster (Plaster of Paris): This is a personal favourite of mine for interior ceilings. It’s quick-drying, lightweight, and gives a nice, smooth finish. It’s perfect for those sleek, modern looks, and the added bonus is that it’s pretty fire-resistant. I’ve used premixed gypsum plaster for smaller jobs, and it’s a godsend for beginners.
- Perlite Plaster: For homes in areas like Melbourne, where we experience extreme temperatures, I’ve found perlite plaster works wonders. It has excellent thermal and acoustic properties, making it ideal for insulating homes or spaces where you want to control sound, like in home theatres or offices.
- Polished Plaster: If you’re after something a bit more luxurious, I’ve seen polished plaster used in high-end homes around Sydney, especially in bathrooms. It’s lime-based, mixed with marble dust, and gives a beautiful glossy finish. It’s a bit more effort to apply, but the results are stunning.
Plastering Tools You Can’t Do Without
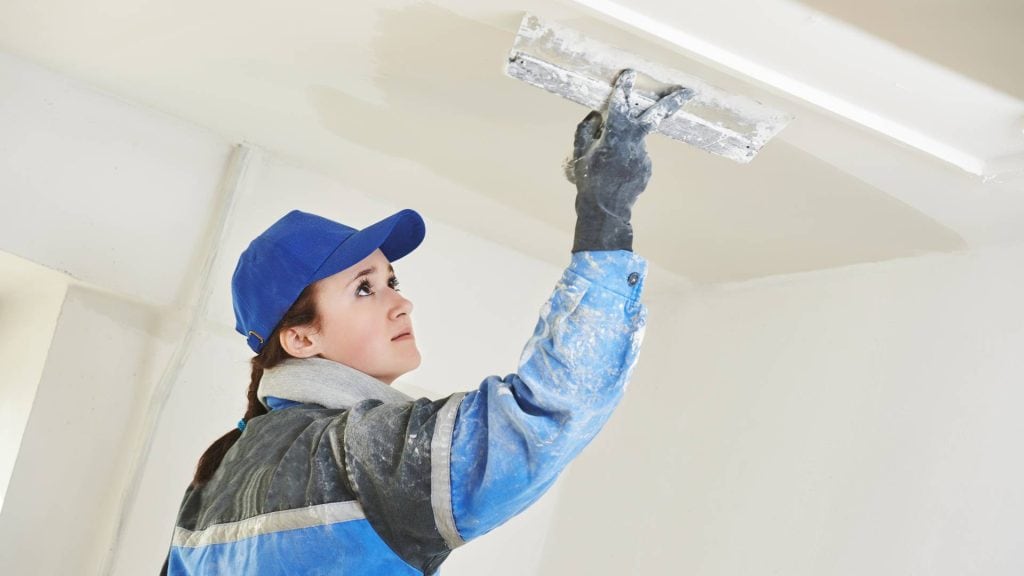
Ah, the plastering trowel—the unsung hero of the ceiling plastering process. Early on, I used a cheap, flimsy trowel that bent at the slightest bit of pressure. Big mistake! These days, I use a strong, high-quality plastering trowel, and trust me, it makes all the difference.
For starters, flexi trowels are a must for that final wet trowel stage. These flexible trowels reduce the strain on your wrist and give the plaster a smooth, flawless finish. I’ve learned the hard way that using a stiff trowel at this stage will leave visible marks, so don’t skimp on quality here.
I’ll also admit, I used to overload the trowel, thinking it would save time, but that only resulted in big blobs of plaster dripping down. It’s all about moderation, my friend—getting just the right amount of plaster on the trowel for a consistent layer is key.
Mixing Plaster for Ceiling: Get the Right Consistency Every Time
Mixing plaster is one of those things that sounds simple but can go awry if you don’t do it right. I remember my first batch: it was either too runny or it dried up on me too fast. It was a disaster.
Over the years, I’ve learned that perfect consistency is crucial. The key is adding plaster to water slowly, little by little, and using a good mixing paddle. Don’t rush this part. The plaster should be smooth, without lumps, but not too runny—think of it like thick whipped cream, not too stiff and not too runny.
Smart Drying Management
Now, this is where patience comes into play. Drying time can make or break your ceiling plastering job. The environmental conditions, like temperature and humidity, play a huge role.
In the warmer months in Brisbane, I can plaster a ceiling and have it dry in a day if I keep the windows open and let the air flow. However, in the cooler, more humid conditions of Melbourne’s winter, drying time can take a bit longer. I usually use fans to speed things up, but I avoid placing a heater directly on the plaster. Doing so can cause cracks and shrinkage, which I learned the hard way!
Applying Plaster to Your Ceiling: Techniques & Tips for Smooth Results
Layering is a technique I’ve come to deeply respect in ceiling plastering. When I first started, I thought applying a single thick coat would do the trick. I quickly learned that this approach leads to all sorts of issues—uneven drying, cracks, and a finish that looks rushed. Instead, the key is in layering your plaster carefully.
Here’s what I’ve found: apply the plaster in thin, even layers. After the first coat, which should be your bonding layer, let it dry completely—this can take anywhere from 12 to 24 hours depending on your environment (the drying process can be longer in Melbourne’s winter months, for example).
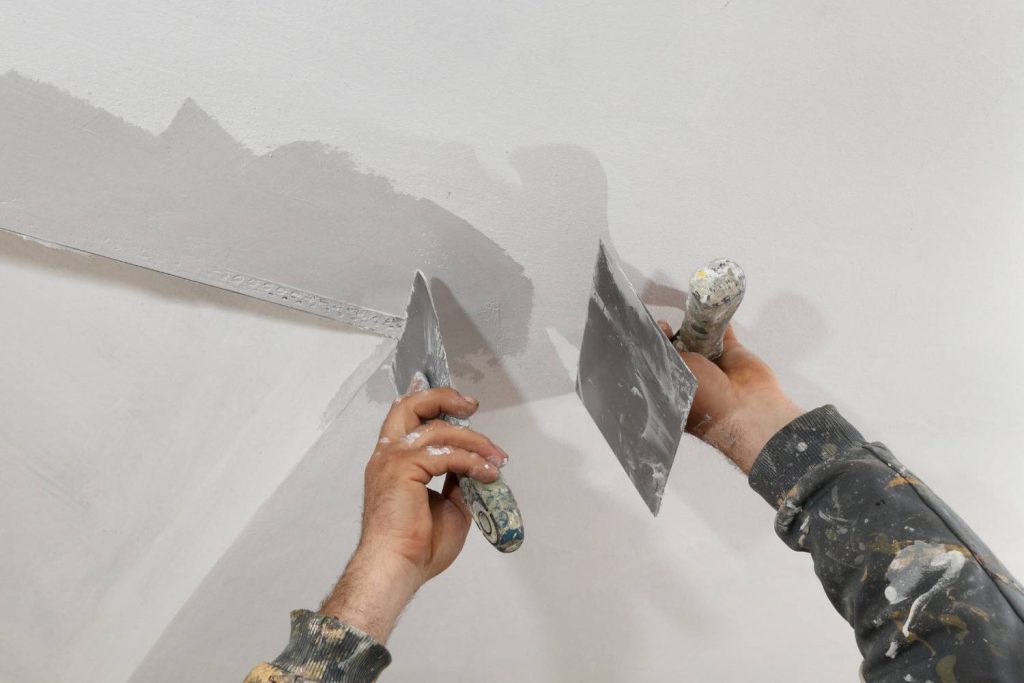
Once dry, lightly sand the first layer for smoothness. The second coat should be a bit thinner than the first, and it’s during this stage that I use a speed skim—a tool that has completely changed how I apply plaster. Speed skims are perfect for flattening out the surface, and unlike a trowel, they don’t leave marks, making the process quicker and smoother. I highly recommend it, especially if you’re a beginner.
By the time the finish coat is applied, your ceiling should be almost perfectly smooth. At this stage, it’s crucial to use a flexi trowel to polish out any remaining imperfections. The goal here is to create a surface that’s almost mirror-like in its smoothness, which, I’ll admit, can feel pretty satisfying when you get it right.
Expert Plastering Techniques for Seamless Application
I can’t stress enough how important the technique is when plastering ceilings. The first time I plastered a ceiling, I tried to work too quickly, thinking I could get it all done in one go. Let’s just say the results weren’t pretty.
Here’s a tip I learned over time: work in manageable sections, and take your time. You don’t need to rush. A good way to approach it is to start at one end of the room and plaster in a ‘big ring’ around the room. This way, you avoid plaster drying out before you finish the job.
When applying plaster, aim for smooth, consistent strokes. Don’t overload your trowel—this is where many beginners go wrong, and I’ve been guilty of it myself. Instead, aim for a light, consistent application. Less is more. When I work overhead, I focus on getting an even, thin coat that doesn’t drip or sag. For this, I often use a plastic trowel for the final “dry trowel” stage. It gives a matte finish and helps eliminate any glossy streaks that steel trowels can leave behind.
Drying and Curing: How to Prevent Cracking and Ensure Durability
Ah, the drying process—the final frontier. When I started plastering, I underestimated how crucial the drying time is. Plaster is finicky; it needs the right temperature and humidity to cure properly. I once had a situation where I plastered a ceiling, but because it was winter in Sydney, I didn’t allow enough drying time. The plaster cracked under the weight of its own drying process, and I ended up having to redo the whole thing.
Now, I always keep an eye on the temperature and humidity. The plaster will dry faster in warmer conditions, but be careful about forcing the drying process with heat, like placing a fan heater near the ceiling. It’s tempting when you’re in a rush, but extreme heat can cause cracking. I’ve learned the hard way that it’s best to let plaster dry naturally. Ideally, your room should be kept around 20°C with good airflow to keep things dry evenly. I often use a humidifier in the winter months to maintain consistent conditions and speed up drying without the risk of cracking.
Fixing Plaster Cracks: Long-Term Solutions for Ceiling Damage
Cracks in plaster ceilings, especially in older homes like mine, are something I deal with regularly. They’re often the result of natural settling or even temperature shifts. The first time I encountered a large crack, I thought I could just fill it and forget about it. However, a few months later, the crack came back, bigger and badder than before.
Since then, I’ve developed a foolproof strategy for fixing plaster cracks. The first step is to use reinforced fibreglass tape for the crack. I’ve found that using a heavyweight compound, like Durabond, for the first coat makes the repair much more durable. Durabond is strong and dries hard, so it sets the foundation for the repair.
Once the first coat is dry, I apply a second, smoother layer of joint compound, which I sand down to a flat, even finish. If the cracks keep coming back, I’ve also had success screwing the plaster back into place by securing it directly to the ceiling joists using drywall screws. This helps prevent the crack from reopening.
Ceiling Plastering vs. Drywall: Which is Better for Your Home?
As much as I love plaster, there are times when drywall can be a better fit. For instance, in new builds or renovations in areas like Brisbane, where humidity can be an issue, drywall might offer more flexibility in terms of installation speed and cost.
However, when it comes to durability and finish, plaster is hard to beat. Drywall, while quick to install, can be prone to dents and is much more vulnerable to moisture than plaster. I’ve found that in older homes, where heritage features matter, plastering is the more authentic, lasting choice. It also offers superior sound insulation, which can be a huge bonus in multi-story homes or units.
For homes in areas like the Gold Coast, where salt air can cause wear and tear, I prefer plaster as it tends to stand the test of time a bit better in these harsher environments. Additionally, plaster ceilings often add more value to the home, which is something to consider if you’re thinking of selling.
