Plastering a ceiling is often seen as a straightforward task at first glance. However, the reality is more complex. This delicate process requires a steady hand, a keen eye for detail, and a deep understanding of the material and techniques involved. In the realm of home improvement and construction, achieving a smooth, flawless finish on a ceiling is akin to an art form, one that is fraught with potential pitfalls even for the most seasoned professionals.
In this blog post, we will delve into the intricacies of plastering, uncovering the common mistakes often overlooked or underestimated by DIY enthusiasts and professionals alike. From the preparation of the surface to the application and finishing touches, we’ll guide you through the critical errors that can compromise the quality of your plastering project.
Our aim is not just to highlight these mistakes but to provide you with the knowledge and tips to avoid them, ensuring your plastering endeavour results in a ceiling that is not only visually pleasing but also enduring. Join us as we explore the pitfalls of plastering a ceiling, offering insights and solutions to help you achieve a seamless finish.
Overview Of Plastering Ceilings
Plastering ceilings is an art that has been refined over centuries, offering a protective layer and a canvas for aesthetic expression. This comprehensive guide draws from a wealth of expert sources to provide an insightful overview of plastering ceilings, from its objectives and methods to the types of plaster and finishes available.
Objectives Of Plastering
The primary goals of plastering are threefold: to protect surfaces from weathering and atmospheric effects, to conceal inferior materials and artistry, and to provide a decorative finish. Plastering enhances the visual appeal of ceilings and walls, allowing for the incorporation of artistic designs and textures.
Key Considerations
It’s crucial to use sharp, angular sand free from impurities when plastering, ensuring the plaster adheres properly and achieves the desired consistency. The correct plaster ratio and careful water management are essential to prevent defects such as crazing. It is vital to prepare the surface by wetting it before application and ensuring a uniform thickness.
Methods And Types Of Plastering
Plastering can be done using various materials, including lime, cement, or gypsum, each offering unique benefits. Techniques range from single to three-coat applications, depending on the desired finish and the plaster’s properties. Specialised plasters, like waterproof or decorative plasters, cater to specific needs, enhancing functionality and aesthetics.
Plaster Finishes
A range of plaster finishes is available, from smooth-cast to textured or pebble-dash, allowing for customisation according to design preferences. Each finish offers a distinct look, contributing to the overall ambience of a space.
Preventing And Addressing Defects
Proper mixing and application techniques are crucial to avoid common plastering defects such as crazing and loss of adhesion. Identifying and rectifying the root causes of these issues, such as moisture penetration or structural movement, is essential for durable repairs.
Installation Insights
Installing plaster ceilings involves meticulous preparation, from cleaning and priming the surface to applying base coats and decorative elements. Modern plaster ceilings, known for their adaptability and durability, offer practical benefits like wire concealment and enhanced insulation, contributing to a room’s warmth and acoustic quality.
Common Errors In Plastering Ceilings
Plastering the ceiling is a critical aspect of building maintenance and renovation that, when done correctly, can significantly enhance a structure’s durability and aesthetic appeal. However, several common mistakes can compromise the quality of plastering work, leading to issues that may require costly repairs.
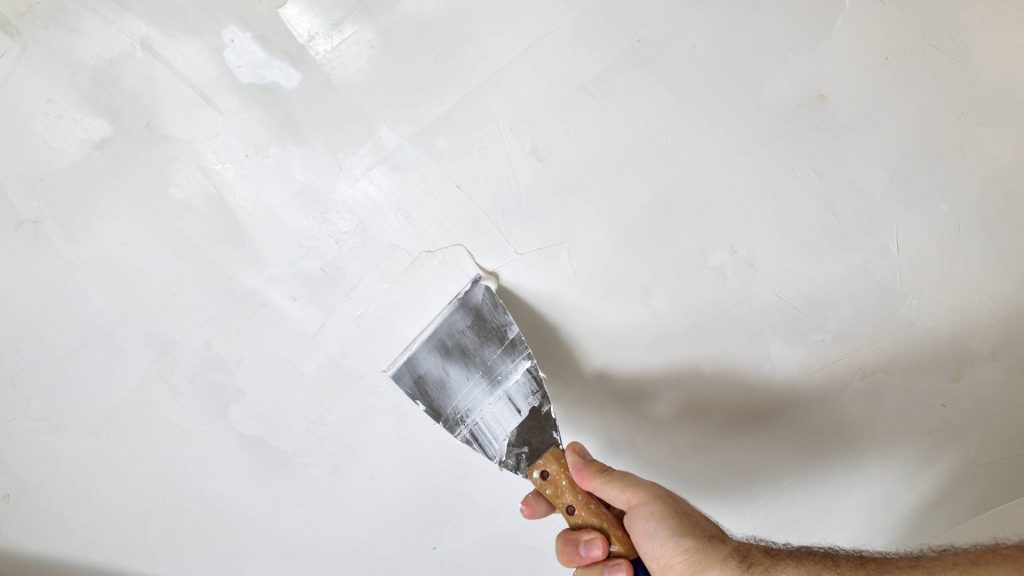
Inadequate Surface Preparation
Inadequate surface preparation before plastering ceilings can lead to many problems, compromising the integrity and appearance of the plasterwork. Here are the importance of proper surface preparation and how paying attention to this crucial step can result in plaster failure.
The Importance Of Surface Preparation
Surface preparation is the cornerstone of a successful plastering job. It involves cleaning the surface thoroughly, ensuring it is free from dust, oil, and other contaminants. Glossy areas must be sanded to create a texture that plaster can adhere to, while porous surfaces should be primed to prevent the plaster from drying out too quickly.
An adhesive bonding agent is recommended to enhance the plaster’s adhesion to the surface. This step is crucial for both the longevity and durability of the plasterwork.
Common Plaster Problems Due To Inadequate Preparation
Cracking: Cracks in plaster can be attributed to several factors, including the cold, but often, the root cause is poor surface preparation. Cracks can be hairline or more severe, such as delaminating cracks, which indicate the plaster is pulling away from the lath, posing a risk of falling plaster, especially dangerous in-ceiling applications.
Discolouration: Discoloured plaster often signals water damage, which can stem from leaks. The appearance of brown water stains on plaster is a telltale sign that the underlying issue needs to be addressed promptly to prevent further damage.
Bubbling: Bubbling or bulging plaster is another sign of water damage. This condition can progress to the point where plaster bubbles and bulges without prior staining, indicating severe moisture issues that need immediate attention.
Efflorescence: The appearance of a whitish crystalline substance on plaster surfaces is a sign of efflorescence caused by soluble salts in the plaster materials or water used in construction. This condition affects the adhesion of paint and can lead to further aesthetic and structural issues.
Peeling and Flaking: These defects are primarily due to bond failure between successive coats of plaster or between the plaster and substrate. Proper material selection and surface preparation can prevent these issues.
Popping: Popping occurs when contaminant particles in the mortar mix create conical holes in the plaster. Ensuring a clean, contaminant-free mix can prevent this problem.
Loose Plaster: Caused by improper mixture and inadequate curing, loose plaster can be prevented with the right mix and sufficient curing time, emphasising the importance of skilled artistry.
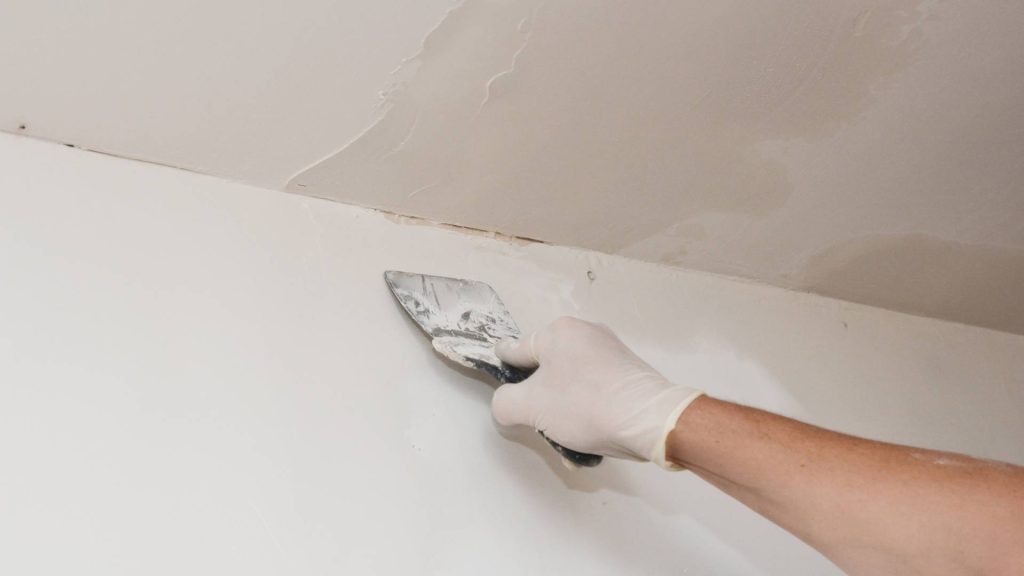
Improper Removal Of Old Plaster
Removing old plaster must be carefully approached to avoid damaging the underlying surface. Chipping away at the old plaster without assessing the stability of the material beneath can lead to significant damage. It’s essential to proceed cautiously, starting with a small section and ensuring the plaster comes off cleanly without harming the underlying surface.
Using Inappropriate Materials
Selecting the wrong type of plaster or mixing materials improperly can lead to suboptimal results. Different types of plaster are suited for various applications, and using the wrong one can cause issues such as poor adhesion, cracking, or insufficient moisture resistance. It’s crucial to choose materials appropriate for the specific conditions and requirements of the project.
Incorrect Mixing Ratios And Application Methods
Achieving the right consistency in the plaster mix is vital for a smooth application and durable finish. Incorrect mixing ratios can result in a mix that is either too thin or too brittle. Additionally, improper application methods, such as uneven spreading or incorrect troweling techniques, can leave the finished surface with lumps, bumps, and uneven textures.
Neglecting Proper Drying And Curing Times
Rushing the drying and curing process of plaster can lead to cracking, delamination, and other issues. It’s important to allow sufficient time for the plaster to dry thoroughly before painting or applying additional finishes. This patience ensures the plaster has adequately bonded to the surface and attained strength.
Failing To Address Underlying Structural Issues
Plastering over existing structural problems requires addressing the root causes to avoid recurring issues. Before starting the plastering process, it’s essential to ensure that there are no underlying structural difficulties that could compromise the integrity of the plasterwork.
Overlooking The Importance Of Professional Expertise
While DIY plastering projects are popular, certain aspects of plastering require professional expertise to achieve optimal results. Inexperienced individuals may make mistakes that compromise the quality of the plastering work. Hiring a professional can ensure the job is done correctly, using the appropriate techniques and materials.
How To Avoid Common Errors In Plastering Ceilings
Plastering ceilings is a complex task that requires skill, patience, and attention to detail. Despite its challenges, achieving a smooth and durable plaster finish is possible by understanding and avoiding common errors.
Ensure Proper Plaster Mixture
A common mistake in plastering is using an improper mixture. Each layer of plaster, from the scratch to the brown and finally the white layer, requires a unique combination of materials. An incorrect mix with too little cementing material, like lime or gypsum, can lead to crumbling plaster. To avoid this, ensure the plaster mix has the correct proportions of all components, providing the necessary binding strength.
Prepare The Surface Adequately
Surface preparation is crucial for a successful plaster application. The surface must be clean, even, and free of dust, dirt, and debris. Failure to properly prepare the surface can lead to plaster de-bonding, where the plaster separates from the wall. This can be prevented by removing dust and oil from the substrate and ensuring it reaches the correct moisture content before plastering.
Address Cracks And Structural Issues
Plaster cracks can occur for various reasons, including bad artistry, expansion, and shrinkage during drying. To prevent cracks, ensure that a skilled mason adds water to the mortar to achieve the desired workability. Proper plaster curing is also essential to slow rapid drying and minimise cracking.
Combat Efflorescence
Efflorescence, a whitish crystalline substance on plaster surfaces, occurs when soluble salts are in plaster-making materials. This defect affects the aesthetic appeal and compromises the adhesion of paint. To prevent efflorescence, use construction materials free from salt and ensure the plastered surface is moisture-free.
Prevent Plaster From Falling Out
Flaking and peeling of plaster are often due to bond failure between successive coats. These defects can be minimised by selecting proper materials and ensuring thorough surface preparation. Good artistry is key to avoiding imperfect adhesion.
Avoid Popping And Lose Plaster
Popping, characterised by conical holes breaking out of the plaster, is caused by contaminant particles in the mortar mix. Loose plaster, on the other hand, results from improper mixture and inadequate curing. Ensuring no contaminant particles and using the correct mixture and curing practices can prevent these issues.
Consult Experienced Professionals
Plastering, especially in historic settings or when dealing with complex issues, often requires the expertise of experienced professionals. Consulting with skilled plasterers can help choose the right materials and techniques and address any underlying structural problems.
Conclusion
Ceiling plastering is a difficult job that needs a steady hand, a good eye for detail, and a lot of knowledge about the materials and methods used. It’s kind of like an art form, and even experienced pros can make mistakes. This blog post is meant to help you avoid making common mistakes when painting ceilings so that you get a good finish that lasts. Plastering ceilings does three main things: protects surfaces from wear and tear, hides cheap materials, and adds a stylistic touch. Important things to think about are using sharp, jagged sand, the right plaster ratio, and being careful with the water. Different plasters are made for different purposes and can be used with different materials, methods, and finishing. Using the right mixing and applying methods is very important to avoid common gluing problems. Modern plaster ceilings have useful features like hiding wires and better insulation, which improves the warmth and sound quality of a room. One common mistake people make when painting ceilings is not preparing the area well enough, which can cause the plaster to fail.
Surface preparation is an important part of painting because it includes cleaning the surface well and making sure it is free of any dirt or other debris. Smooth areas should be scraped so that the plaster can stick to them, and rough areas should be painted so that the plaster doesn’t dry out too quickly. To help the clay stick to the surface better, a sticky bonding agent is suggested.
Plaster problems that happen often because of bad preparation include cracking, discolouration, bubbles, efflorescence, peeling and flaking, popping, loose plaster, removing old plaster the wrong way, using the wrong materials, not following the right mixing ratios and application methods, skipping the right drying and curing times, and not fixing structural problems that are at the root.
To avoid making common mistakes when plastering ceilings, make sure you use the right plaster mix, prepare the surface properly, fix any cracks or structural problems, fight efflorescence, keep the plaster from falling out, avoid hopping and losing plaster, and talk to professionals who have done it before.
If you don’t follow the right drying and finishing times or make sure you use the right mixes, you might not get the best results. Getting the surface ready, being an artist, and drying in the right way can help avoid these problems.
Before you start plastering, you need to fix any structure problems that are there. This will make sure that the plasterwork stays in place. Hiring a professional can help you make sure the job is done right, with the right tools and methods.
Finally, preparing the surface is very important for a good plastering job. Doing it right can help you avoid common mistakes and make sure the plasterwork lasts a long time.
Content Summary
- Plastering a ceiling requires a steady hand, keen eye for detail, and deep understanding of materials and techniques.
- Achieving a smooth, flawless finish on a ceiling is an art form, fraught with potential pitfalls even for professionals.
- The blog delves into common mistakes in plastering, offering insights and solutions for a seamless finish.
- Plastering ceilings, refined over centuries, serves both protective and aesthetic purposes.
- The primary goals of plastering include protection from weathering, concealing inferior materials, and providing a decorative finish.
- Using sharp, angular sand free from impurities ensures proper adhesion and desired consistency of plaster.
- Correct plaster ratio and careful water management are essential to prevent defects like crazing.
- Various plastering materials include lime, cement, or gypsum, each with unique benefits.
- Techniques range from single to three-coat applications, depending on the desired finish.
- Specialised plasters cater to specific needs, such as waterproof or decorative finishes.
- A range of plaster finishes, from smooth to textured, allows customisation according to design preferences.
- Proper mixing and application techniques are crucial to avoid common defects such as crazing and adhesion loss.
- Modern plaster ceilings offer practical benefits like wire concealment and enhanced insulation.
- Inadequate surface preparation can compromise the integrity and appearance of plasterwork.
- Surface preparation involves cleaning, sanding glossy areas, and priming porous surfaces.
- An adhesive bonding agent enhances plaster adhesion to the surface.
- Common plaster problems include cracking, discolouration, bubbling, efflorescence, peeling, popping, and loose plaster.
- Cracks in plaster often result from poor surface preparation and can range from hairline to delaminating cracks.
- Discolouration often signals water damage, requiring prompt attention to prevent further issues.
- Bubbling or bulging plaster indicates severe moisture issues that need immediate attention.
- Efflorescence, caused by soluble salts, affects paint adhesion and structural integrity.
- Peeling and flaking are primarily due to bond failure between coats or with the substrate.
- Popping occurs when contaminant particles in the mortar mix create conical holes in the plaster.
- Loose plaster, caused by improper mixture and inadequate curing, emphasises the importance of skilled artistry.
- Careful removal of old plaster is essential to avoid damaging the underlying surface.
- Selecting appropriate materials is crucial for optimal plastering results.
- Incorrect mixing ratios and application methods can lead to a suboptimal finish.
- Allowing sufficient drying and curing times is important to avoid plaster cracking and delamination.
- Addressing underlying structural issues is crucial before plastering.
- Professional expertise can ensure the job is done correctly, using appropriate techniques and materials.
- Ensure proper plaster mixture to avoid crumbling and ensure binding strength.
- Adequate surface preparation prevents de-bonding and ensures plaster adheres properly.
- Addressing cracks and structural issues is essential to prevent future cracking.
- Combatting efflorescence involves using salt-free materials and ensuring a moisture-free plastered surface.
- Preventing plaster from falling out requires proper material selection and good artistry.
- Avoiding popping and loose plaster involves ensuring a clean mix and correct curing practices.
- Consulting experienced professionals is advised for complex plastering projects.
- Each layer of plaster requires a unique combination of materials for proper application.
- Failure to properly prepare the surface can lead to de-bonding and separation from the wall.
- Cracks in plaster can be minimised by ensuring skilled application and proper curing.
- Efflorescence compromises aesthetic appeal and paint adhesion, requiring attention to material quality.
- Flaking and peeling of plaster can be minimised by selecting proper materials and thorough surface preparation.
- Popping and loose plaster are preventable through clean mixing and correct mixture and curing practices.
- The importance of skilled artistry is emphasised in preventing common plastering defects.
- Proper mixture, surface preparation, and addressing structural issues are key to successful plastering.
- Consulting with skilled plasterers can help choose the right materials and techniques.
- Understanding and avoiding common errors is crucial for achieving a durable and visually pleasing plaster finish.
- The blog provides a comprehensive guide to plastering ceilings, highlighting the intricacies of the process.
- Readers are equipped with knowledge and tips to navigate the challenges of plastering ceilings.
- The goal is to ensure a plastering endeavour results in a ceiling that is both visually pleasing and enduring.
Frequently Asked Questions
What Are The Most Common Mistakes Made When Plastering A Ceiling?
The most common mistakes include not properly preparing the surface, applying plaster unevenly, mixing the plaster to the wrong consistency, and working in poor lighting conditions. These errors can lead to a finish that is uneven, prone to cracking, or does not adhere well to the ceiling surface.
How Important Is Surface Preparation Before Plastering A Ceiling, And What Steps Should Be Taken?
Surface preparation is crucial for a successful plastering job. It involves cleaning the ceiling to remove dust, dirt, and any loose material, ensuring the surface is smooth and free from imperfections, and applying a primer or sealer if necessary. Skipping these steps can result in poor plaster adhesion and a subpar finish.
What Is The Right Consistency For Plaster, And How Can Mixing Errors Affect The Plastering Process?
The plaster should have a consistency similar to thick cream, allowing it to spread easily without running or being too stiff. Mixing errors can lead to a mixture that is too thin, which will sag or run, or too thick, which is difficult to work with and may not bond well to the ceiling. Achieving the right consistency is key to a smooth application and finish.
Why Is Even Application Important When Plastering A Ceiling, And How Can It Be Achieved?
Even application is important to ensure a smooth, uniform finish without dips or bumps. It can be achieved by using the right tools, such as a plasterer’s trowel, and applying consistent pressure and thickness across the entire ceiling. Working systematically in sections also helps maintain even coverage.
Can Poor Lighting Really Affect The Quality Of A Plastering Job On A Ceiling? How?
Yes, poor lighting can significantly affect the quality of a plastering job because it makes it difficult to see imperfections, uneven areas, or missed spots during application. Good lighting is essential to ensure a consistent finish, as it allows the plasterer to assess the work from different angles and identify areas that may need additional smoothing or filling.

