Discovering water damage on your plaster ceiling can evoke a sinking feeling of dread, akin to watching a slow-motion disaster unfold above your head. The stains, the sagging plaster, and the peeling paint are more than mere eyesores; they are silent alarms for immediate action. But fear not, for this unfortunate event doesn’t necessarily spell doom for your cherished ceiling. With the right approach, repairing a plaster ceiling after water damage can be a surprisingly manageable task, transforming despair into accomplishment.
In this comprehensive guide, we’ll journey through the meticulous steps to salvage what seems lost. From the initial shock of discovering the damage to the triumphant application of the final coat of paint, this blog is designed to be your beacon of hope. Whether you’re a seasoned DIY enthusiast or a novice with a can-do attitude, our step-by-step guide will empower you to tackle the repair process with confidence and skill.
So let’s turn this challenge into an opportunity to breathe new life into your ceiling, ensuring it not only recovers but thrives in the aftermath of water damage. Welcome to your ultimate guide to restoring beauty and integrity to your plaster ceiling.
Identifying Water Damage In Ceiling Plasters
Water damage in ceiling plasters can often go unnoticed until it becomes a significant issue, leading to costly repairs and potential health risks. Understanding the signs of water damage and its causes can help homeowners and professionals take early action to mitigate these risks. This guide compiles various experts’ insights to help you effectively identify water damage in ceiling plasters.
Common Signs Of Water Damage
- Discolouration or Stains: Water stains on the ceiling are usually the first sign of water damage. These stains can vary in colour from yellow and brown to copper, indicating the presence of moisture.
- Peeling Paint: Water seepage can cause paint on the ceiling to peel, flake, or bubble. This sign often indicates a persistent leak that keeps the area damp.
- Cracks and Bubbles: The appearance of cracks or bubbles in the plaster clearly indicates water damage. Cracks may appear as straight lines or in a spiderweb pattern, while bubbles form between the drywall and paint.
- Mould or Mildew Growth: The mould or mildew on the ceiling, especially in dark spots or patches, indicates excessive moisture. Mould growth can lead to health issues, including respiratory problems.
- Sagging or Bulging: A sagging or bulging ceiling indicates significant water accumulation and potential structural damage, requiring immediate attention.
- Musty Smell: A persistent or mouldy odour in a room can indicate hidden water damage or mould growth in the ceiling, even if no visible signs are present.
- Visible Leaks: Active water dripping or pooling from the ceiling is an obvious sign of a leak that needs urgent repair.
Causes Of Ceiling Water Damage
- Roof and Plumbing Leaks: Damaged roofs, missing shingles, or broken pipes are common sources of water leaks that lead to ceiling damage.
- High Humidity and Condensation: Excessive moisture in the air can cause condensation on the ceiling, leading to stains, mould growth, and material breakdown.
- Structural Issues: Settling the building or damaged structural elements can cause cracks and sagging in the ceiling.
- Poor Ventilation: Inadequate ventilation, especially in bathrooms and kitchens, can lead to moisture buildup and subsequent ceiling damage.
- Age and Wear: Over time, ceiling materials can deteriorate, leading to cracks, flaking, or crumbling.
Preventing Ceiling Water Damage
Preventive measures include:
- Regular inspection of roofs and plumbing for leaks.
- Ensuring proper ventilation in moisture-prone areas.
- Using dehumidifiers to control indoor humidity levels.
Addressing any signs of damage or moisture early on can prevent more severe issues and costly repairs.
Preparing For Repairs Of Ceiling Plasters
Repairing ceiling plasters is a task many homeowners may face, especially in older homes where plaster is the primary material used for walls and ceilings. Over time, plaster can crack, sag, or even crumble due to various factors, including structural shifts, moisture, and age.
Preparing for repairs is crucial to ensure a successful restoration that not only fixes the damage but also preserves the integrity and appearance of the ceiling.
Identifying The Damage
The first stage in planning for repairs is to examine the amount of the damage completely.
Common signs of plaster ceiling damage include cracks, sagging, discolouration, peeling paint, and sometimes water damage. Use a flashlight to inspect the ceiling closely and mark the areas that need repair. This will help you determine the scope of the project and the materials required.
Safety First
Before starting any repair work:
- Prioritise safety. Wear safety goggles and a dust mask to protect yourself from plaster dust and debris.
- Ensure a stable ladder or scaffolding if you’re working on a high ceiling.
- Use drop cloths to shield the floor and furnishings from any dust or debris that may fall.
Gathering Materials And Tools
Gather the necessary materials and tools depending on the type of repair needed. For small cracks or holes, you may need plaster patching compound, a putty knife, sandpaper, and paint for touch-ups. Larger repairs might require plaster washers, drywall screws, joint tape, and a drill. Always opt for high-quality materials to ensure a durable repair.
Cleaning The Area
Clean the damaged area to remove loose plaster, dust, and debris. This can be done using a vacuum with a brush attachment or a damp cloth. Cleaning the area ensures the new plaster will adhere properly to the existing surface.
Stabilising Sagging Plaster
For sagging plaster, consider using plaster washers and drywall screws to reattach the plaster to the lath (the wooden framework behind the plaster). This method helps stabilise the plaster and prevent further sagging. Drill the screws through the plaster washers and into the lath at regular intervals around the damaged area.
Patching Holes And Cracks
Remove any loose or crumbling plaster with a utility knife for holes and cracks. Apply a plaster patching compound using a putty knife, pressing it firmly into the hole or crack. You may need to apply mesh tape over the area before applying the compound for larger repairs. Smooth the compound with the putty knife and let it dry completely.
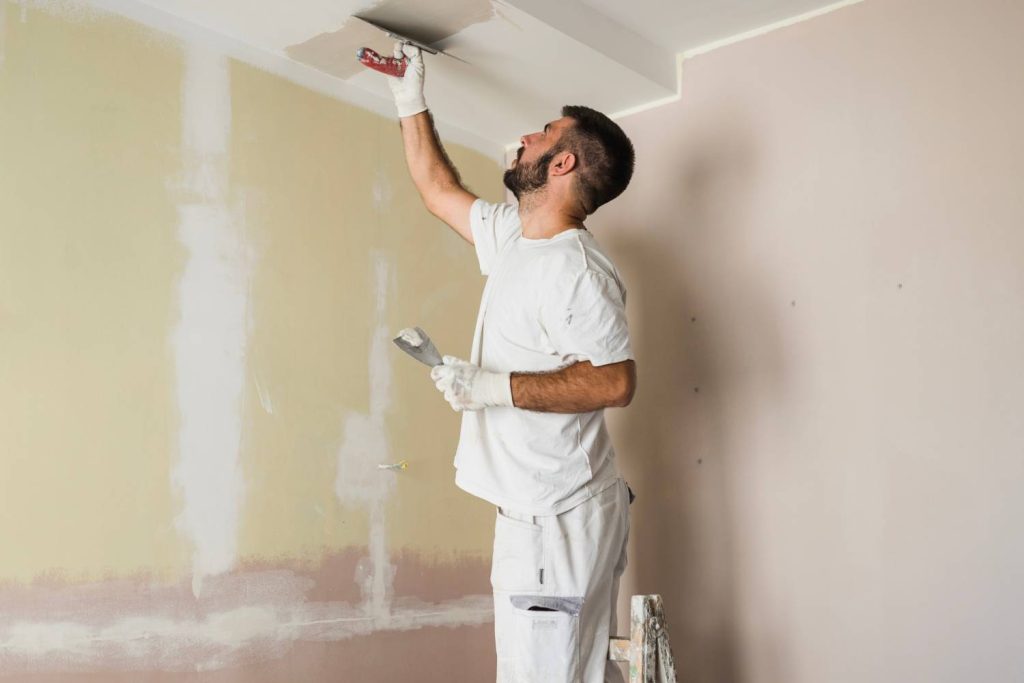
Sanding And Painting
Once the repair compound has dried, smooth the area with a fine-grit sandpaper. Wipe away any dust with a damp cloth before applying a primer. Once the primer is dry, paint the repaired area to match the rest of the ceiling. Use high-quality interior paint that matches the existing finish for best results.
Professional Help
While many plaster repairs can be DIY projects, significant damage or structural issues may require professional expertise. If you need clarification on the extent of the damage or how to proceed, consult a professional plasterer or contractor. They can provide a thorough assessment and recommend the best course of action.
Step-By-Step Repair Process For Plaster Ceilings
Repairing plaster ceilings is a delicate process that requires patience, precision, and the right approach to ensure the longevity and aesthetic appeal of the repair. This guide synthesises expert advice from various sources to provide a comprehensive, step-by-step process for repairing plaster ceilings effectively.
Step 1: Assess The Damage
Begin by carefully examining the extent of the damage. Look for signs of sagging, cracking, or delamination. Gently press on the plaster to gauge the stability and identify areas where the plaster has detached from the lath. Address any underlying issues, such as moisture or structural problems, before proceeding with the repair.
Step 2: Prepare The Area
Safety first:
- Wear protective eyewear and a dust mask.
- Lay down drop cloths to protect your flooring and furniture from debris.
- Consider isolating the repair area with plastic sheeting to contain dust if the repair area is large.
Step 3: Stabilise The Sagging Plaster
For sagging areas, use plaster washers and drywall screws to reattach the plaster to the lath. Space the washers evenly around the damaged area, driving screws into the wooden lath to pull the plaster back into place.
Step 4: Remove Loose Plaster
Carefully remove any loose or crumbling plaster within the damaged area. Use a utility knife to score around the perimeter of the damage, then gently remove the plaster by hand or with a putty knife, taking care not to damage the surrounding areas.
Step 5: Clean And Prep The Lath
Once the loose plaster is removed, clean the exposed lath with a wire brush to remove dust and debris. Apply a bonding agent to the lath and the edges of the existing plaster to ensure a strong bond with the new plaster.
Step 6: Apply The Scratch Coat
Mix quick-setting patching plaster and apply the first (scratch) coat to the repair area, starting at the perimeter and working inward. Ensure the plaster fills the gaps between the laths (keys) and covers the area evenly. There’s no need to scratch this coat as modern materials adhere well without this traditional step.
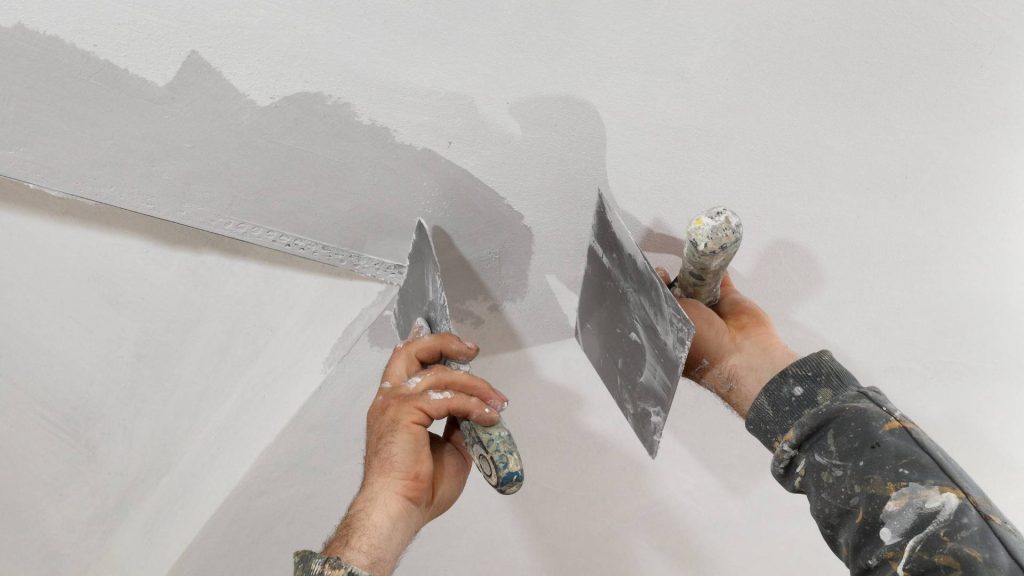
Step 7: Apply The Finish Coat
Once the scratch coat is firm, apply the finish coat of plaster. This layer should be smoother and flush with the surrounding ceiling. Use a plastering trowel for even application and to match the texture of the original ceiling.
Step 8: Sand And Finish
Allow the plaster to dry completely, then sand the repaired area to a smooth finish. Be gentle to avoid damaging the new plaster. Remove all dust with a damp cloth before proceeding to the final steps.
Step 9: Prime And Paint
Priming the patched area will seal the plaster and ensure the paint sticks evenly. Once the primer is dry, apply two coats of paint, matching the colour and finish of the existing ceiling.
Step 10: Clean Up
Remove all protective sheeting and drop cloths. Vacuum any remaining dust and debris to leave the room clean and ready for use.
Preventing Future Water Damage Of Plaster Ceiling
Water damage to plaster ceilings is a common yet serious issue that homeowners face, leading to aesthetic degradation and potential structural and health hazards. Understanding the causes, implementing effective repairs, and taking preventive measures are crucial to safeguarding your home against future water damage.
Understanding The Causes
Several factors can contribute to water damage in plaster ceilings, including roof leaks, plumbing issues, overflowing appliances, condensation, storm damage, and structural cracks. Identifying the root cause is the first step towards effective prevention and repair.
Effective Repairs
Repairing water-damaged plaster ceilings involves a few critical steps:
- Identify and Fix the Source: Before any repair, it’s essential to find and address the source of water intrusion, whether it’s a leaky roof, faulty plumbing, or an overflowing appliance.
- Remove Damaged Plaster: Carefully remove the water-damaged plaster to prevent mould growth and ensure a stable ceiling structure.
- Install New Materials: Replace the compromised materials with new, dry plaster, taking the opportunity to improve insulation and address any underlying issues.
- Mould Remediation: If mould has developed, take immediate action to remove it safely, protecting your health and preventing further contamination.
Preventive Measures
Preventing future water damage to your plaster ceiling involves regular maintenance and proactive measures:
- Regular Inspections: Inspect your roof, plumbing, and appliances to identify and address potential issues early.
- Improve Ventilation: Install exhaust fans or range hoods in high-humidity areas like bathrooms and kitchens to reduce the risk of condensation-related damage.
- Waterproofing and Insulation: Consider waterproofing your attic and basement and ensuring proper insulation to protect against humidity and temperature differences.
Diy Vs. Professional Help
While some minor repairs can be handled as DIY projects, professionals should address extensive damage or complex issues. Hiring a water restoration company or a professional contractor ensures that repairs are carried out effectively and safely, preventing future issues.
Conclusion
It can be terrible to have water damage on a plaster ceiling, but it doesn’t have to be. If you know what to do, fixing a plaster ceiling that has been damaged by water can be easy. This complete guide, “How To Repair A Plaster Ceiling After Water Damage,” will show you everything you need to do, from finding the damage to painting the last coat.
Discoloration or spots, peeling paint, cracks and bubbles, mould or mildew growth, sagging or bulging, a musty smell, and obvious leaks are all common signs of water damage. Roof and pipe leaks, high humidity and condensation, structural problems, poor airflow, and normal wear and tear can all cause water damage to the ceiling. Regularly checking roofs and pipes for leaks, making sure areas that tend to get wet have enough air flow, and using dehumidifiers to manage the humidity inside are all things that can be done to stop this from happening.
It’s important to get ready for ceiling plaster repairs so that the restoration goes well and fixes the damage while also keeping the ceiling’s structure and look. This guide brings together expert tips from a number of different sources to help you get ready for plaster fixes on the ceiling.
First, take a close look at the damage and mark the places that need fixing. Wear safety glasses and a dust mask, make sure the ladder or scaffolding is stable, and use drop cloths to protect the floor and furniture from dust or other debris. Get the tools and materials you need for the job, like plaster fixing paste, a putty knife, sandpaper, and paint for touch-ups. Remove any loose plaster, dust, or other debris from the damaged area. Use plaster bolts and drywall screws to fix any sliding plaster. Fill in any holes or cracks. Finally, paint the area to match the rest of the ceiling.
You can fix a plaster ceiling yourself, but if there is a lot of damage or structural problems, you may need to hire a professional. Step-by-step instructions for fixing a plaster ceiling include figuring out what damage there is, getting the area ready, fixing any sagging plaster, getting rid of any loose plaster, cleaning and preparing the lath, applying the scratch coat, then the finish coat, sanding and finishing, priming and painting, and cleaning up.
Water damage to plaster ceilings is a regular problem that can make them look bad and even pose health and safety risks. To stop water damage from happening again, it’s important to find the reason, fix the problem, and take precautions. Finding and fixing the source of the water leak, removing damaged plaster, putting in new materials, and getting rid of mould are all important parts of making fixes that work.
Regular checks, better ventilation, waterproofing, and insulation are all examples of preventative steps. Some small fixes can be done by do-it-yourself projects, but experts should handle major damage or complicated problems. Hiring a water cleanup company or a skilled contractor makes sure that the fixes are done correctly and safely, which keeps problems from happening again.
To sum up, fixing a plaster ceiling takes time, accuracy, and the right method to make sure it lasts and looks good. People can keep their plaster ceilings from getting water damage in the future by figuring out what causes it, fixing it properly, and taking precautions.
Content Summary
- Discovering water damage on your plaster ceiling can evoke a sense of dread, signaling the need for immediate repair.
- With the right approach, repairing a plaster ceiling after water damage can be manageable, transforming despair into accomplishment.
- This comprehensive guide aims to be your beacon of hope, guiding you through the repair process with confidence.
- Identifying water damage early can prevent costly repairs and health risks associated with mold growth.
- Common signs of water damage include discoloration, peeling paint, cracks, bubbles, and a musty smell.
- Causes of ceiling water damage often stem from roof and plumbing leaks, high humidity, and structural issues.
- Preventing water damage involves regular inspections, ensuring proper ventilation, and using dehumidifiers.
- Repairing plaster ceilings requires identifying the damage, prioritising safety, and gathering necessary materials.
- Safety precautions include wearing protective gear and using stable ladders or scaffolding.
- The repair process involves removing damaged plaster, cleaning the area, stabilising sagging plaster, and patching holes and cracks.
- Sanding and painting the repaired area ensure a smooth finish and aesthetic appeal.
- Significant damage or structural issues may necessitate professional expertise.
- Assessing the damage is the first step in repairing plaster ceilings, identifying stability and underlying issues.
- Preparing the area for repair includes wearing protective gear and protecting flooring and furniture from debris.
- Sagging plaster can be reattached to the lath using plaster washers and drywall screws.
- Loose plaster must be carefully removed to prevent further damage to the surrounding area.
- Cleaning and prepping the lath with a bonding agent ensures a strong bond with the new plaster.
- The scratch coat of plaster fills gaps between laths and covers the repair area evenly.
- Applying the finish coat of plaster achieves a smooth surface flush with the surrounding ceiling.
- Sanding and finishing the repaired area creates a smooth, ready-to-paint surface.
- Priming and painting the repaired area protect the plaster and match the existing ceiling appearance.
- Preventing future water damage requires understanding the causes and implementing effective repairs and preventive measures.
- Identifying and fixing the source of water intrusion is critical before any plaster repair.
- Removing damaged plaster and replacing it with new material prevents mold growth and ensures structural integrity.
- Regular maintenance, such as inspecting roofs and plumbing, improves ventilation, and waterproofing can prevent future damage.
- While some repairs can be DIY projects, extensive damage or complex issues should be handled by professionals.
- This guide empowers homeowners to tackle plaster ceiling repairs after water damage with knowledge and skill.
- Recognising the signs of water damage early can save time and money, preventing further deterioration.
- Addressing the source of water damage is essential for a lasting repair, ensuring the problem doesn’t recur.
- The meticulous repair process, from stabilising sagging plaster to applying the finish coat, requires patience and precision.
- Sanding and painting not only restore the ceiling’s appearance but also protect it from future damage.
- Professional assistance may be necessary for significant damage, ensuring repairs are done correctly and safely.
- Preventive measures, including regular inspections and improving home ventilation, safeguard ceilings against water damage.
- The guide highlights the importance of safety, proper preparation, and the use of quality materials in plaster ceiling repairs.
- Water damage in plaster ceilings can lead to aesthetic degradation and health hazards if not addressed promptly.
- Effective repairs and preventive measures are crucial in protecting plaster ceilings from future water damage.
- Identifying the root cause of water damage is the first step towards effective prevention and repair.
- Removing water-damaged plaster and installing new materials help maintain the ceiling’s structural integrity.
- Mould remediation is essential if mold has developed, protecting health and preventing further contamination.
- Regular inspections and maintenance can identify potential issues early, preventing extensive damage.
- Waterproofing, proper insulation, and ensuring adequate ventilation can mitigate the risk of water damage.
- Deciding between DIY repairs and professional help depends on the extent of the damage and the complexity of the repair.
- Hiring professionals for extensive damage ensures effective and safe repairs, preventing future issues.
- This guide provides a comprehensive overview of repairing plaster ceilings after water damage, from assessment to prevention.
- Understanding the causes, signs, and preventive measures of water damage is essential for homeowners.
- The step-by-step repair process outlined in the guide helps homeowners approach plaster ceiling repairs methodically.
- Addressing underlying issues, such as moisture or structural problems, is crucial before proceeding with plaster repairs.
- The guide emphasises the importance of quality materials and proper techniques in achieving durable and aesthetically pleasing repairs.
- Preventing future water damage involves a combination of regular maintenance, moisture control, and professional assessments when necessary.
- Ultimately, this guide aims to empower homeowners with the knowledge and confidence to restore the beauty and integrity of their plaster ceilings after water damage.
Frequently Asked Questions
What Are The First Steps To Take When You Notice Water Damage On Your Plaster Ceiling?
Upon noticing water damage on your plaster ceiling, immediately identify and address the source of the water leak to prevent further damage. Then, assess the extent of the water damage. Small areas may require drying and minor repairs, while extensive damage might necessitate professional assessment and restoration.
How Can I Tell If The Water-Damaged Plaster Ceiling Can Be Repaired Or Needs To Be Replaced?
The decision to repair or replace a water-damaged plaster ceiling depends on the severity of the damage. If the plaster is sagging, severely cracked, or has large portions that are soft and crumbly, it may need to be replaced. However, if the damage is superficial, such as small cracks or discolouration, repairs may suffice.
What Preventive Measures Can Be Taken To Avoid Future Water Damage To Plaster Ceilings?
To prevent future water damage to plaster ceilings, regularly inspect and maintain your roof, gutters, and plumbing to avoid leaks. Ensure that bathrooms and kitchens are well-ventilated to reduce humidity levels. Consider using moisture-resistant plaster and paint in areas prone to high humidity. Regularly check for signs of water damage to address any issues promptly before they escalate.
What Materials And Tools Are Required To Repair A Water-Damaged Plaster Ceiling?
To repair a water-damaged plaster ceiling, you will need plaster or joint compound, a putty knife or trowel, sandpaper, primer, paint, and possibly reinforcement materials like mesh tape. Safety equipment, such as goggles and a dust mask, is also essential to protect yourself during the repair process.
Can I Paint Over A Water-Damaged Plaster Ceiling After It’s Been Repaired?
Yes, you can paint over a water-damaged plaster ceiling once it has been properly repaired and thoroughly dried. It’s crucial to apply a primer designed for use on plaster before painting to ensure the best finish and adhesion of the paint. Choose a paint that is suitable for the room’s conditions, especially in areas with high moisture levels.

