Plastering is essential in building and remodelling because it gives walls and ceilings a smooth, long-lasting surface. However, even the most seasoned do-it-yourselfers can make some basic plastering mistakes that will reduce the quality of their work.
Cracking, uneven surfaces, and poor adhesion are just some of the problems that can arise from improper plaster mixing and application.
In this post, we’ll go over some of the most typical plastering problems, along with some solutions that will help you get a smooth, even coat every time.
This guide will help you get a smooth plaster finish whether you’re a weekend warrior or a professional.
Plastering’s Significance in Construction and Renovation Projects
Plastering is a crucial step in building or remodelling because it provides a long-lasting, smooth surface for walls and ceilings. It’s a barrier that keeps out dampness and other hazards while also improving the room’s aesthetics.
When a wall or ceiling is plastered, it acts as a buffer against heat loss and noise from the outside world. Plastering can also increase a home’s worth, making it more appealing to potential buyers or tenants.
Water, dampness, and mildew can cause expensive repairs and health hazards if not properly plastered, so it’s important to do it right the first time.
Plastering must be done properly and to a high degree with the appropriate materials, tools, and procedures in order to provide a finish that is both long-lasting and aesthetically beautiful.
Even the most seasoned DIYers or contractors can make blunders that lower the quality of their plastering work.
Using the wrong kind of plaster, not properly preparing the surface, improperly mixing the plaster, spreading it too thickly or too thinly, and not giving it enough time to cure are all frequent problems while plastering.
Using the incorrect equipment or methods, failing to sand or smooth the surface before applying the final layer, and failing to repair any cracks or holes before plastering are all common blunders. Uneven surfaces, cracking, poor adhesion, and a rough finish are just some of the problems that can result from these blunders.
In order to create a long-lasting and aesthetically beautiful plaster finish, it is essential to avoid these pitfalls and ensure that the work is done properly and to a high degree.
Planning and Preparation
Identifying the Surface To Be Plastered
It is essential to determine the surface to be plastered before beginning the plastering process.
The type and quantity of plaster required can then be determined with this information.
All dust, dirt, and other particles should be removed from the area, and the surface should be clean and dry.
To guarantee appropriate plaster adhesion, all pre-existing paint, wallpaper, or other coatings must be removed.
Before you start plastering, you should make sure there are no holes or gaps in the surface.
Plasters such as bonding plaster are used to attach other materials to surfaces like bare brickwork, while finish plaster is used to conceal imperfections in previously plastered walls.
Plastering correctly and providing a smooth and durable finish depend on accurately identifying the surface to be plastered and preparing it.
Gathering Necessary Tools and Materials
Locating the area that needs plastering is the first step in preparing to plaster. A mixing bucket, plastering trowel, plastering hawk, corner trowel, float, sandpaper, and a spirit level are the essential instruments for plastering.
If you’ll be working at a high elevation, you’ll also need a scaffold or a ladder, as well as a plastering machine and a mixer drill.
Plastering requires sand, water, PVA adhesive, and the proper type of plaster (bonded plaster, finish plaster, or multi-finish plaster).
Protective gear, including gloves, goggles, and a dust mask, should be worn to avoid injury from the plastering process’s flying dust and debris.
Make sure you have everything you need to finish the work quickly and effectively by gathering all the tools and materials you’ll need in advance.
Preparing the Surface for Plastering
Plastering over a properly prepared surface is essential for a long-lasting and smooth finish. Plaster can only adhere to a clean, dry surface that is free of debris, dust, and other particles.
Filling or joint compound can be used to patch up any holes or cracks, and flaking paint can be scraped off.
It may be essential to apply a basecoat of bonding plaster to achieve a level surface if the surface is especially uneven or has significant fissures.
When any necessary repairs are done, a coat of PVA adhesive should be used as a primer to help the plaster adhere better and delay its drying time.
Skirting boards, light switches, and other nearby fixtures should be covered with masking tape or plastic sheeting for added protection. The plaster will adhere better and provide a more uniform surface if the surface is adequately prepared beforehand.
Applying the Correct Type of Plaster
If you want a professional look, you need to use the right kind of plaster. The plaster used to achieve the appropriate look and feel will be selected based on the surface being plastered.
The difference between bonding plaster and finish plaster is that the latter is used on previously plastered surfaces while the former is applied to bare brick or block walls.
Plaster with multiple finishes is an adaptable material that serves multiple purposes, including bonding and aesthetics.
As with the plaster’s thickness, the desired surface texture should inform your choice of coarse or fine plaster. Plaster must be mixed thoroughly and uniformly according to the manufacturer’s specifications before it can be applied smoothly.
Cracking and poor adhesion are just two of the problems that might arise from over- or under-mixing.
Plaster is best done in stages, beginning with a scratch coat and ending with a finish coat. Too much plaster applied at once might create cracking or sagging, so it’s crucial to let each layer cure before applying the next.
A plaster finish that stands the test of time is the result of utilising the right kind and quality of plaster and applying it properly.
Plaster Mixing and Application
Correct Mixture Preparation
For a professional result, it is essential to properly prepare the plaster mixture. Following the manufacturer’s recommendations for the specific type of plaster being used is essential for achieving the correct mixing ratio.
In most cases, purified water should be used, and the mixture should be thoroughly blended to avoid any lumps. In order to prevent lumps from forming while mixing, water should be poured into a clean mixing bucket before the plaster is added.
Overmixing the plaster might lead it to set too rapidly, making it hard to work with.
Undermixing, on the other hand, might produce a weak and brittle final product.
The plaster should be allowed to rest for a few minutes after mixing to allow any air bubbles to rise to the surface.
Afterwards, you just tap the mixing bucket or use a plaster float to get rid of them.
Having a smooth and even finish that is easy to work with is the result of properly preparing the plaster mixture.
Applying the Plaster in the Right Consistency
Plaster must be applied at the proper consistency for a superior finish to be produced.
Plaster shouldn’t be too wet or too dry; rather, it should be smooth and easy to work with. Too much water causes plaster to shrink and crack, while too much dryness makes the finish weak and brittle.
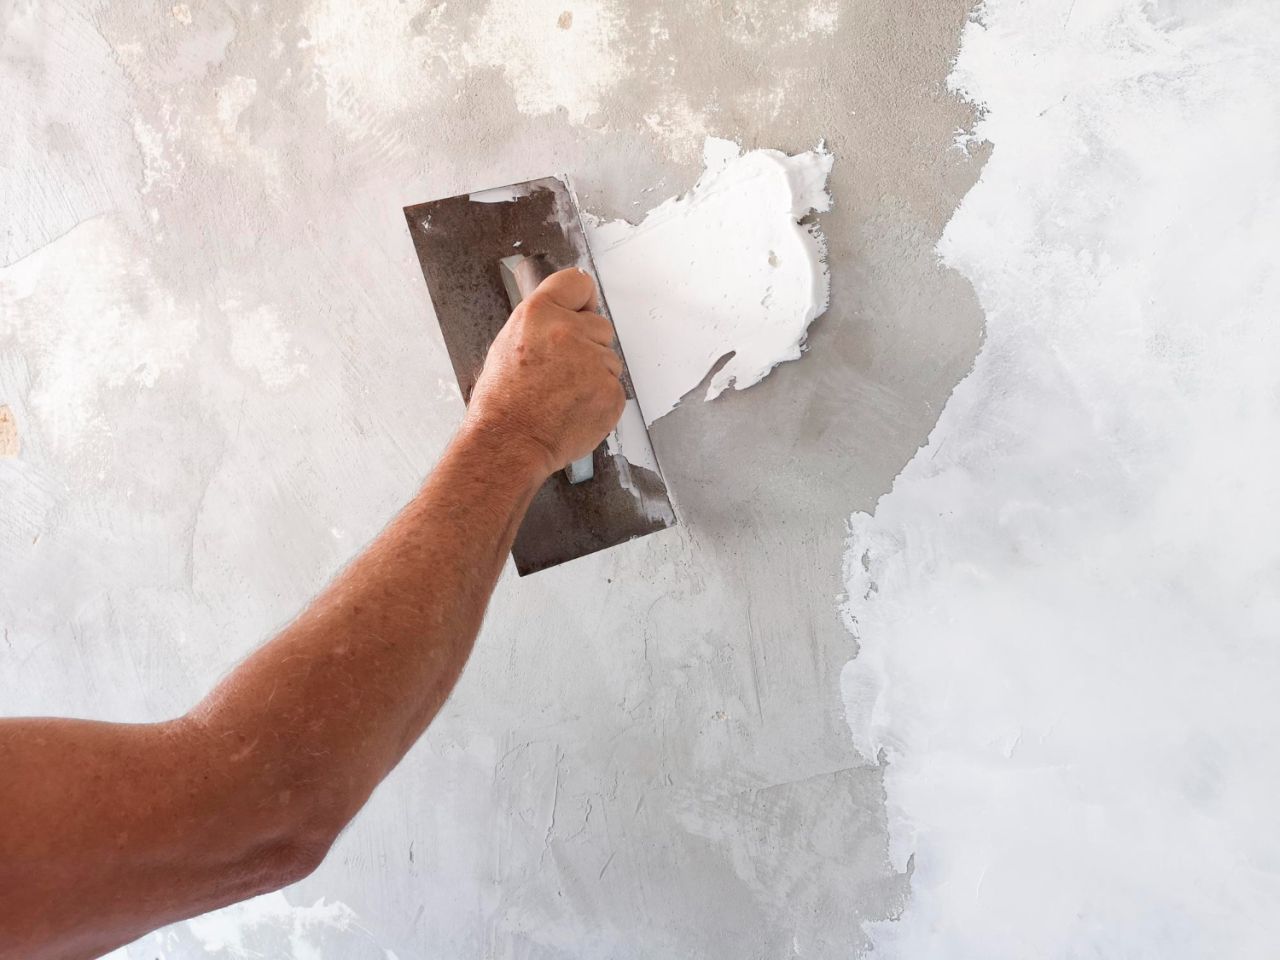
Quick, even strokes with a plastering trowel or float are required to create a smooth, even coat of plaster.
Plaster should be applied in small pieces, starting at the top and working your way down, with a slight overlap between sections to prevent gaps and unevenness.
When you apply each new piece, smooth it out and level it with a trowel or float so that there are no uneven spots. Plaster should be applied at the same thickness all over the surface it will cover to prevent cracking and shrinking. A smooth and even finish that will last can be achieved by applying the plaster at the correct consistency and working fast and evenly.
Using the Proper Plaster Application Technique
Using the proper method when applying plaster is crucial for getting a professional look.
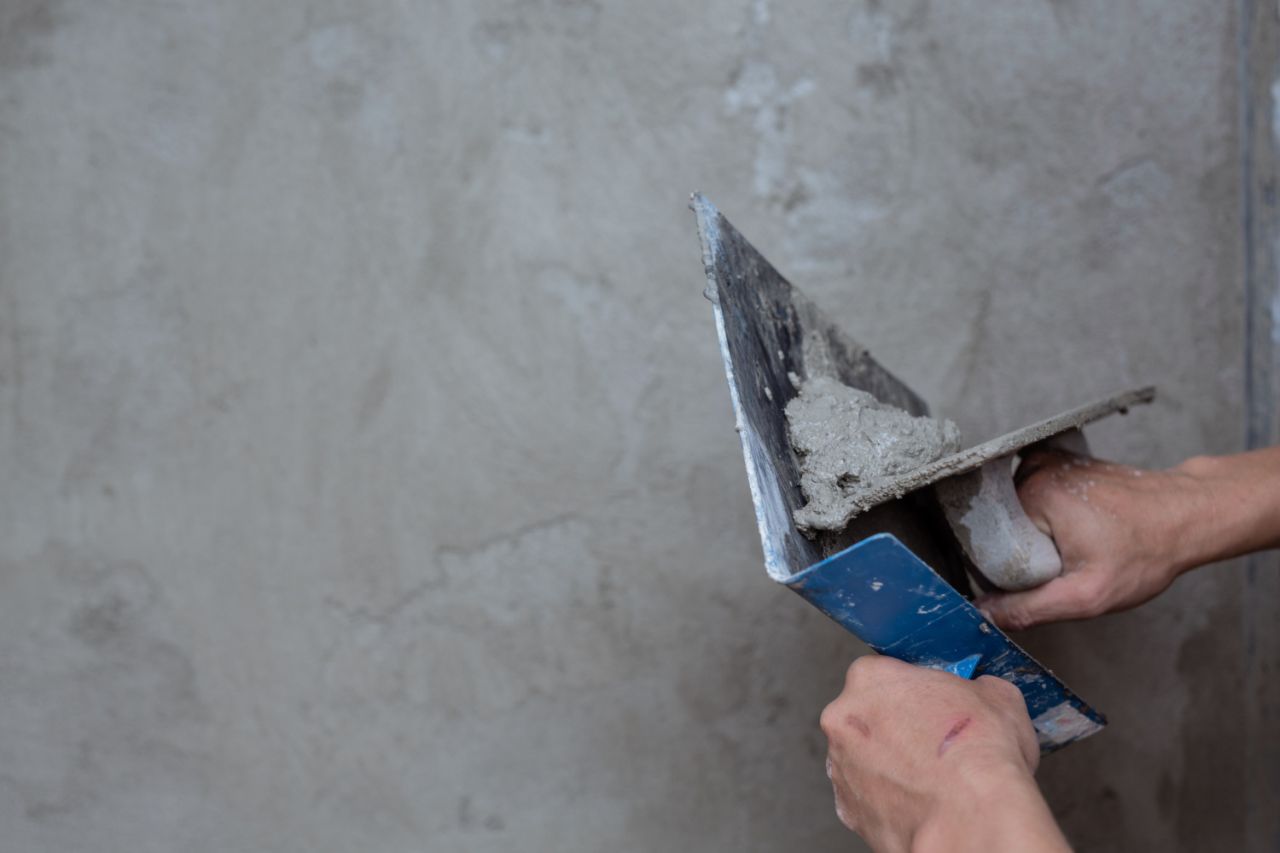
Plaster should be applied in a thin, even coat with a trowel or float for the best results. When applying plaster, hold the trowel or float at a little incline so that the leading edge is touching the surface.
Plaster should be put in a very thin layer, working from the surface’s surface up.
Avoid gaps and unevenness by slightly overlapping each area.
Using the trowel or float, make sure there are no lumps or ridges on the surface after each application.
Plaster should be applied at the same thickness all over the surface it will cover to prevent cracking and shrinking.
After the plaster has dried for the specified amount of time, it can be levelled and smoothed with a moist sponge or a plastering trowel. You may get a finish that lasts for a long time and looks great by following the right procedures.
Avoiding Common Mistakes in Plaster Application
Plastering mishaps can be avoided by following proper procedures and using safety equipment.
Plastering faults include using too much plaster at once, not letting it cure between layers, and not smoothing it out properly.
Plaster can fracture and droop if too much is applied at once, and it can become weak and brittle if the layers aren’t given enough time to cure in between applications.
With a plastering trowel or float, you must smooth out the plaster thoroughly so that it is free of bumps and ridges.
Poor adhesion and cracking can also occur from not adequately preparing the surface before plastering.
Before applying plaster, make sure the surface is clean and primed by removing any loose or flaking material.
The plaster should be of the appropriate type and grade for the surface being plastered, and it should be mixed properly. Many faults in plastering can be avoided and a smooth, long-lasting finish can be achieved by following proper procedures and using safety equipment.
Finishing and Drying
Not waiting for the plaster to cure entirely before applying a finishing coat, not sanding the surface properly, and not priming or painting the surface correctly are all common faults in finishing and drying plaster. Some advice on how to avoid these common pitfalls follows:
- Allow the plaster to dry completely: Plaster should be allowed to dry completely between coats and before a final coat is applied. Cracking and sagging can be prevented in this way.
- Sand the surface properly: Make sure there are no bumps or defects by using fine-grit sandpaper to smooth off the plaster’s surface. This will aid in attaining a uniform appearance and eliminating rough spots.
- Prime and paint the surface correctly: Follow the manufacturer’s recommendations when applying a primer made specifically for use with plaster. Before painting over the primer, be sure it has dried fully.
- Avoid overworking the plaster: Be careful not to overwork the plaster as you smooth it out; doing so can cause it to thin and weaken.
- Avoid applying too thick of a finishing coat: Using too much finish coat might cause the surface to fracture and buckle. Instead of sanding and priming or painting, apply a thin coating of finishing coat and let it cure completely.
Following these guidelines can help you avoid frequent problems with plaster drying and finishing, allowing you to create a finish that will stay.
Hire an Expert
An expert plasterer will be able to spot any issues with your surface and fix them before they become noticeable to the naked eye.
They are well-versed in the processes of surface preparation, plaster mixing and application, and plaster finishing and drying.
Plastering, especially if you’re not experienced with it, can be a tedious and messy operation.
A skilled plasterer can fix your walls in no time, so you can get back to your day as soon as possible. They are able to make sure things are done properly the first time around, saving money on fixes and redos.
You may rest assured that a skilled plasterer will provide a finish of the highest quality and durability. They are confident in their abilities and guarantee your satisfaction with their finished product.
Conclusion
The smooth, durable finish that plastering provides to walls and ceilings makes it an indispensable construction and renovation material. Poor adhesion, uneven surfaces, and cracking are typical problems with plastering.
Follow this advice and your paint job is guaranteed to be even and smooth.
Plastering not only enhances the visual appeal of a space but also serves as a protective barrier against moisture and other hazards.
Not properly plastering can lead to costly repairs and health risks from water, damp, and mildew.
Important information in this text includes procedures for properly plastering a surface.
Plastering properly entails a number of steps, such as figuring out what needs to be plastered, acquiring the materials and equipment you’ll need, preparing the surface to be plastered, using the right kind of plaster, mixing the plaster, applying it at the right consistency, applying it with the right technique, avoiding common mistakes, and drying the surface properly.
Avoiding these mistakes and ensuring the work is done properly and to a high degree is crucial for ensuring a long-lasting and aesthetically beautiful plaster finish.
Knowing where you’ll be plastering is crucial for achieving a durable, even coat.
When applying plaster, do so in small sections, working from the top down, and overlapping them slightly.
To avoid cracking and shrinking, plaster should be applied at a consistent thickness across the entire surface it will cover. Use of too much plaster at once, failing to let it cure between layers, and improper smoothing out are all mistakes to be avoided when applying plaster. Some common mistakes in plastering are applying too much at once and failing to wait for layers to dry before applying more.
Content Summary
- Plastering is essential in building and remodelling because it gives walls and ceilings a smooth, long-lasting surface.
- However, even the most seasoned do-it-yourselfers can make some basic plastering mistakes that will reduce the quality of their work.
- Cracking, uneven surfaces, and poor adhesion are just some of the problems that can arise from improper plaster mixing and application.
- Plastering is a crucial step in building or remodelling because it provides a long-lasting, smooth surface for walls and ceilings.
- It’s a barrier that keeps out dampness and other hazards while also improving the room’s aesthetics.
- When a wall or ceiling is plastered, it acts as a buffer against heat loss and noise from the outside world.
- Plastering can also increase a home’s worth, making it more appealing to potential buyers or tenants.
- Water, damp, and mildew can cause expensive repairs and health hazards if not properly plastered, so it’s important to do it right the first time.
- Plastering must be done properly and to a high degree with the appropriate materials, tools, and procedures in order to provide a finish that is both long-lasting and aesthetically beautiful.
- Even the most seasoned DIYers or contractors can make blunders that lower the quality of their plastering work.
- Using the wrong kind of plaster, not properly preparing the surface, improperly mixing the plaster, spreading it too thickly or too thinly, and not giving it enough time to cure are all frequent problems while plastering.
- Using the incorrect equipment or methods, failing to sand or smooth the surface before applying the final layer, and failing to repair any cracks or holes before plastering are all common blunders.
- Uneven surfaces, cracking, poor adhesion, and a rough finish are just some of the problems that can result from these blunders.
- In order to create a long-lasting and aesthetically beautiful plaster finish, it is essential to avoid these pitfalls and ensure that the work is done properly and to a high degree.
- It is essential to determine the surface to be plastered before beginning the plastering process.
- The type and quantity of plaster required can then be determined with this information.
- All dust, dirt, and other particles should be removed from the area, and the surface should be clean and dry.
- To guarantee appropriate plaster adhesion, all pre-existing paint, wallpaper, or other coatings must be removed.
- Before you start plastering, you should make sure there are no holes or gaps in the surface.
- Plasters such as bonding plaster are used to attach other materials to surfaces like bare brickwork, while finish plaster is used to conceal imperfections in previously plastered walls.
- Plastering correctly and providing a smooth and durable finish depend on accurately identifying the surface to be plastered and preparing it.
- Locating the area that needs plastering is the first step in preparing to plaster.
- A mixing bucket, plastering trowel, plastering hawk, corner trowel, float, sandpaper, and a spirit level are the essential instruments for plastering.
- If you’ll be working at a high elevation, you’ll also need a scaffold or a ladder, as well as a plastering machine and a mixer drill.
- Plastering requires sand, water, PVA adhesive, and the proper type of plaster (bonded plaster, finish plaster, or multi-finish plaster).
Frequently Asked Questions About Plasterering
Which type of plastering is best?
Exterior walls are best plastered with cement plaster due to its resistance to moisture, which helps to shield the wall from the effects of climate change and pollution. In addition, cement plaster’s durability makes it a great option for both exterior and interior applications.
How many layers of plaster should be used?
In order to achieve a professional-looking sheen, you’ll need to apply at least two coats. After the second coat has dried, check for obvious grooves and indents; if there are any, trowel on a third.
What are the defects in plastering?
Plastering work often has issues like blistering, cracking, efflorescence, flaking, peeling, popping, softness, and uneven surfaces. As soon as these plastering flaws are spotted, they must be fixed.
What is the ideal temperature for plastering?
Ventilation, temperature, and humidity levels must all be taken into account to guarantee productive work environments. Plaster should be applied in temperatures between 60 and 70 degrees Fahrenheit (at least 55 degrees Fahrenheit) and relative humidities that correspond to normal drying conditions.
How can plastering defects be prevented?
Preventative measures include selecting appropriate materials and following standard construction procedures, as well as proper preparation and cleaning of the wall surface. Plasterwork is less likely to delaminate when the wall surface is clean and properly prepared for the application of the plaster.

