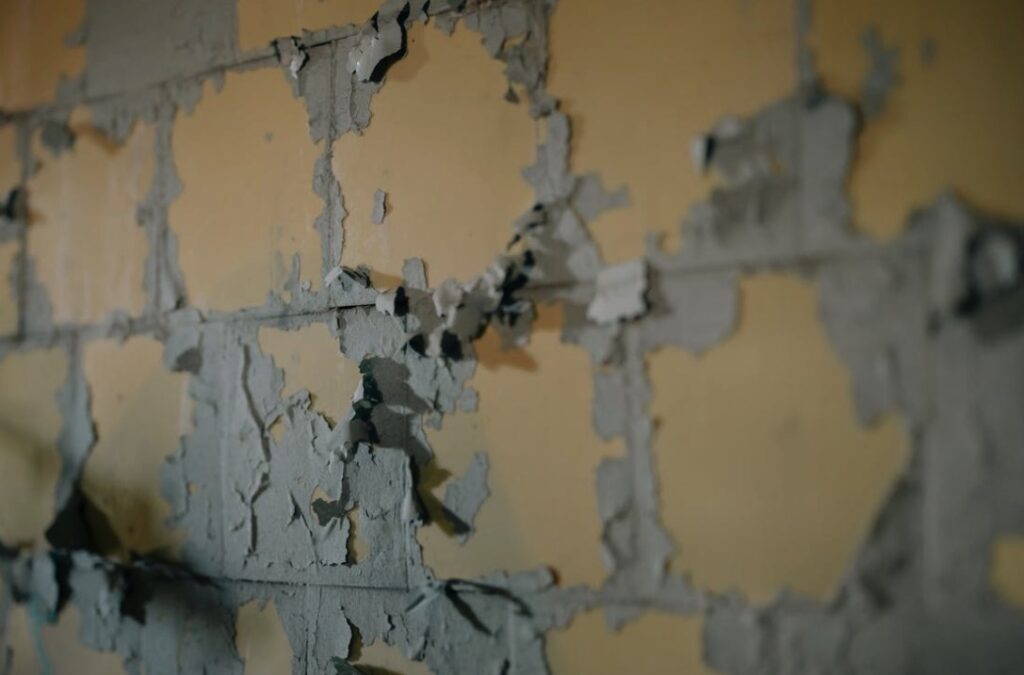
A plaster ceiling can add timeless beauty to any home, but it requires proper maintenance, like all things. Over time, gravity, vibrations, and structural changes can cause plaster ceilings to crack, sag, or even come loose.
Fortunately, with the right techniques and tools, you can restore your plaster ceiling to its original condition. This guide will walk you through the steps for effectively repairing a plaster ceiling.
Let’s get straight to the point.
Repairing a plaster ceiling requires careful preparation, proper tools, and patience. First, remove loose plaster and clean the surface before reattaching it to the lath using adhesive and plaster washers.
For cracks, widen them slightly, apply joint compound with drywall tape, and sand smooth once dry. Severe sagging may require drilling holes, injecting adhesive, and properly supporting the ceiling until the plaster bonds.
Addressing water leaks, inspecting for cracks, and maintaining proper ventilation can prevent f. Inspecting. With the right decal techniques, you can restore the strength and appearance of your plaster ceiling strength and appearance with the right decals techniques while preserving your home’s historic charm.
Tools And Materials Needed For Plaster Ceiling Repair
Before starting the repair process, gather the following tools and materials:
- Drywall screws and plaster washers
- Joint compound or spackling paste
- Sandpaper (100-grit)
- Utility knife
- Adhesive for plaster reattachment
- Drill with a carbide-tipped bit
- Caulking gun
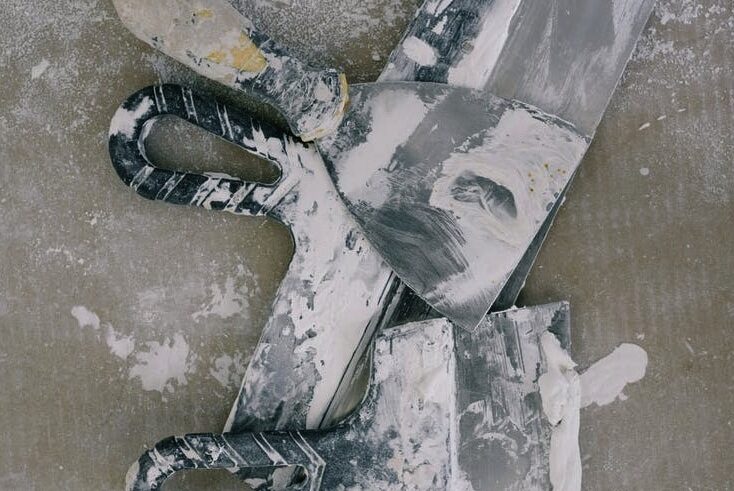
- Putty knife
- Primer and paint
- Wet/dry vacuum
Step-By-Step Guide To Fixing A Plaster Ceiling
Step 1: Prepare The Area
Begin by removing any loose plaster from the damaged area. Use a utility knife or a 5-in-1 tool to scrape away the cracked or peeling plaster.
Be careful not to damage the surrounding stable plaster.
Tip: Always wear protective goggles and a mask while removing plaster to avoid inhaling dust.
Step 2: Clean The Surface
Vacuum the debris and dust from the area to create a clean surface for your repair work. Ensuring a clean base will help the adhesive and joint compound bond properly.
Step 3: Reattach Loose Plaster
If the plaster has pulled away from the lath but is still in good condition, you can reattach it using plaster washers and drywall screws. Drill small holes every 6 inches around the sagging area.
Insert the screws with plaster washers into these holes to draw the plaster back up to the lath.
Note: Do not overtighten the screws, as this could cause further damage to the plaster.
Step 4: Inject Adhesive
For sections where the plaster has fully detached from the lath, drill 1/4-inch holes into the plaster at regular intervals (about 3-4 inches apart). Use a caulking gun to inject adhesive into these holes.
This adhesive will help bond the plaster back to the lath, creating a strong connection.
Step 5: Support The Plaster
After injecting the adhesive, prop the ceiling with a temporary support made of plywood and a wooden pole. This support should hold the plaster in place while the adhesive sets, usually for at least 24 hours.
Tip: Ensure the support is secure but not too tight, as excessive pressure can force the adhesive out of place.
Step 6: Remove The Support And Clamps
Once the adhesive has fully cured, gently remove the support and any temporary clamps. Using a putty knife, clean up any excess adhesive, being careful not to damage the newly secured plaster.
Repairing Cracks In Plaster Ceilings
Step 1: Widen The Crack
Use a utility knife to carefully widen the crack to about 1/4 inch at a 45-degree angle. This will create a smooth surface to which the joint compound can adhere.
Step 2: Apply Joint Compound
Spread a thin layer of joint compound over the crack. Place drywall tape over the compound and press it to ensure it sticks well.
Apply a second coat of compound to the tape, smoothing it out with a trowel. Then, allow it to dry completely.
Step 3: Sand And Finish
Once the compound is dry, sand it with 100-grit sandpaper until the surface is smooth. Wipe away any dust and apply a primer before painting the repaired area to match the rest of the ceiling.
Addressing Severe Plaster Sagging
Step 1: Locate The Lath
Identify the location of the wooden lath that supports the plaster. Laths are typically 1 1/2 to 2 inches wide and about 1/4 to 1/2 inches apart.
Finding the lath will help guide where to inject the adhesive and where to place screws.
Step 2: Drill Injection Holes
Drill 1/4-inch holes through the plaster, but stop before reaching the lath. Space these holes 3 to 4 inches apart. This will allow you to inject adhesive directly where it’s needed.
Step 3: Inject Adhesive And Support The Ceiling
Use a caulking gun to fill each hole with adhesive, then prop up the ceiling with plywood support while the adhesive sets. Allow it to cure for 24 to 48 hours.
Step 4: Finish The Repair
After the adhesive is set, remove the support and fill the injection holes with a joint compound. Then, sand the area smooth, prime it, and paint it as needed.
Common Causes Of Plaster Ceiling Damage
1. Gravity And Structural Movement
Plaster ceilings often develop cracks and sags due to natural forces like gravity. Over the years, these ceilings can weaken, especially if the keys (the parts that anchor the plaster to the lath) begin to fail.
Seasonal changes can also cause your home’s structure to expand or contract, adding more stress to the plaster.
2. Water Leaks
Water damage from leaks is another common cause of plaster ceiling issues. When water seeps into the plaster, it weakens the material, causing it to crumble or fall away from the lath.
It’s important to address any water leak before repairing the plaster.
3. Poor Installation Practices
Inadequate installation practices—such as not using enough screws or adhesive—can cause plaster to separate from the lath over time. When not properly secured, the plaster becomes more susceptible to cracks and sagging.
Preventing Future Damage To Plaster Ceilings
Adopting a proactive approach to protect and maintain plaster ceilings is essential. Regular maintenance can significantly extend the life of your plaster and prevent costly repairs.
Below are some key tips:
Address Water Leaks Promptly
Water is the leading cause of damage to plaster ceilings. Ensure any leaks from your roof, plumbing, or HVAC system are immediately repaired.
Prolonged exposure to moisture can lead to cracks, sagging, and even structural failure in the ceiling.
Inspect The Ceiling Regularly
Regular inspections are vital in spotting early signs of damage. Look for
- Cracks, especially those that appear suddenly or grow over time.
- Discoloration or staining could indicate moisture infiltration.
- Sagging areas are a warning sign of structural weakness. If these issues are detected early, minor repairs can be performed before they escalate into bigger problems.
Stabilise Your Home’s Foundation
The movement or shifting of a home’s foundation can create stress on plaster ceilings. Homes in areas prone to soil subsidence may require:
- Underpinning or restumping to strengthen the foundation and prevent further settlement.
- Installing foundation piers or other supports to maintain structural integrity and reduce the risk of cracks forming in ceilings.
Ensure Adequate Ventilation
Poor ventilation can lead to humidity buildup, which weakens plaster over time. To reduce moisture accumulation, ensure your attic or roof space is well-ventilated.
Use Ceiling Insulation
Installing proper insulation in the ceiling can help regulate temperature, reducing the expansion and contraction of the plaster. This prevents cracking and prolongs the ceiling’s life.
By following these tips, homeowners can minimise the risk of future plaster ceiling damage, preserving their homes’ appearance and structure.
Conclusion
Repairing a plaster ceiling is challenging but rewarding. You can restore the ceiling’s beauty and integrity with patience and the right tools.
Proper preparation, reattachment techniques, and finishing steps ensure a durable repair.
Whether dealing with minor cracks or significant sagging, these methods will help you bring your plaster ceiling back to life.
Maintaining an older home’s plaster ceilings may take effort, but it is well worth it.
A well-repaired plaster ceiling enhances a home’s aesthetic appeal and preserves its historical character for years to come.
Frequently Asked Questions About Plaster Repair
Can Plaster Ceiling Be Repaired?
The good news is that it’s possible to repair and rescue plaster ceilings from further damage. We have successfully reattached many old ceilings by injecting adhesive between the plaster and lath where the keys (anchors) have broken away over time.
Can You Patch Plaster Ceiling With Drywall?
Use a drywall screw with a plaster washer to re-secure the damaged sections of plaster to the lathe. Remove the strapping. For areas where the washers don’t hold or the plaster is very damaged, cut out the plaster and create a patch using drywall. Secure the patch with 1 5⁄8″ drywall screws.
How Do I Know if My Ceiling Is Lath and Plaster?
The module follows Google guidelines and adds FAQ schema.
Should I Board Over a Lath and Plaster Ceiling?
You can use overboard the ceiling as your surveyor suggests. However, the ceiling will always follow the contours of the old one. To be done properly, the lath and plaster ceiling needs to be pulled down and re-boarded directly onto the ceiling joists with 12.5mm plasterboards.
Can I Use Polyfilla on Plaster?
Polycell Plaster Repair Ready Mixed Polyfilla is formulated to be much easier to apply and smooth out than ordinary plaster. It is ready mixed with a light consistency that will not slump, shrink or crack and adheres strongly. It smooths out easily to a ‘ready to decorate’ finish.

