Mixing plaster by hand might seem tricky at first, but with the right steps, it becomes straightforward. Whether you’re new to plastering or looking to refine your technique, following a clear guide will help you achieve a smooth and even finish on your walls.
This step-by-step guide will cover everything you need to know about mixing plaster for wall repairs and creating flawless surfaces.
Let’s get straight to the point.
Mixing plaster properly is key to achieving a smooth, even finish on walls. Start by preparing your workspace, ensuring clean tools, and protecting the area.
Begin mixing by adding water to the bucket first, then gradually adding plaster to create a smooth, toothpaste-like consistency. Apply the plaster immediately after mixing, within 20-45 minutes, and clean your tools right after use to maintain their quality.
Avoid overmixing, using too much water, or mixing more plaster. Cellulose filler can be a quick alternative for minor repairs. Proper preparation and technique lead to better plastering results.
Why Is Proper Plaster Mixing Essential?

A well-mixed plaster ensures your walls are flat, smooth, and ready to paint. It is important to prepare a balanced mixture before plastering begins.
Plastering is all about consistency—the correct ratio of water to plaster and a smooth texture make the difference between a seamless finish and a patchy mess.
What You’ll Need For Mixing Plaster?
To get started, gather the following supplies and equipment:
- A large bucket or tub
- A paddle mixer (or a piece of smooth wood if you don’t have a mixer)
- A trowel for application
- Dust sheets or tarps to protect surfaces
- Clean water
- A broom and dustpan for cleanup
Before beginning, ensure that all your tools are clean. Dirt or old plaster residue can affect the quality of your mixture.
Step 1: Preparing Your Work Area
Setting Up The Workspace
- Clean the Area: Before you start, choose a location that won’t interfere with your plastering task. Lay down dust sheets, old newspapers, or plastic coverings to protect nearby surfaces.
- Organise Your Tools: To avoid contamination, keep a bucket of clean water nearby when washing tools. Also, remove any traces of old plaster from your equipment.
- Set Up a Cleaning Station: Designate an area where you can clean boots or shoes to prevent plaster from being tracked into other parts of the house.
Step 2: Mixing The Plaster
Adding Water First
Fill the Bucket: Pour clean water into the bucket, using approximately 11.5 to 12.5 litres of water for one bag of multi-finish plaster. Starting with the right amount of water helps prevent the plaster from becoming too thick.
Adding The Plaster
Gradually Add Plaster: Slowly add plaster by the handful to the water. The plaster should settle below the water’s surface, ensuring a smooth mixture. Continue adding plaster until a small portion rises above the water.
Mixing The Plaster
- Blend the Mixture: Use a power drill fitted with a mixing paddle to stir the plaster until it reaches a consistency similar to toothpaste or cake mix. Avoid overmixing, as it can affect the plaster’s quality.
- Check Consistency: Once mixed, the plaster should be creamy and smooth. If the mixture is too thick or thin, adjust by adding small amounts of water or plaster as necessary.
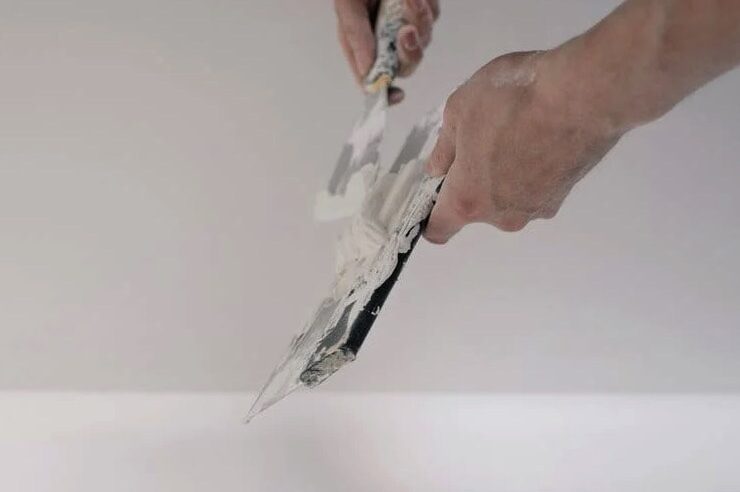
Step 3: Applying The Plaster
Using The Plaster
- Apply Immediately: Freshly mixed plaster should be applied immediately. Aim to apply it within 20-45 minutes to avoid it setting too quickly.
- Covering the Surface: Start with a thin, even coat of plaster on the wall. A thinner application often provides better results than a thick one, allowing for smoother finishing.
Step 4: Cleaning And Maintaining Tools
Tool Maintenance
- Clean Tools Promptly: After finishing your plastering work, clean all tools immediately with warm water and a brush. Allowing plaster to dry on tools can make it difficult to remove later and may affect their performance in future projects.
- Avoid Contamination: Any old plaster on tools can ruin new batches, so thorough cleaning is essential.
Tips For Mixing Plaster Like A Pro
Achieving The Perfect Consistency
- Water-to-Plaster Ratio: When mixing gypsum finishing plaster, stick to a general 2:1 ratio (plaster to water). For a standard 25 kg bag, around 11.5 litres of water is ideal.
- Avoid Overmixing: Once the plaster begins to set, do not add extra water, which can weaken its strength.
- Mix in Small Batches: If you’re new to plastering, mix in small amounts to avoid wasting materials if the plaster sets too quickly.
Advanced Plastering Techniques
- Use a Hawk Board: A hawk board can help you control the plaster more effectively when applying it to walls or ceilings.
- Filling Deep Cracks: Use a slightly stiffer plaster mix to ensure it bonds well to the surface for larger cracks or holes. Once dried, follow up with a smoother, thinner coat.
Common Mistakes To Avoid When Mixing Plaster
Properly mixing plaster is key to achieving a smooth and durable finish. However, several common mistakes can undermine your efforts. Understanding these pitfalls will help you create a flawless plaster mixture every time.
1. Overmixing And Inconsistent Plaster
Overmixing can cause plaster to become too thick, making it difficult to apply. The key is achieving a smooth, creamy consistency—thick enough to stay on the trowel without dripping but not so thick it’s hard to spread.
Tips to Avoid Overmixing:
- Use a slow, steady mixing speed to avoid introducing air bubbles, which create an uneven finish.
- If the plaster feels too thick, gradually add small amounts of water.
- Scrape the bucket sides to prevent dry lumps that could ruin the plaster’s texture.
2. Adding Too Much Water
Excess water weakens plaster, making it less durable and slower to set. While more water may seem helpful, it can weaken the finish.
Tips for Water Ratio:
- Follow the recommended ratio, typically around 2:1 (plaster to water).
- Always add water first to the bucket to prevent clumping.
3. Ignoring Tool Maintenance
Dirty or poorly maintained tools can negatively affect the plaster’s consistency and quality.
Tool Maintenance Tips:
- Clean tools immediately after use to prevent hardened plaster buildup.
- Use a soft brush to avoid damaging your tools.
- Regularly check for tool damage, as cracked buckets or bent paddles can result in an uneven mix.
4. Mixing Too Much Plaster
Plaster sets quickly—typically within 20-45 minutes—so mixing more than you can use leads to waste as the plaster hardens.
Tips to Avoid Waste:
- Work in small batches and plan your work area to apply plaster within a workable time.
5. Ignoring Environmental Conditions
Temperature and humidity impact the plaster’s setting time. Hot or dry environments speed up the setting, while high humidity slows it down.
Tips for Environmental Control:
- Use cold water in warm conditions to slow the setting process.
- Ensure good ventilation, but avoid direct drafts on the plaster.
6. Poor Mixing Techniques
Improper mixing can result in lumps and weak spots, making the plaster uneven and hard to apply.
Mixing Tips:
- Mix at a consistent speed and scrape the bucket thoroughly to ensure full integration.
7. Rushing Set Time
The plaster needs time to set before applying additional coats of paint.
Set Time Tips:
- Allow at least 24 hours for the plaster to cure fully, keeping the area ventilated and dry.
Using Cellulose Filler For Minor Repairs
Cellulose filler can be a practical alternative to gypsum plaster for smaller repairs. Mixing it in smaller quantities is easy and provides a good solution for quick fixes.
How To Mix Cellulose Filler?
- Prepare a Small Container: Mix the filler with a plastic tub or container.
- Add Water Gradually: Mix the cellulose filler with water until it reaches a thick, creamy consistency. Use a slightly thicker mix to ensure a secure bond for deeper cracks.
Conclusion
Mixing plaster is a skill that improves with practice. The more you work with it, the better you understand consistency and timing.
Always use clean water and tools to maintain strength and durability, and avoid adding extra water to already-mixed plaster.
A successful plastering job depends on preparation, consistency, and clean equipment.
Following these guidelines, you’ll master mixing plaster, ensuring that your walls are smooth, even, and ready for painting or any other finishing touch.
Frequently Asked Questions About Plaster
What Is the Correct Mix for Plaster?
Generally, you’ll want to use approximately a 1:1 ratio of plaster to water; other words, half and half. However, you should add only about half of the plaster at this point, as more will be added later. Try not to take more than a couple of minutes to sift the plaster, or it will begin to set.
Can I Use a Normal Drill to Mix Plaster?
It works like a treat. It comes with a “normal chuck” for the mixing paddles you can buy and an SDS chuck. But most SDS drills should be capable of mixing plaster if you can find an SDS paddle.
What Temperature Can You Plaster?
Plaster shall be applied when the ambient temperature is higher than 40 degrees Fahrenheit (4.4 degrees Celsius) unless provisions are made to keep cement plasterwork above 40 degrees Fahrenheit (4.4 degrees Celsius) during application and 48 hours after that.”
Can You Mix Just Cement and Water for Plastering?
Cement mixed with water alone creates a grout that can be used for repairing any damage to concrete structures. This cement-based grout mix is also used when normal concrete won’t work, such as underwater concreting. Concrete is used worldwide because it is durable, economical and versatile.
What Is Sand Used for Plastering?
It provides the structure of plaster, and the quality of your sand can make the difference between success and failure. River sand is used for any plastering work. Generally, in any plastering work, plasterers are used natural sand, crushed stone sand or crushed gravel sand.
