Plastering may seem like a straightforward task, but when it comes to commercial fitouts, it’s anything but simple. From managing uneven walls and dust control to ensuring that every coat of plaster is smooth and durable, there’s a range of challenges that can make or break a project. Having worked on countless retail, office, and showroom fitouts, I can tell you that while plastering is one of the most important aspects of any build, it also comes with its fair share of hurdles. In this blog, we’ll dive into the common plastering challenges you’ll encounter during shop fitouts and explore proven strategies to tackle them head-on, ensuring your space not only looks great but also stands the test of time.
Dealing with Uneven Walls in Commercial Spaces
Uneven walls are one of the most common challenges in commercial fitouts. It’s almost a given that you’ll encounter them at some stage, whether it’s in older buildings with settling foundations or new structures with imperfections. But don’t worry – with the right approach, you can turn those bumps and dips into a perfectly smooth surface.
Causes of Uneven Walls During Plastering
Uneven walls can be caused by a number of factors. Most often, it’s due to the foundation settling over time, especially in older buildings. The type of material used for the wall, such as brick or timber, can also contribute. And let’s not forget the construction process itself. If the initial wall framing or surface wasn’t installed level, no amount of plastering will fix that unless you correct it first.
During a project in Brisbane, I worked on a heritage building where the walls were all over the place. The owners were adamant about keeping the original plaster, but after scraping away the old material, we found that the underlying walls were warped from years of shifting. We had to take an extra day to level them out, which added some time to the job, but the end result was worth it.
Techniques to Smooth Uneven Surfaces
You’ll want to tackle uneven walls in a few stages to ensure the surface is level before you start plastering. Here are a few techniques that I recommend from experience:
- Use a Levelling Compound: For minor irregularities, a levelling compound can help create a smooth base before plastering. Just be sure to apply it evenly and allow it to dry completely before starting with the plaster.
- Plasterboard or Lining: In more extreme cases, it may be worth applying a layer of plasterboard or a lining system. This not only helps with unevenness but also provides better sound insulation – something that’s often a priority in commercial spaces like offices or stores.
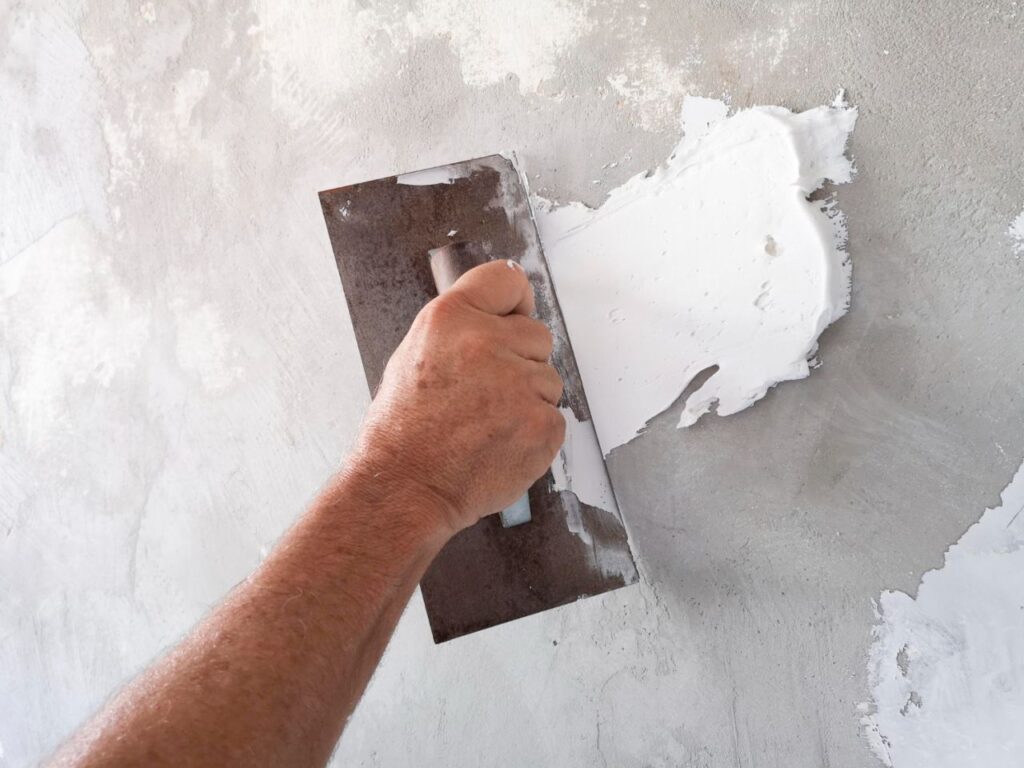
- Skim Coat of Plaster: When the walls are a bit bumpy but not horribly uneven, a skim coat is often the best solution. It involves applying a thin layer of plaster over the entire surface to smooth it out. You’ll need to ensure your troweling technique is on point here, as it’s easy to create new imperfections if you’re not careful.
- Sanding: Once the plaster has dried, use a sander to smooth out any remaining imperfections. I always recommend using a block hand sander for smaller areas, but for large-scale commercial fitouts, an electric sander with fine-grade sandpaper can save hours of manual labour.
Best Tools for Levelling Walls Effectively
Having the right tools makes all the difference. For large, uneven walls, the laser level is an absolute game-changer. It projects a perfectly straight line across the room, allowing you to assess the wall’s unevenness at every level. For smaller, more precise areas, a spirit level and trowels will do the job just fine. And don’t forget to keep a good plastering float on hand to smooth out any bumps after application.
A Hypothetical Scenario:
Imagine you’re working on a retail store fitout in Sydney. The walls are a mix of older brick and newer plasterboard. You’ve got some significant height to work with and need a smooth surface for the branding to shine through. Instead of rushing through the process and covering up the unevenness with thicker plaster, you decide to spend an extra day ensuring the surface is level. After applying the plasterboard, you use a skim coat, level out the surface, and smooth it all down. In the end, the time spent on preparation not only ensures a flawless finish but also prevents the need for costly repairs down the line.
How to Prevent Uneven Walls from Becoming an Issue
The key here is to inspect and prepare the surface properly before plastering begins. Always check for any existing foundation movement or wall imperfections and address them before applying plaster. This might mean more time up front, but it’ll pay off in the long run. And remember – don’t rush! Take the time to level your walls thoroughly before starting the plastering process.
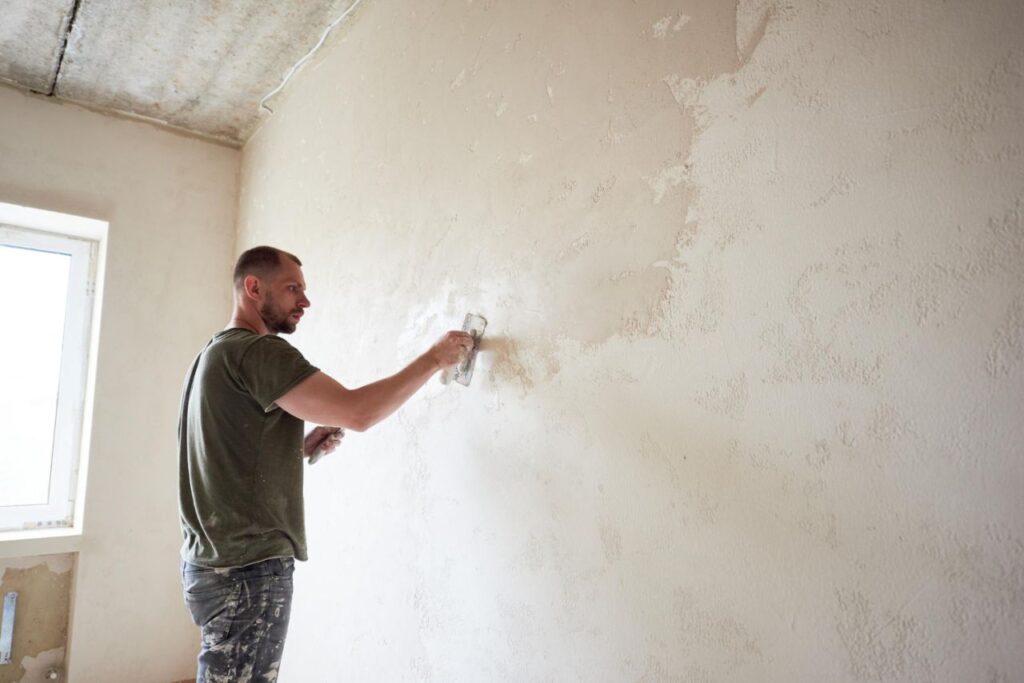
Surface Preparation: The Foundation of Quality Plastering
Plastering is like painting a picture on a blank canvas. But before you even think about applying that smooth, perfect finish, the surface you’re working on needs to be ready. If the surface is uneven, dusty, or damp, all the effort you put into your plastering could be for naught.
From my experience, I’ve seen it too many times – workers rushing through the surface prep because they’re eager to get to the “fun” part. But trust me, spending that extra time in the beginning can save a lot of headaches down the road.
Importance of Clean and Dry Surfaces
For a flawless finish, the surface must be clean, dry, and free from debris. If you’ve worked on commercial fitouts in places like Melbourne or Sydney, you’ll know that the climate can throw in a curveball. A damp wall in winter or even a dusty wall in summer can make all the difference. You’re not just dealing with aesthetics here; poor preparation can lead to all sorts of defects, from peeling plaster to poor adhesion, which can end up costing more time and money to fix.
A Personal Experience:
I once worked on a retail fitout where the client insisted we rush through the plastering, despite the walls being a little damp from the previous rains. We ended up with bubbling plaster in several areas, and it wasn’t long before we had to return, rip out sections, and redo them. It delayed the project by a week and caused the client to blow their budget on repairs.
How Poor Surface Preparation Leads to Issues
Even the smallest bit of moisture can cause the plaster to crack, blister, or even peel. I recall another job where the surface was improperly primed, and we noticed cracks appearing almost immediately after the first coat dried. You could trace the cause back to improper prep – the moisture from the walls didn’t allow the plaster to bond properly. If the foundation isn’t right, it’s just not going to hold.
Preventing Problems with Proper Surface Preparation
Here’s a quick checklist for surface preparation that can save you a lot of time (and money):
- Check for Dampness: Use a moisture meter to ensure the wall is dry.
- Clean the Surface: Remove old paint, dirt, grease, or wallpaper. If you’re working on a newly constructed space, ensure there’s no construction dust or debris.
- Fill Cracks and Holes: Use filler for any imperfections. Small gaps may seem harmless, but over time, they can show through the plaster.
- Prime the Surface: Apply a bonding agent (like PVA adhesive) to help the plaster adhere properly, especially on smooth or non-porous surfaces.
Dust Control: A Key Health and Safety Challenge
Plastering generates a significant amount of dust, and when you’re working in a commercial space—especially one that’s going to host clients, staff, or customers—the importance of controlling that dust can’t be overstated. It’s not just about keeping the workspace tidy; it’s about protecting workers’ health and ensuring compliance with safety regulations.
Health Risks Associated with Plastering Dust
If you’ve ever spent a day on a plastering job, you’ll know the fine dust gets everywhere. Inhaling it can cause respiratory issues, with plaster dust containing harmful particles like silica that can lead to lung disease over time. I remember one particularly dusty job on a Melbourne office fitout where the team had to wear protective masks all day, and even then, it felt like the dust would settle into our lungs. It’s not only uncomfortable; prolonged exposure to plaster dust can lead to more severe conditions like silicosis, which is a progressive lung disease.
The risks are especially important in high-traffic areas like shopping malls, where you could be working near employees or customers who may be sensitive to dust or have existing respiratory issues.
Effective Dust Management Strategies
From personal experience, managing dust on a plastering site requires a combination of proactive measures and a little ingenuity. Here’s how I keep the dust under control:
- Dust Extraction Systems:
One of the best investments I’ve made is using a dust extraction system. These systems, which connect directly to your tools, can capture dust at the source, significantly reducing airborne particles. For larger projects, I recommend industrial vacuum systems that can keep up with the dust generated from large-scale plastering. On a commercial fitout in Sydney, we used a high-powered vacuum system that collected 80% of the dust from the air, making a massive difference to the overall air quality. - Dust Barriers and Enclosures:
When you’re working in a commercial space with existing tenants or clients, dust barriers are a must. These can be set up to isolate the plastering area from the rest of the building. I’ve worked on numerous projects where we hung plastic sheeting around the work area to prevent the spread of dust. For particularly sensitive areas, such as in medical centres or food retail, we’ve used temporary walls or seals around ventilation units to prevent dust from escaping into adjacent spaces. - Air Scrubbers and Ventilation:
If you’re working in a confined area, you’ll want to ensure that the air is constantly circulated. I’ve seen great results from using portable air scrubbers that filter out fine dust particles. In an office fitout in Brisbane, we used a series of scrubbers in a high-ceiling space, and it made the air much more breathable. Adding fans for ventilation also helps, but they should be strategically placed to avoid blowing dust into clean areas. - Wet Methods:
In some cases, you can use a wet method to help control dust. By dampening the surface before plastering, you can prevent the dust from becoming airborne. This method works particularly well when prepping for a smooth, even application. - Personal Protective Equipment (PPE):
I cannot stress the importance of PPE on a plastering site. Masks, goggles, and protective clothing are crucial to keeping your team safe. On one fitout in Perth, we had a strict PPE policy due to the volume of plastering required. Each worker was provided with high-quality respirators (not just the basic face masks), which made a huge difference in terms of comfort and safety throughout the day.
Worker Protection and Ventilation Tips
In addition to using the right equipment, consider the following tips to keep the air clean and your workers safe:
- Change Filters Regularly: Dust extraction systems rely on filters, and if these get clogged, the effectiveness can be compromised. Make sure you change filters often to maintain maximum efficiency.
- Position Fans Wisely: Don’t just point fans at workers. Instead, position them near windows or doors to help draw dust away from the workspace and out of the building.
- Rotate Shifts: During intense plastering jobs, it’s a good idea to rotate workers in and out of dusty areas, allowing for breaks in cleaner air, especially in larger, open spaces like shopping centres or large office fitouts.
