Embarking on a home renovation can be an exciting yet overwhelming experience, filled with endless decisions and logistical hurdles. Among the many moving parts, plastering services and removalist services play pivotal roles in ensuring the process runs smoothly. Whether it’s transforming your interior walls into a polished, durable finish or safeguarding your belongings from the dust and debris that come with renovations, both services are essential for achieving a seamless home renovation. Drawing on years of hands-on experience, I’ve witnessed firsthand how the integration of these services can streamline your project, reduce stress, and even save you time and money. In this guide, we’ll explore how plastering and removalist services work together to enhance your renovation, making your home makeover both efficient and hassle-free.
How Plasterers and Removalists Work in Sync for Better Results
I can’t stress enough how important timing is when it comes to a smooth renovation. One of the trickiest parts of coordinating plastering and removalist services is ensuring the move-out and move-in occur at just the right moments. It’s all about finding the sweet spot between when the removalists clear out the space and when the plasterers are ready to work.
Minimising Dust and Site Hazards for a Cleaner Renovation
As much as we all love a beautiful finish, let’s face it – dust is the one thing that ruins every renovation. It’s as if it has a mind of its own, slipping into the tiniest crevices and making itself at home in places it shouldn’t. Having worked on countless renovations, I’ve learned that the trick to managing dust isn’t just about covering up your belongings – it’s about effective site preparation.
Dust control doesn’t just mean covering furniture, either. You need to ensure ventilation systems are protected. I’ve personally seen homes where dust circulated through air ducts, making clean-up take much longer. I’ve found that using high-grade plastic (4mm-6mm thick) is key for this.
The Overlooked Role of Removalist Services in Renovations
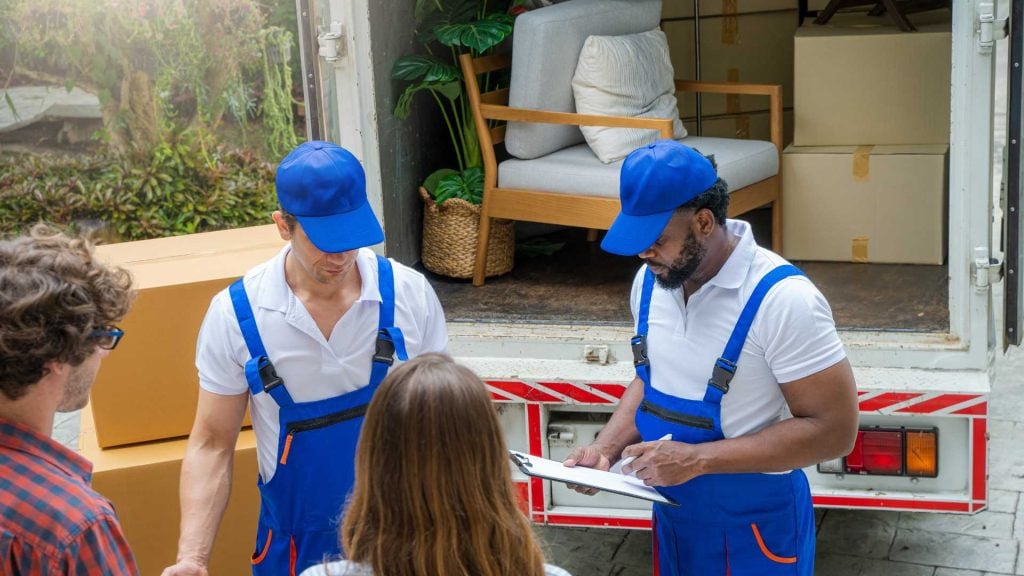
As much as plastering takes centre stage in any renovation, I can tell you from experience that removalist services are just as crucial. Imagine this: you’re mid-renovation, and the house is in disarray. Furniture is scattered everywhere, dust is flying, and you’re juggling between cleaning and organising. It’s a nightmare waiting to happen. That’s where professional removalists step in, ensuring your belongings are packed up securely and safely out of harm’s way.
It’s often the little things that count. I remember an instance where a leather sofa was moved to a temporary storage unit, only for the removalists to realise that the temperature difference could cause it to crack. They quickly transferred it to a different space with more consistent conditions. That’s the kind of service that takes renovation stress off your shoulders.
Temporary Storage Solutions to Keep Your Home Functional
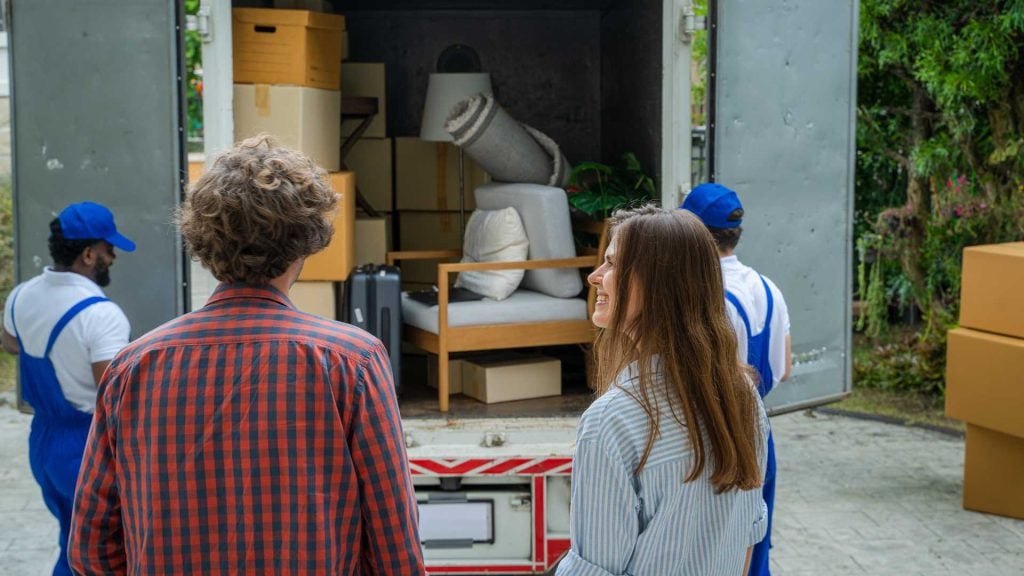
When you’re planning a major overhaul, having temporary storage solutions on hand is an absolute lifesaver. It’s easy to overlook this step, but after countless renovations, I can vouch for its importance. During one renovation in Adelaide, we were working with a family who needed to store their belongings for six months while their home was being fully renovated.
This isn’t just about storing furniture either. Items like vintage rugs or fragile glassware require special care, which is why it’s essential to choose a removalist with experience in packing, storing, and managing such goods. The facility I worked with had temperature and humidity controls, which were critical, especially in Queensland’s humid subtropical climate. For those living in Sydney, or any area with fluctuating temperatures, it’s crucial to choose climate-controlled storage for items that could be harmed by excess moisture or extreme heat.
Why Hourly Movers Can Save You Money and Time
It may seem like an additional expense, but trust me when I say hiring hourly movers can be one of the best decisions you make during a renovation. I’ve worked on many projects where homeowners were looking to save a few bucks, but realised later on that trying to handle the move themselves ended up being far more costly – both in time and effort.
What made it even better for this family was the flexibility of hourly movers. They were only charged for the time spent moving their furniture out and back in. This allowed them to spread out the work over several days, saving both time and money, without feeling rushed.
For a more cost-effective option, look into backloading, which means you only pay for the space your items take up in a removalist’s truck, rather than the full cost of a dedicated truck. This option is ideal for those who are on a tight budget but still want their items safely transported. During a project near Hobart, backloading worked wonders. The client only needed to move a few pieces of furniture, and instead of paying for a full move, they shared space with someone else going in the same direction. It worked out brilliantly, and the client was pleased with the savings.
Step-by-Step Guide to Planning a Seamless Renovation and Move
Before the dust starts flying and the plaster begins to set, there’s a crucial step that can often be overlooked – pre-renovation preparation. In my years of working on renovations, I’ve come to realise that the more effort you put into preparing your space before the workers arrive, the smoother the whole project will go. Here’s a step-by-step checklist that I personally swear by:
- Declutter and Organise: Start by sorting through all your belongings. Is there furniture or decor you can donate, sell, or simply get rid of? The less you have to move, the easier it’ll be to manage your space. I recently worked on a job in North Melbourne where the homeowner spent a few days decluttering before the removalists arrived. It made the entire process so much faster.
- Pack Up Valuable Items: For anything you want to protect, such as antique furniture, delicate artworks, or electronics, be sure to pack them carefully or have the removalists take care of it. During a renovation in Byron Bay, the removalists took extra care packing fragile glassware and heirlooms into sturdy boxes with cushioning – this was essential to protect the items from dust and debris during plastering.
- Communicate with the Professionals: One thing I’ve learned the hard way is to ensure clear communication between all parties. Make sure your plastering team and removalists know the project timeline and the scope of work. For instance, I once worked with a client in Bondi who forgot to discuss their precise requirements with the plasterers, which led to some misaligned expectations on the timeline. It caused delays that could have been avoided.
- Check Utilities and Safety: Ensure all utilities (water, electricity, and gas) are working and accessible. You’ll need water for mixing plaster and electricity for equipment. I always recommend checking your power supply beforehand to avoid any surprises when the tradesmen arrive.
- Notify Neighbours: If you’re living in a shared space or a busy suburban area, let your neighbours know about the renovation. In Brisbane, one of the bigger projects I worked on involved major plastering, and the noise was pretty intense. By informing the neighbours, we got ahead of potential complaints and kept good relations.
Site Preparation for Plastering Services
Getting your home ready for plastering services is about more than just moving furniture. Proper site preparation can mean the difference between a smooth, efficient job and one that runs into unexpected hiccups. I’ve seen countless renovations where the initial lack of planning led to delays, so here are the key steps:
- Prep Your Walls: I always recommend homeowners strip old wallpaper, remove flaking paint, and clean up any loose plaster. For example, in a renovation in Richmond, we spent an extra day just getting the walls prepped. Once the surface is clean and smooth, it allows the plaster to adhere properly, reducing the chance of imperfections.
- Clear Walkways and Access Points: Plastering involves ladders and scaffolding, so make sure there are clear pathways to the areas being worked on. Melbourne’s weather can be unpredictable, so we often have to move around quick and make sure everything’s in place before a downpour. Having an unobstructed path made the whole process much faster.
- Scaffolding and Ladders: If your ceilings are high, plastering can require scaffolding. Ensure that it’s properly set up for the team. I remember a Sydney project where the scaffold wasn’t positioned correctly the first time, causing a day of delays.
- Safety First: Plastering is heavy-duty work. Keeping the area clear of obstacles, ensuring there’s plenty of ventilation, and following safety guidelines should be a priority. I always remind my clients to keep pets and children out of the work zone – dust and chemicals can be hazardous.
Post-Renovation Cleaning and Furniture Relocation
After the plastering is complete, and you’ve sat back and admired your smooth, flawless walls, the work doesn’t end there. One thing I’ve learned from working on renovations is that post-renovation cleaning is just as important as preparation.
Once the plaster’s dry and everything’s been cleaned up, the furniture relocation is the final step. But be careful – even after cleaning, dust can linger in the air or settle in tricky spots. I’ve worked on homes in Brisbane where dust from plastering was still floating around, even after it seemed like the space had been cleaned. To get rid of the remaining particles, a deep clean is essential.
Here’s a breakdown of post-renovation cleaning steps:
- Dusting and Vacuuming: Use a high-powered vacuum cleaner with a HEPA filter to trap fine dust. When cleaning in the living areas, I recommend microfibre cloths, as they can trap dust without spreading it further.
- Air Purifiers: For particularly dusty jobs, consider using air purifiers to help clear the air. After a plastering project in Melbourne, we installed a few air purifiers to help circulate clean air through the home while we finished cleaning.
- Returning Furniture: Once everything is cleared up, it’s time to bring your furniture back. It’s important to allow time for the plaster to set and cure before moving heavy furniture back into place. Moving your furniture too early can cause marks on the fresh plaster.
- Final Touches: I always suggest homeowners add a fresh coat of paint after the plaster has cured, especially on the areas where walls were repaired. This gives your space a polished, brand-new look.
Choosing the Right Professionals for the Job
When it comes to choosing the right plasterers, there are a few qualities I always look for – and so should you. Trust me, after working with various tradespeople, the right plastering team can make a world of difference to your home’s renovation:
- Experience and Portfolio: Always ask for previous work examples. I once worked with a plasterer in Perth who had an impressive portfolio of historical restorations, and it was clear he had the experience needed for our high-end job. Don’t be afraid to ask for references or photos.
- Licences and Insurance: This is a must. You want someone who’s fully licensed and insured, as plastering can be dangerous work. Look for plasterers who adhere to local regulations; in New South Wales, for example, all plasterers need to be licensed under the Fair Trading Act.
- Cleanliness and Attention to Detail: Good plasterers are also clean workers. I once hired a team that didn’t cover the floors properly, and I ended up with plaster specks all over a freshly laid carpet. Look for plasterers who take extra care with clean-up.
How to Vet Licensed Removalists
Choosing the right removalists can seem daunting, but I’ve found it’s all about reliability. Here’s how you can choose the best for your renovation project:
- Experience: Look for removalists who specialise in renovation moves. In Sydney, I worked with a removalist team that handled all aspects of the move – from taking down shelves to ensuring nothing got scratched. Their expertise was invaluable.
- Insurance: Just like with plasterers, make sure your removalist is insured. If you’re moving valuable or fragile items, you’ll want protection. During a move in Melbourne, I had one item of fragile glass that wasn’t properly insured by a cheaper service. It cracked during transit. Lesson learned!
- Clear Communication and Quotes: Avoid surprises by asking for detailed quotes. I’ve had experiences where hidden costs popped up – always insist on a written quote that includes everything from packing materials to storage fees.
