Venetian plaster, also known as the Plaster of Venice, is a decorative wall finish that dates back centuries. It is made by layering compound plaster and gives walls and ceilings a polished, stone-like appearance.
Though originally costly and labour-intensive, modern advancements have made Venetian plaster more accessible for professionals and DIY enthusiasts. Here’s a comprehensive guide to applying Venetian plaster, from preparation to finishing touches.
Let’s get straight to the point.
Venetian plaster is a decorative wall finish that creates an elegant, marble-like look, often resembling polished stone. To apply it, you’ll need to start with proper surface preparation. Begin by cleaning and priming the walls, then apply thin layers of plaster using a trowel. After applying the layers, burnish the surface to achieve a smooth, glossy finish. Waxing the surface will enhance its durability, especially in moisture-prone areas. Venetian plaster is not only durable and easy to maintain, but it is also eco-friendly when made with lime.
To ensure the best results, avoid rushing the drying time or skipping the surface prep. Although this project is suitable for DIY enthusiasts, it requires patience and attention to detail.
What Is Venetian Plaster?
Venetian plaster is a wall finish made from lime plaster, marble dust, and pigments. When applied correctly, it gives the surface a smooth, polished look, resembling natural stone, such as marble.
Originally used in palaces, villas, and cathedrals across the Roman Empire, this finish gained popularity in Renaissance Venice, where it was used extensively.
Nowadays, Venetian plaster has evolved with acrylic polymers, making it more durable and easier to apply.
Tools And Materials You’ll Need
Before starting, gather the following tools and materials:
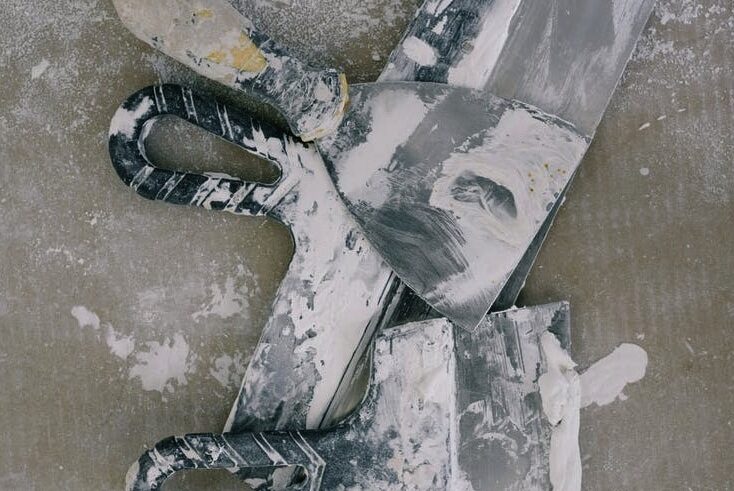
- Stainless steel trowel or spatula (4-6 inches wide)
- Safety gear: Goggles, gloves, and a dust mask
- Primer or flat wall paint for the base coat
- Venetian plaster (either lime-based or synthetic)
- Quartz primer (optional for improved adhesion)
- HydroWax for finishing
Additional Items:
- Floor covering (e.g. drop cloths
- Paint roller and tray
- Painter’s tape (be cautious when using with lime-based plaster)
Preparation: The Key To A Smooth Finish
Surface preparation is crucial before applying Venetian plaster. This ensures the plaster adheres correctly and dries without imperfections.
1. Clean The Surface
Ensure the wall is free of dust, dirt, and grease. Wash and rinse the surface to prepare it for priming.
2. Fill Any Imperfections
Use filler to seal any cracks or holes, then sand them smooth. Venetian plaster highlights imperfections, so a smooth surface is essential.
3. Prime The Walls
Apply a primer or flat paint to the new drywall before plastering. This ensures better plaster adhesion and a longer-lasting finish.
If the walls have a glossy finish, lightly sand them to remove the sheen.
Applying Venetian Plaster
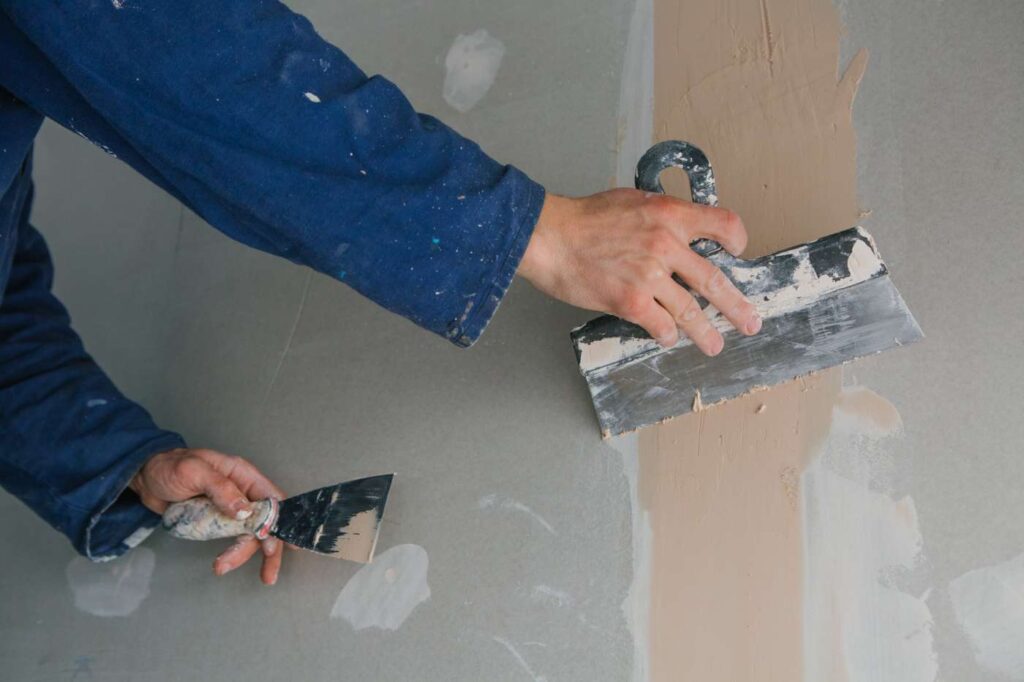
Now that the surface is prepped, it’s time to apply the plaster. Venetian plaster is applied in thin layers using a trowel or spatula, and each coat is crucial for building the final effect.
Step 1: Apply The First Coat
- Start in the top left corner. Hold your trowel at a 15 to 30-degree angle and apply a thin coat of plaster in long, overlapping strokes.
- Work in small sections. This prevents the plaster from drying before you finish an area. Use varying stroke lengths and angles for a more natural look.
- Ensure even coverage: The first coat will act as a base, and imperfections may appear in the final result. Allow the plaster to dry for at least 4 hours.
Step 2: Apply The Second Coat
- Wait for the first coat to dry. This is especially important with synthetic plasters, which may require up to 10 days for a lime-based product to dry.
- Apply the second coat similarly: Use a steeper angle on the trowel (60 to 90 degrees) and make overlapping strokes. This coat builds depth and texture.
- Smooth the surface: As you apply the second coat, check for bumps or depressions. While the plaster is still wet, smooth these out with a small trowel.
Step 3: Burnishing And Finishing
Once the second coat is dry, it’s time to burnish—this gives Venetian plaster its polished finish.
- Sand the surface: Use fine-grit sandpaper (400-600 grit) to sand the plastery lightly. Apply gentle pressure to achieve a smooth, reflective finish for higher polish and more firm.
- Firm surface: Burnish the surface with a trowel’s flat edge or a clean cloth. This enhances the sheen and brings out the plaster’s marble-like appearance.
Waxing For Extra Durability
Waxing adds a protective layer and enhances the shine of Venetian plaster, particularly in high-moisture areas like bathrooms.
- Apply HydroWax: Use a clean trowel to spread thin layers of coloured wax across the surface. Wait 10 minutes between each coat. Multiple light layers work better than one thick coat.
- Buff the wax: After the wax has dried, buff the surface with a soft cloth to create a high-gloss finish, similar to polished marble.
Maintenance And Cleaning
Venetian plaster is low-maintenance, but regular care will ensure it stays beautiful for years.
- Dust weekly: Use an electrostatic duster or a vacuum cleaner with a soft brush attachment to remove dust.
- Clean as needed: For dirt or smudges, wipe the surface with a solution of mild detergent (1 teaspoon) mixed in 4 cups of water. Rinse with a clean, damp cloth.
- Avoid harsh chemicals: Never use abrasive cleaners on Venetian plaster, as they can damage the surface.
Benefits Of Venetian Plaster
Venetian plaster offers several advantages:
1. Elegant Finish
Venetian plaster’s smooth, polished surface resembles luxurious marble, elevating the aesthetic of modern and traditional spaces. Its subtle sheen and depth create a timeless, high-end look that complements various interior styles.
2. Durability
Once properly applied and sealed, Venetian plaster becomes highly durable, withstanding wear and tear in high-traffic areas. Its natural resistance to moisture and mildew makes it ideal for bathrooms, kitchens, and humid environments and maintains its beauty over time.
3. Easy Maintenance
Sealed Venetian plaster is non-porous, meaning it repels dirt and grime, requiring minimal effort to keep it looking pristine. Occasional dusting or wiping with a damp cloth is usually sufficient to maintain its shine, making it a low-maintenance option for busy households or commercial spaces.
4. Eco-Friendly Options
Lime-based Venetian plaster is a sustainable choice, as it is made from natural materials that are biodegradable and non-toxic. In addition, its natural composition helps regulate humidity in a room by absorbing excess moisture and releasing it, promoting a healthier indoor environment.
Common Mistakes To Avoid
Applying Venetian plaster can be tricky, especially for beginners. Here are a few common pitfalls to watch out for:
- Not prepping the surface correctly: Failing to smooth or clean the walls can lead to imperfections that stand out once the plaster is applied.
- Rushing the drying process: Each coat of plaster needs time to dry. Skipping this step will compromise the final result.
- Overworking the plaster: Excessive troweling can create visible marks or remove too much plaster, ruining the finish.
- Neglecting safety precautions: Always wear gloves, goggles, and a dust mask to protect yourself from skin irritation and dust inhalation.
Synthetic Vs. Lime-Based Venetian Plaster
There are two main types of Venetian plaster—synthetic and lime-based. Each has its advantages and disadvantages.
Synthetic Venetian Plaster
- Pros: Easier to apply, more colours available, and dries faster.
- Cons: Less eco-friendly and needs the authentic stone-like transformation of lime-based plaster.
Lime-Based Venetian Plaster
- Pros: Natural, eco-friendly, and mould-resistant. Over time, it hardens into a stone-like material.
- Cons: More difficult to apply and takes longer to dry between coats.
Conclusion
Venetian plaster is an excellent way to achieve an elegant, marble-like finish on walls and ceilings. By following the steps above—surface preparation, applying multiple thin coats, burnishing, and waxing—you can transform any space with this timeless technique.
With the right materials, tools, and patience, you can create a stunning Venetian plaster wall finish that will withstand the test of time and add a touch of historical charm to your home.
Frequently Asked Questions About Plaster
Where In Your Home Might You Make Use Of Some Venetian Plastering?
Plaster of Venice can be applied in various ways to give a building an air of refined sophistication. For instance, the living room is frequently an excellent location to launch an interior design project. Additionally, Venetian plaster is utilised to construct the kitchen, bathrooms, corridors, and bedrooms.
Is Painting Necessary Before Applying Venetian Plaster?
Yes, but only if the paint has sufficiently hardened. If it hasn’t, the moisture in the air will cause bubbles, and the appearance will be less appealing.
Is Drywall A Suitable Substrate For Venetian Plaster?
You certainly can, but remember to give everything a light coat first. For example, following the application of a scratch coat, you will be required to place a “skim” coat over it with drywall compound and then sand it smooth.
Do You Need A Professional To Apply Venetian Plaster?
Be aware that applying homemade or synthetic Venetian plaster treatments demands outstanding painting abilities, yet savvy do-it-yourselfers can apply these plaster treatments independently. However, homeowners must also have experience working with a trowel and hawk before attempting a do-it-yourself installation.
What Exactly Is The Distinction Between Regular Plaster And Venetian Plaster?
Caption Options. Venetian and lime plasters are distinguished by the absence of aggregates. Tadelakt and Marmorino, for instance, both contain materials such as marble, granite, or even glass in their composition.

