Venetian plastering is the process of applying a stucco finish to a wall. This title may sound like it was taken from a bygone era, but it actually describes a very modern method.
Putty used in traditional Venetian plastering is prepared by mixing pulverised marble or burned limestone with water. Putty is another name for lime plaster.
After applying the coating, it is burnished to give the surface the appearance and texture of polished marble.
Inside palazzi, villas, and cathedrals all around the Roman Empire, imported plaster was employed to create the look of stone. It was in the Italian city of Venice that the use of Venetian plaster first began.
Thin, overlapping layers of compound plaster created from a combination of lime plaster, marble dust, and colours were troweled on in the traditional Venetian style. Amazing results were achieved in the end.
In the past, it took expensive, hard-to-obtain materials and the skill of a master artisan to replicate the look of a Venetian plaster surface.
Due to advancements in technology, now anyone can produce expert-level work in a fraction of the time and with much less effort than was previously necessary.
In today’s products, acrylic polymers are often used to boost the surface’s hardness and durability.
You get what you pay for with Venetian plaster.
The lowest quality Venetian plastering is only a thick coat of paint, while the finest quality is constructed using genuine marble dust combined with an acrylic base.
That’s what sets it apart from low-priced alternatives.
To this day, experts in the field of painting still use this precise procedure. But most do-it-yourselfers employ a plaster finish made of coloured joint compound and coloured glaze, or they use ready-to-apply cans of synthetic paint made to look like Venetian plaster.
They are both widely available at any department shop or hardware store.
If you’re looking for Plaster of Venice, you may find it at any home improvement or paint store. Like paint, it comes in containers of one gallon.
You or your supplier may need to use a universal colourant on an uncoloured product to get the desired colour. In the second case, you have access to a wider palette of colours to work with.
The walls and ceilings of your living room, bedroom, and bathroom can have the expensive look of real stone without the high cost or hassle of installation if you choose any of the methods available to you.
Inside palazzi, villas, and cathedrals all around the Roman Empire, imported plaster was employed to create the look of stone. It was in the Italian city of Venice that the use of Venetian plaster first began. Thin, overlapping layers of compound plaster created from a combination of lime plaster, marble dust, and colours were troweled on in the traditional Venetian style.
Amazing results were achieved in the end.
In the past, it took expensive, hard-to-obtain materials and the skill of a master artisan to replicate the look of a Venetian plaster surface.
Due to advancements in technology, now anyone can produce expert-level work in a fraction of the time and with much less effort than was previously necessary.
In today’s products, acrylic polymers are often used to boost the surface’s hardness and durability. You get what you pay for with Venetian plaster.
The lowest quality Venetian plastering is only a thick coat of paint, while the finest quality is constructed using genuine marble dust combined with an acrylic base. That’s what sets it apart from low-priced alternatives.
To this day, experts in the field of painting still use this precise procedure. However, most do-it-yourselfers employ a plaster finish made of coloured joint compound and coloured glaze, or they utilise ready-to-apply cans of synthetic paint made to look like Venetian plaster. They are both widely available at any department shop or hardware store.
If you’re looking for Plaster of Venice, you may find it at any home improvement or paint store.
Like paint, it comes in containers of one gallon. You or your supplier might need to use a universal colourant on an uncoloured product to get the desired colour. In the second case, you have access to a wider palette of colours to work with.
You may use any technique you like to make your walls and ceilings look like expensive natural stone without breaking the bank or going to the trouble of installing it in the living room, bedrooms, or bathrooms.
Venetian Plaster: What You Need to Know Before Attempting It
There has been a recent resurgence of interest in Plaster of Venice, a surface technique that dates back centuries but is seeing renewed use in contemporary building. Interior walls and ceilings are commonly covered in this material to mimic the textured, natural appearance of stone.
This greatly simplifies the installation process by eliminating the need to bring in and set up big marble or limestone slabs.
In order to make your home look like it was built in another era, you can use one of three techniques: Venetian lime plaster, Plaster of Venetian imitation paint from a store, or a hand-crafted finish that mimics Venetian plaster.
The ancient Romans were the masters of layering plaster to create monumental sculptures. No major changes have been made to this approach in over two thousand years.
The method was rediscovered in Renaissance Italy, where it was given the name “Marmorino.”
The field has had a rebirth in recent years, catapulting it to the forefront of contemporary architectural and aesthetic discourse. Architects and interior designers working in the modern era frequently employ this finish to further distinguish the buildings they create.
Stuccoing the outer walls of a building is a time-honored practise that is still widely used today, hence the term “Venetian Plastering.” Venetian plaster is made by mixing limestone, marble dust, and other minerals.
It provides the ceiling and wall the appearance of depth and texture when applied in multiple thin coats and then polished. You need to do this before you polish the object.
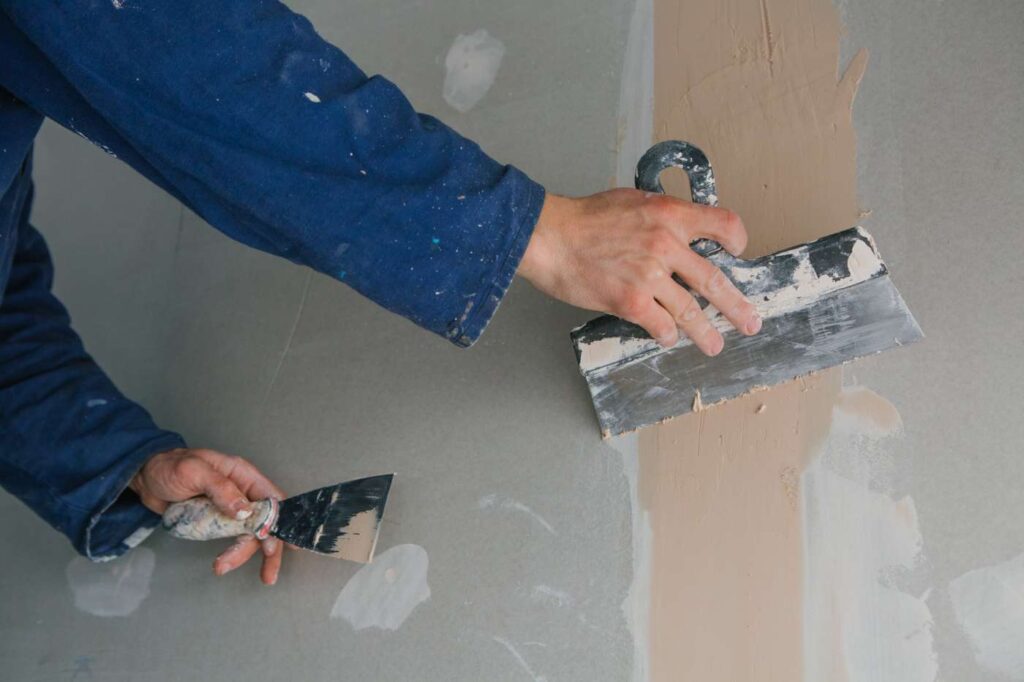
Venetian plaster has a number of benefits, one of which is that it does not necessitate a large toolkit to instal.
Plaster and a steel trowel are all you need to create a basic Venetian finish.
New drywall requires a primer or flat wall paint as a base coat before being painted, so you may also need to invest in standard painting supplies.
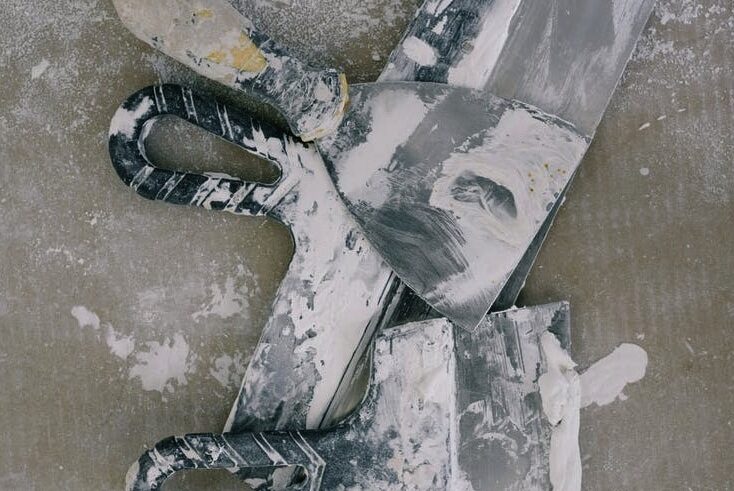
The Tools You’ll Need to Win:
Equipment / Tools
- a four- to six-inch wide stainless steel trowel or spatula
- Tools for the job include goggles, gloves, a paintbrush, roller, and tray.
Materials
- Supplies: Quartz Primer, Venetian Plaster, Stainless Steel Tape, a Spatula or Trowel, HydroWax Universal Colorants, Floor Covering.
Do something with your expertise rather than just keeping it to yourself.
Not everyone who is good with a paintbrush is also good at applying Venetian plaster. Putting what you’ve learnt into practise is the best way to increase your competence and confidence.
Plastering some drywall is an excellent method to get some practise and learn about different troweling techniques and angles. Try out several techniques to create a surface with a wide diversity of textures.
Tinting the plaster requires careful experimentation with varying amounts of colourants and small batches to record the results.
The Preferred Wall Covering
It is also possible to use synthetic paints or lime-based plasters in place of Venetian plaster. It’s a matter of how much research you do and how much money you have to spend.
Because of their ability to eventually turn into stone, lime plasters are widely regarded as quintessentially Venetian.
When compared to lime-based plasters, the handcrafted finish of synthetic plasters just cannot hold up over time.
Since synthetic materials aren’t exactly eco-friendly, their natural origins are an added bonus.
Lime plaster also has a natural resistance to mildews and moulds, which is a nice plus.
Synthetic Venetian plaster, on the other hand, is made completely of inorganic materials and is available in just the colours specified by the producer. Coloring it also isn’t an easy process because it calls for specialised tools. Make sure the Venetian plaster is real before putting it to use.
Prepare to Leave!
Spread out a drop cloth and clear as much floor space as you can.
Make sure the surface is totally flat and smooth before adding Venetian Plaster.
Filling and sanding any gaps or flaws in the surface should be the first step.
If you give it a good wash and rinse, it will appear as good as new.
Prior to applying Venetian plaster, a primer or flat paint layer should be put to the surfaces.
Tips
- To plaster over glossy paint, a light sanding is required to eliminate the shine. To find out if there are any further preparations needed before using Venetian plaster, read the can’s instructions.
- Steel trowels and drywall knives have sharp corners that can leave lines and scratches in the plaster. The use of 100-grit sandpaper to smooth out the instruments’ sharp edges is recommended to avoid this.
- You should always wear gloves when working with plaster because it can cause skin irritation.
- If you intend to use Venetian plaster for aerial application, you need protect your eyes with goggles.
- Before using, properly combine the Venetian plaster.
Make use of the tarps and put the tools away.
Placing plastic sheets on the floor is a wonderful technique to contain the dust created by your work.
You should also have paint rollers with long handles, trowels, grout sponges, and buckets on hand.
Moldings and other wall features that won’t be plastered should not be covered with painter’s tape.
In the case of plaster, especially lime-based plaster, the removal of the tape could cause cracking or flaking because plaster is not as flexible as paint.
Taking the “Primer” Approach
Starting in the room’s centre, use a flexible steel trowel or a spatula with a breadth of four to six inches to apply the plaster to the surface.
The next step is to apply a thin coat of plaster to the wall while keeping the trowel at an angle of 15 degrees to 30 degrees.
Use long and short strokes of varied angles to apply the plaster.
It’s important to use a clean trowel when applying a finish so that dried plaster doesn’t soak through.
Applying the top coat will highlight any flaws in the undercoat. Disperse it evenly throughout the whole region. Please give it a full day to dry.
Put your first word in the top left of the page
Place the trowel against the wall at an angle in the first room’s upper left corner. Plaster applied in an X pattern must be applied quickly, with strokes that overlap.
Make sure you don’t leave any discernible trowel marks by varying the length of your strokes, the force with which you apply them, and the angle at which you hold the trowel.
The brushstrokes ought to be overlapping
Begin in the corner and go on with overlapping strokes to create a larger area.
A thin, transparent coating is the way to go if you want to cover up the paint.
By wiping down the trowel on a frequent basis, you may prevent plaster dust from being embedded in the finish. Drying time for plaster is at least four hours.
Putting on a second coat is essential
It’s recommended to wait at least four hours between applying the first and second coats of synthetic plaster. If you’re using a lime-based plaster, though, you have up to 10 days to wait.
The second coat should be applied in the same way as the first. Using a trowel held at an angle of sixty to ninety degrees and applying the plaster in overlapping strokes of varying size can give the end product a very unique appearance.
It is crucial to maintain track of your progress at regular intervals to make sure that any humps and craters have been smoothed out as you walk across the terrain.
Use a tiny trowel to even out any bumps or depressions in the material before it dries completely.
Apply a third layer if you’re still not happy with the results after the second.
Over lime-based plaster, you can apply a coloured topcoat made of lime particles, soap, colouring agent, and linseed oil.
We recommend waiting at least 24 hours for the plaster to dry before proceeding with the finishing process.
Begin your writing in the top left corner of the page
The trowel’s flat side should be pressed against the top left corner of the first wall at all times.
Plaster should be put in a very thin layer, using a combination of quick and long strokes, to ensure even covering.
Filling in depressions and smoothing out bumps might improve the surface’s appearance, but you shouldn’t strive for perfection.
In order to link disjointed sections, use repetition
The ideal strategy is to start at one end of the wall and work your way to the other, carefully overlapping the panels as you go.
The trowel should be wiped clean as necessary if dried plaster has accumulated on it.
Whenever possible, modifications should be made
Check in with yourself frequently to see how far you’ve come.
You may get a consistent look by varying the trowel’s angle and the amount of pressure you use with each stroke.
Allow the plaster to dry for a full day.
Putting the Finishing Touches on the Results
The final processes involve burnishing the Venetian plaster’s surface and, if necessary, covering it.
Burnish the area in a circular motion with 400 or 600 grit sandpaper until the desired effect is attained for optimal results.
After you’re done, clean the area with a moist cloth.
After everything else is done, you may give the area a more professional look by rubbing it with the clean, flat edge of a trowel or putty knife.
- Take all necessary precautions and safety measures.
- Dress appropriately for the environment by donning a dust mask and a comfortable set of safety goggles.
- Sanding the surface is recommended.
- Kitchen Infinity recommends using a block sander and 600-grit sandpaper to give the finished surface a light sanding. You can polish to a higher shine by applying more force, or you can use less pressure to create a more understated look.
- Eliminate Any Remnants of Dust.
- To get rid of the sanding dust, use a damp rag.
Maintaining your regular appointments at Wax
Use a clean trowel to apply thin layers of the coloured paste wax all over the plaster. It’s important to wait for the paint to dry between coats. In contrast to one thick layer, multiple light ones are prefered.
If you want your surface to shine like a freshly waxed automobile, apply multiple coats of Wax and allow each coat dry for ten minutes in between applications, then buff with a clean towel or soft cloth.
Glazing the lighter areas of your work with a contrasting colour is another option for drawing attention to the shifts in tone.
Always keep in mind that veining is responsible for the beautiful tonal variation found in genuine marble.
If you want your floor to look like marble, as it does in its natural state, go with the deeper colour.
The Trowel can be used to remove wax in scoops. If you’ve used a coloured wax on the Trowel, wipe off any excess with a clean cloth.
Put your first word in the top left of the page
Apply a thin layer of wax by keeping the Trowel at an angle towards the top left corner of the wall and moving it back and forth slowly.
It’s important to overlap your strokes
Gently overlap your strokes as you move from one corner to the next.
Consistent coating can be maintained by repeatedly backing up. It’s best to leave the Wax out overnight so it can dry completely.
At this point, you can stop waxing
Burnishing wax is as simple as placing a clean trowel almost flat against the wall and massaging it with circular motions.
The Tools and Supplies Necessary for Waxing and Repairing
- Dishwashing liquid soap
- Water’sRags painter’s tarp tape (also called as “painters tape”), coloured plaster stir sticks in the Venetian style
- Spade made of iron
- A dust mask to protect your face
- Goggles
- Sandpaper for a block sander with a grain size finer than 600 grit
- Wax paste in a rainbow of hues.
Put on the Finishing Touches
The final step, applying a top coat, increases durability and reduces maintenance hassles. Once again, this is an essential maintenance task for regularly damp and extensively travelled regions.
It is important to think about the type of plaster you used before applying the final coat. Otherwise, coverage might not be consistent.
Don’t forget that the last layer could make the colour look even darker.
When the surface has dried sufficiently, use the flat side of a clean trowel or putty knife to give it a final burnishing. Applying paste wax to a surface not only gives it a beautiful sheen, but also helps to protect it.
Burnish the surface by rubbing it with the side of the trowel after applying a small coating of wax across it with the trowel.
A car buffer or a clean, soft cloth can also be used to buff wax to a shine. You are free to go with either option.
Tip
There are many different shades of coloured and uncoloured Venetian plaster to choose from. If you want to save the hassle and mess of painting plaster, you may just purchase plaster that has already been tinted to the desired colour.
Get some assistance from a coworker if you can.
One person’s tactic may vary marginally from another’s. Two plasterers working together, for instance, can create a smoother finish than either one working alone.
Prior to calling it a day, make sure a whole wall is finished and then completely hide any remaining plaster.
This technique can only be done on wet plaster since Venetian plaster dries so quickly.
How Can I Preserve the Charm of My Venetian Plaster?
It is recommended that sealed Venetian plaster walls be dusted once a week using an electrostatic duster to maintain their beautiful appearance.
You might also try vacuuming the area with a soft brush attachment. A cloth draped over the broom’s head will protect you from scratches if you like to sweep.
When dirty, wipe the surface down with a solution of one teaspoon of liquid detergent in four cups of warm water.
It is recommended that you apply this solution with a clean sock or a soft towel.
To get rid of the soap solution, simply wipe the area clean again with water.
The Venetian plaster finish on your project should survive for years, if not decades, provided you use the right techniques and follow the guidelines here.
Warning
The majority of people who come into contact with Venetian plaster get skin, eye, or respiratory irritations.
If you have sensitive skin that responds severely to chemicals, you should always wear gloves to protect your hands.
When working at heights or burnishing, always wear goggles and a dust mask, if one is available. Imperfection in the surface is accentuated by the plastering process. As such, the first order of business is to ensure that your walls are as flat and clean as possible.
Frequently Asked Questions About Plaster
Where In Your Home Might You Make Use Of Some Venetian Plastering?
Plaster of Venice can be applied in various ways to give a building an air of refined sophistication. For instance, the living room is frequently an excellent location to launch an interior design project. Additionally, Venetian plaster is utilised to construct the kitchen, bathrooms, corridors, and bedrooms.
Is Painting Necessary Before Applying Venetian Plaster?
Yes, but only if the paint has sufficiently hardened. If it hasn’t been, the moisture in the air will cause bubbles, and the appearance won’t be very appealing.
Is Drywall A Suitable Substrate For Venetian Plaster?
You certainly can, but remember that you will need to give everything a light coat first. As an illustration, following the application of a scratch coat, you will be required to place a “skim” coat over it with drywall compound and then sand it smooth.
Do You Need A Professional To Apply Venetian Plaster?
Be aware that applying homemade or synthetic Venetian plaster treatments demands outstanding painting abilities, yet, savvy do-it-yourselfers can apply these plaster treatments on their own. However, homeowners must also have experience working with a trowel and hawk before attempting a do-it-yourself installation.
What Exactly Is The Distinction Between Regular Plaster And Venetian Plaster?
Caption Options. The absence of aggregates in Venetian plaster and lime plaster is the primary characteristic that sets them apart from other types of plaster. Tadelakt and Marmorino, for instance, both contain materials such as marble, granite, or even glass in their composition.

