Cement plaster has been the backbone of Aussie construction for decades, and for good reason. From heritage terraces in Fitzroy to new high-rises in Southbank, it’s what gives walls their strength, smooth finish, and weather protection. I’ve spent over 20 years plastering Melbourne homes and commercial sites, and I can tell you this: when cement plaster is mixed and applied properly, it’ll outlast most of the finishes in the building. But it’s not a one-size-fits-all product. Get the mix wrong, skip curing, or use it in the wrong spot, and you’ll be battling cracks, damp walls, or worse, costly repairs. This guide runs through everything you need to know about cement plaster, from the basics and benefits to the drawbacks, techniques, and finishes that actually work in our local conditions.
Cement Plaster Mix – The Standard Ingredients That Make It Work
Work
The heart of any plaster job is the mix. Standard is Portland cement, clean sand, and fresh water. Simple, but it’s amazing how often blokes try to cut corners. Use dirty sand or salty bore water, and you’ll end up with cracks, peeling, or efflorescence (that white powder that shows up on the surface).
Here’s the basic formula most of us stick to:
|
Job Type |
Typical Cement: Sand Mix |
Notes |
|
Internal walls (brick) |
1:6 or 1:5 |
Smooth finish for painting |
|
Ceilings |
1:4 |
Lighter, thinner coat |
|
External walls |
1:4 |
Stronger to handle the weather |
|
Harsh climate or repair |
1:3 |
Heavy-duty mix |
One hard and fast rule: always add plaster to water, never the other way around. If you dump water into plaster, you’ll be fighting lumps all day.
Why Builders Still Choose Sand and Cement Plaster Today
Now, you’ll hear some say cement plaster’s “old-school” compared to gypsum or acrylic finishes. Truth is, it’s still the workhorse of construction across Melbourne. Why? Because it’s tough, cheap, and does the job.
Take a house I worked on in Werribee last year. The owner had started patching his extension with a pre-mix gypsum plaster because “it was quicker.” By the first wet winter, the stuff had gone soft, and mould was creeping through. We stripped it out and redid it with a proper sand-and-cement plaster. Haven’t heard a peep since – and that’s the difference. Cement plaster might take longer to cure, but it holds up for decades if you look after it.
It also gives you options. Want a smooth finish for a high-end townhouse in Toorak? No problem. Need a roughcast finish for a backyard shed in Preston? Easy done. It’s versatile, and that’s why it’s still king on site.
Advantages of Cement Plaster That Make It a Popular Choice
Strength and Durability for Interior and Exterior Walls
If you’ve been around Melbourne long enough, you’ll know our weather isn’t gentle on buildings. Hot northerlies in summer, cold, damp winters, and the odd hailstorm that sounds like golf balls hitting the roof. Cement plaster holds up to all of it.
I’ve been back to jobs I did fifteen years ago in Footscray and Carlton. Aside from a fresh coat of paint, the plaster still looks solid. No crumbling, no spalling, just a strong skin over the brickwork. That’s the kind of long-term durability you don’t always get with gypsum or acrylic alternatives.
Inside, cement plaster gives walls the muscle to handle knocks and bumps. Kids slam doors, furniture scrapes the wall, tradies carry in a fridge that’s too big for the doorway – I’ve seen it all. A properly plastered wall doesn’t crumble under that day-to-day punishment.
Fire, Sound, and Weather Protection Benefits
One of the underrated bonuses of cement plaster is the protection it gives against hazards you don’t think about until it’s too late.
- Fire resistance: Cement plaster won’t stop a fire completely, but it slows things down. I once patched up an old Victorian in Richmond after a kitchen fire. The timber framing was cooked, but the plastered masonry walls stood strong. That bought the family valuable time to get out.
- Sound resistance: Ever lived next to a busy road in St Kilda or an apartment with paper-thin walls? Cement plaster has mass, and mass blocks sound. The thicker the coat, the quieter the room. It’s not perfect soundproofing, but it makes a big difference.
- Weather shield: On exteriors, it’s like a raincoat for your walls. Bricks are porous, so without plaster, water seeps in. Cement plaster sheds water and adds another barrier against wind-driven rain, which Melbourne is notorious for in winter.
Cost Savings and Energy Efficiency in Large-Scale Projects
I’ll be straight with you – cement plaster isn’t the fanciest material out there. But it’s cost-effective, and that matters on big jobs.
On a commercial fit-out I did in Docklands, the budget was tight. The developer considered switching to a polymer-based render. Trouble was, the price per square metre was nearly double. Cement plaster gave the same durability and fire rating, at a fraction of the cost. That decision saved them tens of thousands.
And it’s not just upfront costs. Cement plaster adds thermal mass to your walls. That means it helps keep heat in during Melbourne’s icy July mornings, and it slows down the summer heat when the north winds are blowing. Less reliance on heaters and aircons equals lower bills.
Real-World Example: Why Melbourne Builders Prefer Cement Plaster Over Alternatives
Here’s a story that sticks with me. A mate of mine, also a plasterer, took on a townhouse project in Northcote. The client had specified gypsum plaster throughout because they’d read online that it gave a smoother finish for paint.
The problem was that the upstairs bathrooms and the external-facing walls copped a heap of condensation. Within a year, bubbling paint and mould patches started showing. The client called us back in a panic. We stripped out the gypsum, re-did those walls with cement plaster, and the problems vanished.
That’s why most local builders still default to sand and cement plaster – especially for exterior or wet areas. It’s a safer bet for long-term performance, even if it takes an extra day or two to apply and cure.
Aesthetic and Environmental Limitations Compared to Gypsum or Lime Plaster
Here’s the thing: cement plaster isn’t always the prettiest option. Gypsum plaster, for example, gives a much smoother surface that painters love. If you’re going for a flawless finish in a luxury apartment in Toorak, gypsum might be the better call for interiors.
Cement plaster also carries an environmental cost. Cement production chews up a lot of energy and spits out carbon emissions. Compared to lime plaster – which actually reabsorbs CO₂ as it cures – cement comes off second-best. I had a client in Fitzroy renovating a heritage terrace who specifically asked for lime plaster on the interior walls to keep the house “breathing” and to cut down on environmental impact. Cement plaster just wasn’t the right fit for that project.
Why Skilled Labour is Critical for a Professional Finish
Cement plaster isn’t very forgiving. You need a steady hand and experience to get that wall flat and smooth. Too thin, and it crumbles. Too thick, and it cracks. Leave a cold joint where two batches meet, and you’ll see it forever.
DIY jobs are where I see this most. A bloke in Essendon called me after he’d had a crack at plastering his own garage. He’d mixed the plaster too wet and slapped it on without guides. The result? Waves running up and down the wall like the ocean at St Kilda beach. We had to knock it back and start again.
Professional plasterers know how to judge consistency, how to set up guides, and when to scratch or float a coat. It’s one of those trades where practice makes perfect – and where inexperience shows quickly.
The Cement Plastering Process Step by Step

If there’s one step you can’t rush, it’s surface prep. Get this wrong, and no amount of fancy plaster will save you.
Before plastering, I always check walls for dust, loose mortar, or oil marks. In older homes around Collingwood, I often see soot stains from old fireplaces that need to be scrubbed back. If you plaster straight over it, you’ll get de-bonding within months.
We also dampen down porous walls. Brickwork in Melbourne dries out quickly in summer heat, and if you don’t pre-wet, the bricks will suck moisture out of your mix too fast. You’ll be left with crumbly plaster. A light spray with the hose or a damp sponge on small areas usually does the trick.
For tricky joins – like where brick meets concrete – I always fix chicken mesh across the joint. It stops future cracks. And if we’re working on smooth concrete, I use a bonding agent to give the plaster something to grip.
Mix Ratio for Cement Plaster: Getting it Right for Walls, Ceilings, and Exteriors
Now onto the mix. The golden rule is that different areas need different ratios:
- Internal walls (brick) – 1:6 or 1:5 cement to sand.
- Ceilings – 1:4. Needs a lighter, finer mix because of gravity.
- External walls – 1:4 for strength against the weather.
- Harsh conditions or repairs – 1:3.
A mistake I see with DIY jobs is people chucking in too much water. The mix should hold shape on your trowel, not run off like soup. My rule of thumb? Think “thick cream.” And always, always add plaster to water — not water to plaster — or you’ll be fighting lumps all day.
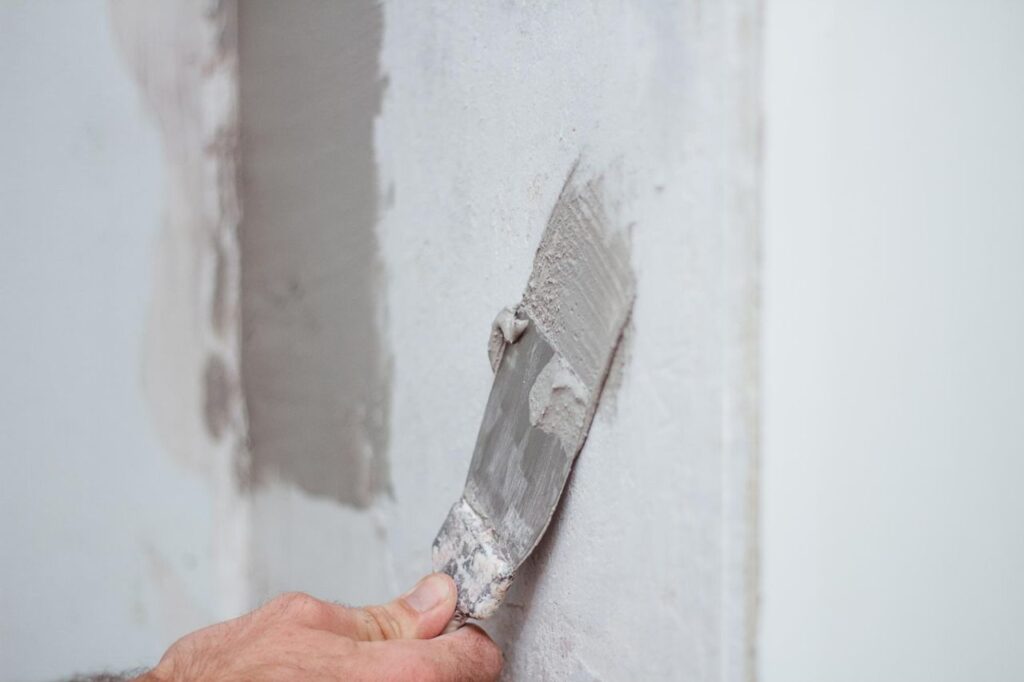
Plastering Techniques – From Scratch Coat to Finish Coat
Cement plastering is usually done in two or three coats. Here’s how we break it down:
- Scratch Coat (first coat) – About 10–15mm thick for brickwork. This gets roughed up with a scarifier to give the next coat something to bite into.
- Brown Coat (second coat) – Another 8–10mm. Level the wall and get things flat.
- Finish Coat (final coat) – 2–3mm thin layer to smooth it all off.
On most Melbourne builds, two coats do the job, but for high-end interiors, I’ll sometimes go three. The total thickness shouldn’t exceed 20mm on inside walls and 25mm outside. Any more, and you’re asking for cracks.
Timing matters too. If you’re doing both coats the same day, give the scratch coat three hours to firm up. If not, leave a gap of at least three days, no more than seven, before applying the second coat.
Tools for Cement Plaster Application – From Trowels to Plastering Machines
A good plasterer is only as good as his tools. On my sites, you’ll see:
- Trowels – finishing, window, and bucket trowels for different spaces.
- Plasterer’s float – for smoothing and compacting.
- Hawk – to hold and carry small amounts of mix.
- Straight edge or feather edge – keeps walls flat and true.
- Scarifier – scratches the first coat for grip.
- Mixer – I use a hand-held power mixer these days; quicker and less backbreaking than mixing with a hoe.
- Plastering machines – on big commercial jobs in Docklands or Southbank, machines pump and spray plaster onto walls, cutting labour costs and speeding up timelines.
