What Are The Plastering Problems And How To Avoid Them?

Table of Contents

    Even though plastering is a long-lasting and adaptable finishing technique, there are a number of issues that might arise from improper application. Cracking is a typical problem that can arise from many sources, including incorrect mix proportions, insufficient surface preparation, or too much drying. Using the right mix ratio, making sure the surface is ready, and dampening the plaster as it sets are the three most important things you can do to keep it from breaking.

    Bleaching is another typical issue; it shows up as bubbles or raised spots on the plaster’s surface. Substrate moisture, inadequate ventilation, or overly thick plaster layers are the three main causes of blistering. Plaster should be applied in thin, even layers and only after the substrate has been adequately prepped and dried; otherwise, blistering can occur. Another way to keep moisture buildup and scorching at bay while drying is to keep the air vents open.

    Also, when the plaster doesn’t adhere well to the substrate, it might separate off the surface, which is known as delamination. Inadequate surface preparation, incorrect mix proportions, or poor application procedures can all lead to delamination. If you want your plaster to stick without flaking, make sure you prepare the surface well, use the right mix ratio, and apply it evenly and firmly. To further aid adhesion and avoid delamination, make sure the substrate is clean and clear of any dirt or debris.

    Plastering: What Is It?

    Walls, ceilings, pillars, and other building components can have a smooth, long-lasting surface by applying a thin coating of mortar and then smoothing it out with a plastering procedure. The plaster of the Wall describes this.

    Here are some of the aims and purposes of plastering a wall:

    • So that precipitation and other components of the atmosphere are unable to penetrate the exterior surfaces that are being shielded from the elements.
    • To create a surface that is completely smooth and cannot be soiled.
    • To give a sense of the ornamentation.
    • To keep bugs from wreaking havoc.
    • To cover up the use of low-quality materials or shoddy artistry.

    Different Plaster Of Wall Finishes

    You can get a wide variety of plaster of wall finishes, each with its distinct appearance, as listed below.

    Smooth Cast 

    Use a 1:3 cement-to-sand ratio when mixing mortar for smooth cast finishing. Fine sand is ideal for use in mortar when working with this wall plaster. When applying mortar, a skimming float or a wooden float works well. A level and smooth surface is the end product of this process.

    Rough Cast

    In surface treatment parlance, a “rough cast finish” is analogous to a splatter dash. To get a rough cast finish, you need mortar, which is made up of coarse aggregate, cement, and sand. They are roughly 1:1.5:3 about one another. Coarse aggregate typically ranges in size from 3 to 12 mm. The process begins with a big scoop of mortar, which is then mashed into the surface with a trowel. A wooden float is then used to level out the mixture. It is common practice to apply this plaster or wall coating to outside surfaces.

    Sand Faced 

    Plastering a wall with a sand face usually calls for two coats. For the first layer, use a 1:2 ratio of cement to sand and make it 12 mm thick. The initial layer is best applied using zigzag lines. Following that, it needs to be cured for seven days. Next, a second layer is put on, this time with an eight mm thickness and a sand-to-cement ratio of one to one. To even it out, use a sponge. The result of filtering sand is a grain of consistently small size. The second layer of filtered sand is dispersed using a skimmer float or a hardwood float. A sand-faced finish, defined by uniformly sized grains of sand, is the final result.

    Pebbledash 

    Pebble dash finishes require a mortar layer 12 mm thick, with a cement-to-sand ratio of 1:3. Toss pebbles onto the newly poured surface, with sizes ranging from 10 to 20 mm. Gently press them into the plaster using a wooden float once you’re ready. Once they’ve set, they enhance the building’s visual appeal.

    plastering 1

    Scrapped 

    The air pockets and long scrape lines are seen when thick plaster layers are scraped away. The size of the marks varies depending on the scraping device employed. Scraping, which has characteristics similar to pebble dash finishing, aids in crack prevention by exposing air pockets that, had they been left unchecked, would have grown and contracted over time, leading to surface cracks-possibly deep ones.

    Depeter 

    This finishing procedure, which isn’t very widespread, uses a mix of flint material and larger gravel-sized stones or a combination of the two to achieve the desired impression. The gravel is almost entirely in a straight line, with little ridges dividing each row of rocks, as opposed to pebble dash. This finishing solution is ideal for damp or crack-prone areas and is typically applied directly to masonry.

    Textured

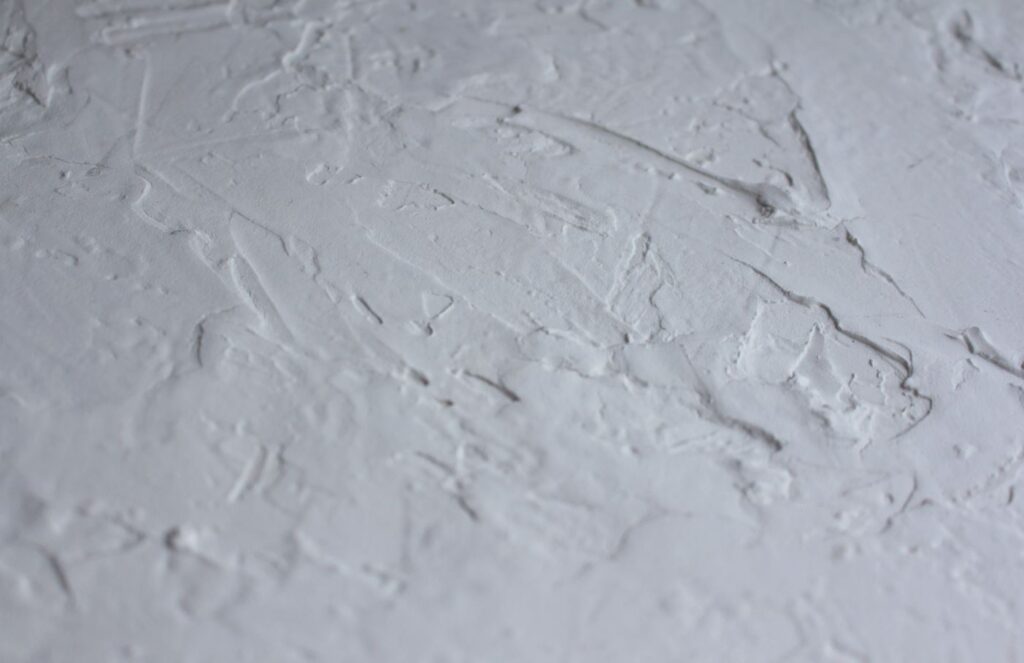
    In this context, “finishing application” means any method other than the ones listed above. Most hand-finished textures are either fanned or have a fancy-edge trowel or jagged finish. The variety of natural textured finishes is practically infinite. Plaster, which is rich in potential, is much more than a mere surface. To make a finished space interesting and draw the eye to different parts, skilled plasterers and imaginative architects use a variety of finishing techniques. Using a variety of textures adds dimension and intricacy to any room, whether it’s a whole room or a little nook.

    Considerations To Be Kept In Mind

    To make sure you get the results you desire while plastering a wall, there are a few key things to think about beforehand.

    • Crisp, jagged, and dust-free sand is required for plastering.
    • The aggregates must be washed extensively to ensure that the sand’s clay concentration is below 5%. In most cases, the presence of clay makes it more difficult for cement or lime to adhere to sand particles.
    • It is crucial to completely mix the aggregates and binder to attain the desired consistency for wall plaster. The correct quantity of plaster for the task is of the utmost importance.
    • Plastering surfaces requires careful monitoring of the mortar’s moisture content to avoid crazing.
    • Do not force the plaster to cure too quickly; doing so will cause crazing, which destroys the plastering job.
    • Before using the water or materials, make sure they are free of any salts or other pollutants. A flaking and powdering of the plastered surface is observed as the soluble salts in the mixture crystallise.
    • To maintain a consistent thickness of plaster, any projections beyond 13 mm from the level surface of the masonry should be ground away. Because of this, you can anticipate using less plaster mortar.
    • It is advised to fill the spaces between the bricks to a depth of 16-20 mm. Get rid of any dust or stray mortar by giving the joints a good cleaning. Failure to do so will result in plaster separation from either the backing or the coatings, which will severely damage the final product.
    • The maximum thickness of a single layer is 15 mm.
    • It is essential to wet the wall before laying the plaster. The dried back will extract moisture from the mortar, leading to improper adhesion.

    The plastering must be completed to the top of the openings or the entire wall, whichever occurs first.

    FAQs About Plastering

    What Should I Do If I Encounter Trowel Marks Or Ridges In The Plaster?

    Avoid trowel marks by using a damp sponge to smooth the surface while the plaster is still workable. Work in small sections and blend the edges of each section to create a seamless finish.

    How Can I Prevent Plaster From Drying Too Quickly And Causing Problems?

    Control the drying process by working in manageable sections, keeping tools and materials moist, and avoiding direct sunlight or drafts that can accelerate drying. Consider using a misting bottle to keep the plaster moist if necessary.

    What Steps Can I Take To Avoid Color Variations In The Finished Plaster?

    Use the same batch of plaster mix for each section, maintain consistent application techniques, and ensure uniform drying conditions throughout the project to minimise colour variations.

    How Can I Address Efflorescence Or Mineral Deposits On Plastered Surfaces?

    Efflorescence is caused by mineral deposits migrating to the surface of the plaster. Address it by removing the deposits with a stiff brush or mild acidic solution, then seal the surface with a suitable primer or sealer to prevent recurrence.

    What Should I Do If I Encounter Mould Or Mildew On Plastered Surfaces?

    Treat mould or mildew promptly with a solution of water and bleach, then thoroughly dry the area and improve ventilation to prevent future growth. Consider using mould-resistant plaster or additives in high-moisture areas.
    Standard Issues With Plastering

    Plastering problems can develop before, during, or after the plastering process. Plastering issues frequently arise and include:

    • One of the most prevalent issues with plastering is cracking. Inadequate mixing, uneven application, temperature or humidity variations, and incorrect curing are among the many causes of plaster cracking.
    • Problems with application or surface preparation might cause plaster to peel off the surface. Moisture exposure or incorrect bonding application are other potential causes of this.
    • Air bubbles: When plaster is applied, air bubbles can form in it, which can cause weak places and cracking.
    • Plaster that was not applied uniformly or was poured too thickly may begin to droop or sag.
    • Plaster has the potential to shrink and split as it dries, leading to surface fissures or separations.
    • The tiling and furniture arrangement in the space might be significantly affected by walls that are not precisely at a right angle.

    The following part will go over how to avoid these issues by following the right procedures for preparation and application, using high-quality materials, and keeping the right conditions before and after the application.

    plastering 3

    Avoiding Issues With Plastering

    • Following these procedures can help us avoid plastering problems:
    • The surface must be clean, dry, and devoid of any loose material or debris before the plaster layer can be applied. To achieve this, we can spray a mixture of sand, cement, and water onto the block to create a rough enough surface. Before we apply the plaster, we need to fix any surface damage or cracks and make sure the block has cured properly.
    • Pick the proper tools: When plastering, use a high-quality mix that is appropriate for the surface you are covering, or if the material is not ready to mix, use the correct parentage with the right type of sand in the mix. For the best results, mix and apply the plaster according to the manufacturer’s directions.
    • For future fracture prevention, apply the metal mish to the edges, corners, and places where the concrete elements and blocks meet.
    • Always use the level dots, which are small areas that will serve as our final surface level. To measure the level, sit a straight edge between any two dots on the X-axis or Y-axis and place the level tool on top of it. To measure the 90 degrees between two adjacent walls, sit two straight edges on top of the dots of each wall on the Y-axis and place the 90-degree ruler toolset on top of them.
    • You can apply the plaster in thin layers, building up the thickness until you reach the desired finish while keeping each layer as rough as possible. This technique might work if the walls are slightly out of square.
    • If you want your plaster to look nice and be placed uniformly, use a trowel or straight edge. Extra care should be used to smooth out any ridges or valleys in regions that are not perfectly at a right angle.
    • Evenly distribute the product: Use a trowel to spread and smooth the plaster. To prevent cracking caused by air bubbles, be careful not to overwork the plaster.
    • Regulate the heat: Keep the room at a constant temperature as you apply the plaster. Plaster can fracture or peel if exposed to very cold or very hot temperatures.
    • Stay away from moisture: Make sure the room is well-ventilated, and don’t let the plaster sit in damp or humid conditions. Because of this, the plaster may become pliable and crack over time.
    • Permit the cure time to elapse: After applying plaster, let it cure according to the manufacturer’s directions. It is important to wait for the plaster to cure completely before sanding or applying a finish, as doing so will weaken it.
    • Applying the final smooth layer (a mixture of fine sand and cement) requires a straight edge and a soft sponge to smoothen the surface; nevertheless, the sponge should not be applied with pressure to prevent an even plaster surface.
    • Finish by sanding the surface to a smooth texture after the plaster has dried. Be careful not to sand the plaster too forcefully when using fine-grit sandpaper; doing so can weaken it and cause it to break.

    Care must be exercised to prevent plaster problems, which are among the most prevalent issues encountered during construction.

    It is a well-known adage in the construction business that plastering can hide any flaws in the building’s framework, but it won’t fix issues with the structure itself, such as walls that aren’t perfectly level or have a 90-degree angle.

    Conclusion

    Plastering is a crucial finishing work for buildings, preserving and improving their appearance and functionality. It can insulate, make a room fireproof, and shield surfaces from harm. Plastering aims to prevent precipitation and other atmospheric components from penetrating exterior surfaces, create a smooth, soiled surface, give a sense of ornamentation, prevent bugs from wreaking havoc, and cover up low-quality materials or poor artistry.

    There are various plaster of wall finishes, each with its distinct appearance. Smooth cast involves using a 1:3 cement-to-sand ratio, while rough cast involves using mortar made of coarse aggregate, cement, and sand. Sand-faced plaster requires two coats, with a sand-faced finish defined by uniformly sized grains of sand. Pebble dash finishes require a mortar layer 12mm thick, with a cement-to-sand ratio of 1:3. Scrapped plaster layers expose air pockets and long scrape lines, aiding in crack prevention. Depeter is a finishing procedure using a mix of flint material and larger gravel-sized stones, ideal for damp or crack-prone areas.

    Textured plaster adds dimension and intricacy to any room, whether it’s a whole room or a small nook. Skilled plasterers and imaginative architects use various finishing techniques to make a finished space interesting and draw the eye to different parts.

    Plastering walls require crisp, jagged, and dust-free sand and thoroughly washed aggregates to ensure clay concentration is below 5%. Mixing the aggregates and binder to achieve the desired consistency is crucial for wall plaster. Monitoring mortar moisture content is essential to avoid crazing. Wet the wall before applying plaster, as dried back materials can cause improper adhesion.

    Plastering problems can arise before, during, or after the plastering process, including cracking, uneven application, temperature or humidity variations, and incorrect curing. Air bubbles can form during plaster application, causing weak places and cracking. Uneven plaster application or plaster that is too thick may droop or sag, leading to surface fissures or separations. Walls not perfectly at a right angle can affect tiling and furniture arrangement.

    Preventing plaster problems is crucial in construction, as plastering can hide flaws in the building’s framework but cannot fix structural issues like walls not being perfectly level or having a 90-degree angle.

    Content Summary

    • Plastering is a critical finishing activity that enhances both the appearance and functionality of buildings.
    • Properly applied plaster can provide insulation, fireproofing, and protection against external elements.
    • Learn about common plastering problems and effective solutions in this comprehensive blog post.
    • Plastering involves applying a thin mortar coating to walls, ceilings, and pillars for a smooth, durable surface.
    • The aims of plastering include preventing weather penetration, creating a smooth surface, and adding decorative elements.
    • Plastering serves to deter bugs, hide material flaws, and ensure the use of quality craftsmanship.
    • Various plaster of wall finishes include Smooth Cast, Rough Cast, Sand Faced, Pebbledash, Scrapped, Depeter, and Textured.
    • Smooth Cast involves a 1:3 cement-to-sand ratio, providing a level and smooth finish.
    • Rough Cast, similar to splatter dash, uses coarse aggregate, cement, and sand for an outdoor surface.
    • Sand Faced requires two coats with specific cement-to-sand ratios, resulting in a grainy finish.
    • Pebbledash finishes involve tossing pebbles onto wet plaster for visual appeal.
    • Scrapped and Depeter finishes expose air pockets or utilise flint material for unique textures.
    • Textured finishes, created with various techniques, add dimension and complexity to spaces.
    • Quality sand is crucial for plastering, and aggregates should be extensively washed to reduce clay concentration.
    • Proper mixing of aggregates and binders is essential for achieving the desired plaster consistency.
    • Moisture content monitoring during plastering prevents crazing, ensuring a successful job.
    • Avoid forcing plaster to cure quickly, as it may lead to crazing and damage the final result.
    • Ensure water and materials are free of salts or pollutants to prevent flaking and powdering.
    • Maintain a consistent plaster thickness by grinding away any projections beyond 13 mm.
    • Fill spaces between bricks to prevent plaster separation and damage to the final product.
    • The maximum thickness for a single layer of plaster is 15 mm.
    • Wetting the wall before plastering is crucial to proper adhesion and preventing drying-related issues.
    • Plastering should extend to the top of openings or the entire wall, whichever comes first.
    • Common plastering problems include cracking, peeling, air bubbles, sagging, shrinking, and uneven walls.
    • Proper preparation is key to avoiding plastering issues before, during, and after the application.
    • The surface must be clean, dry, and free of loose material before applying plaster.
    • Use the right tools and mix for the surface, following the manufacturer’s directions for optimal results.
    • Apply metal mesh to edges and corners for future fracture prevention.
    • Utilise level dots for measuring surface levels and maintaining right angles during plastering.
    • Apply plaster in thin layers to build up thickness gradually and avoid issues with out-of-square walls.
    • Use a trowel or straight edge for uniform application, paying extra attention to areas not at right angles.
    • Evenly distribute the plaster to prevent cracking caused by air bubbles.
    • Regulate room temperature to prevent plaster cracking or peeling due to extreme temperatures.
    • Ensure proper ventilation and avoid moisture exposure during plastering to prevent long-term issues.
    • Allow sufficient cure time for plaster according to the manufacturer’s directions before sanding or finishing.
    • The final smooth layer requires a mixture of fine sand and cement, applied with a straight edge and soft sponge.
    • Exercise caution when sanding plaster to prevent weakening and breakage.
    • Plastering problems are common in construction but can be avoided with careful adherence to procedures.
    • Plastering can hide flaws in a building’s framework but won’t fix structural issues like uneven walls.
    • The blog post provides comprehensive insights into plastering techniques, finishes, and problem prevention.
    • Avoiding moisture exposure, proper curing, and using quality materials are crucial steps for successful plastering.
    • Each plaster finish, from Smooth Cast to Textured, has specific requirements for mixing and application.
    • Texture and dimension can be added to spaces through creative plastering techniques.
    • Proper preparation, including cleaning and repairing surfaces, is essential for successful plaster application.
    • The use of level dots and careful measurement ensures a precise and uniform plaster finish.
    • Applying plaster in thin layers and using a trowel helps prevent common issues like cracking and sagging.
    • Regulating room temperature and avoiding moisture exposure during plastering contribute to a successful outcome.
    • Curing time, adherence to the manufacturer’s directions, and careful finishing techniques are critical for plaster durability.
    • The blog post serves as a valuable guide for both novice and experienced plasterers in avoiding common pitfalls.
    • Understanding the different plaster finishes and their applications is essential for achieving the desired results in construction.

    Eugene M has been a fixture in Melbourne's plastering scene for over 16 years, initially starting his journey as an apprentice in the bustling construction sector. His early years on job sites across Melbourne exposed him to the rich variety of plastering work, from traditional homes in the suburbs to modern commercial buildings in the city. Over time, Eugene honed his skills, learning the art of plastering, from setting drywall to mastering decorative finishes, and quickly gained a reputation for his exceptional craftsmanship and problem-solving abilities.

    Driven by a love for the craft and a desire to share his knowledge, Eugene began documenting his experiences, challenges, and insights into plastering. This eventually led to the creation of his blog, Plastering National. Here, he combines his in-depth trade expertise with a natural talent for writing, making complex plastering concepts accessible to everyone, from DIY enthusiasts to seasoned professionals. His blog covers a wide range of topics, including how-to guides, industry trends, product reviews, and maintenance tips.

    Eugene’s transition from the physical trade to becoming a full-time blogger was fueled by his belief in empowering others through knowledge. He understands the nuances of the Melbourne property market, which allows him to tailor his advice to the specific needs of the local community. Today, Eugene M continues to serve as Melbourne’s go-to plastering expert through his writing, offering valuable insights that help homeowners and professionals alike achieve flawless plastering results.

    Contact the Author

    Posted in
    Scroll to Top