Plastering is both an art and a science, requiring a unique set of tools to create smooth, flawless surfaces that stand the test of time. Whether you’re a seasoned professional or a DIY enthusiast, the right equipment can make all the difference—turning a challenging task into a straightforward, satisfying job. In this guide, I’ll take you through the essential tools every plasterer needs, from the basics like trowels and hawks to more advanced equipment that boosts productivity and precision. With the right gear in your hands, you’ll not only improve your craft but also enjoy the process—because when it comes to plastering, having the best tools isn’t just a luxury, it’s a game-changer.
Essential Plastering Tools for Beginners and Basic Applications
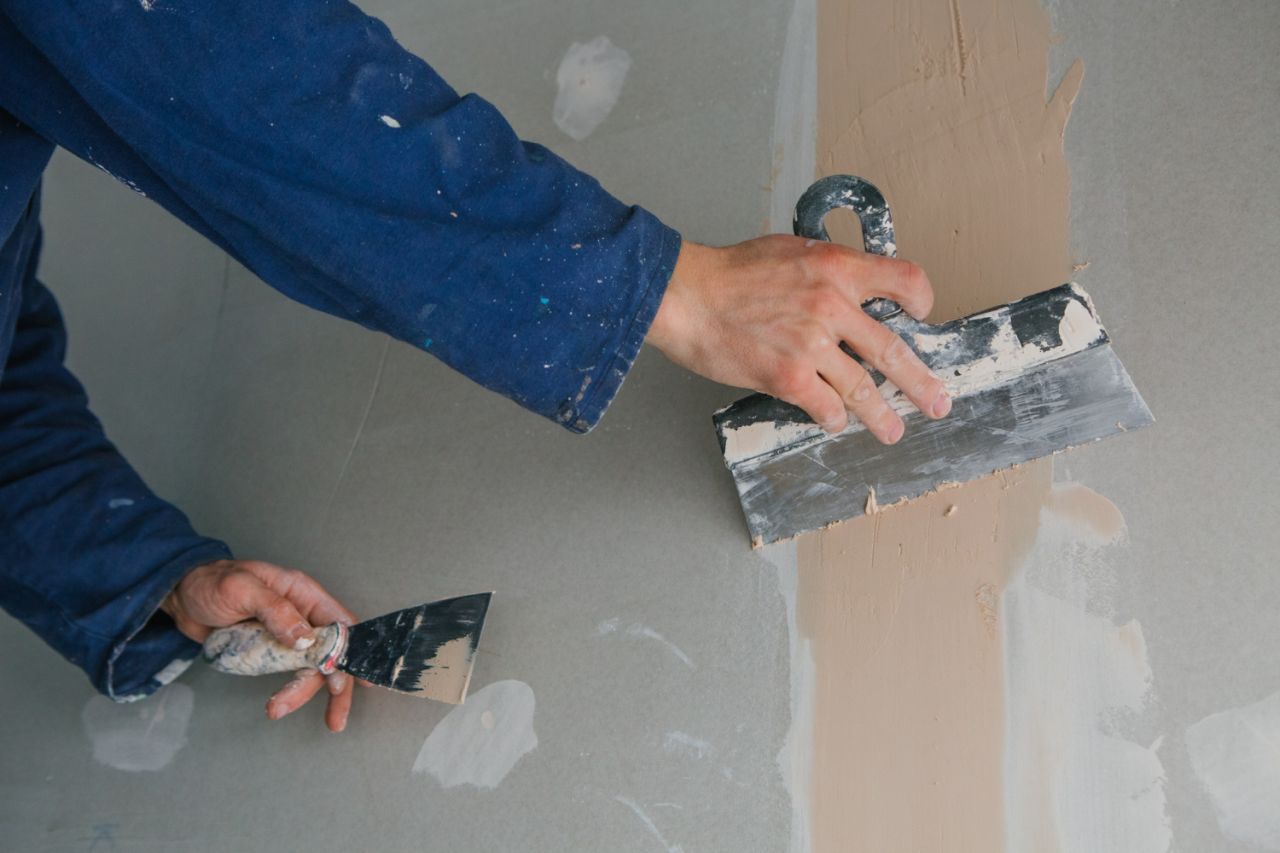
Plastering is both an art and a craft, and having the right tools from the start can make all the difference. When I first started plastering, I remember feeling overwhelmed by the number of tools on the market. But over time, I learned that it’s not about having every tool under the sun—it’s about having the essentials that will help you get the job done with precision and ease.
For those just starting out, here’s a look at the core tools you’ll need. Trust me, investing in good-quality tools will save you time, effort, and frustration in the long run.
1. Plastering Trowel: The Heart of Plastering
The plastering trowel is where it all begins—it’s the backbone of your plastering toolkit. When I first picked up a trowel, I was given some advice that stuck with me: “Treat your trowel like a brush and your wall like a canvas.” That’s how essential this tool is—every stroke shapes your work.
Size and Material:
The size of your trowel matters. As a beginner, I started with a 14-inch stainless steel trowel, and I’m glad I did. It’s an all-rounder that gives you enough control without feeling too small for larger surfaces. You’ll see some plasterers recommend smaller trowels for more control or larger ones for bigger jobs, but the 14-inch is a solid starting point. Stainless steel is the way to go. It’s rust-resistant, durable, and easy to clean. If you’re looking to step up your game, invest in a carbon steel trowel. These are sharper and hold their edge longer, but they require a little more care to avoid rust.
Types of Trowels:
- Standard/Base Trowel: This is your all-purpose tool, used for the bulk of the plastering process. I personally recommend a Marshalltown Permashape or Nela Premium—these are reliable and can handle all types of plaster applications, from base to finish.
- Finishing Trowel: When you’re ready to smooth out that last coat, this is your go-to. It’s flexible, helping you flatten and smooth the final layers to perfection.
- Flexible Trowels: These are essential for polishing and finishing. Don’t use them in the beginning stages—they’re too soft and will follow irregularities in the wall, leading to “Zebra Stripes.” But when you’re fine-tuning, they make a world of difference. I personally use the Refina Superflex for those final touches.
2. Plasterer’s Hawk: Handling Plaster Efficiently
Next up is the hawk, which is surprisingly underrated. As a beginner, I was intimidated by how often professional plasterers reached for their hawks. But once I understood its role, I saw why it’s essential.
The hawk holds the plaster as you work, eliminating the need to bend over to your mixing bucket constantly. Trust me, after a day of plastering, your back will thank you.
Features to Look For:
- Material: Aluminium is the best choice. It’s lightweight, rust-resistant, and incredibly durable. I started with a plastic hawk, which worked fine, but upgrading to aluminium felt like a game-changer for ease of use and longevity.
- Size: Hawks are typically 13-14 inches square, perfect for holding a good amount of plaster while being easy to maneuver.
- Grip: The handle should be comfortable, ideally with a soft grip to prevent strain. I learned the hard way that flimsy handles make for sore hands after a long day of work.
For beginners, a plastic hawk is great for getting the hang of the tool. But for anyone serious about plastering, an aluminium or magnesium hawk is worth the investment.
3. Mixing Equipment: Getting the Consistency Right
Mixing plaster can be one of the messiest parts of the job, but it doesn’t have to be. When I first started, I did everything by hand—trust me, it wasn’t pretty. But eventually, I learned that having the right mixing equipment is a game-changer.
Power Mixers / Paddle Mixers: These electric mixers are a godsend. They ensure that your plaster is lump-free, saving you time and muscle. I swear by the Refina MEGAMIXER—it’s powerful, durable, and has never let me down.
Mixing Buckets: You’ll need at least two buckets—one for mixing, and another for cleaning. Keep them scrupulously clean to avoid contaminating the plaster with leftover residue. High-sided buckets reduce splashing, and I found that the tall Gorilla tubs are a great option for mixing plaster without the mess.
4. Water Brush/Sprayer: Perfecting the Final Coat
A water brush might seem like a small tool, but it plays a pivotal role in ensuring your plaster goes on smoothly and finishes flawlessly. When I first started, I didn’t realise how crucial it was to keep the plaster moist during the application process. A dry trowel can easily pull at the plaster and ruin the finish.
How It Helps: The water brush or sprayer is used to dampen the wall and the trowel. It prevents the plaster from drying too fast, especially when you’re working on large surfaces or during hot weather. For me, working in Australia’s heat, this tool is a lifesaver, ensuring that the plaster stays workable for longer and that the finish is smooth and consistent.
Choosing the Right Brush: A 6-inch water brush is usually perfect for most plastering jobs. Be cautious when buying cheaper brushes—some can shed bristles into your plaster, which will leave unsightly marks once the plaster dries. I personally recommend investing in a decent water brush that’s easy to clean and comfortable to use. I’ve also found that a sprayer is excellent for large areas, ensuring an even mist without over-wetting the plaster.
5. Floats: Achieving a Smooth, Even Finish
A float is an essential tool for smoothing and finishing plaster, removing any imperfections and creating a consistent texture. When I first used one, I was amazed at how it could smooth out rough edges with minimal effort.
Sponge Floats: These are used for the final finishing touches. I learned early on that using a sponge float with a small amount of water on the surface helps to blend the plaster seamlessly and remove any trowel marks or air pockets. It’s the key to achieving that buttery-smooth finish that makes your work stand out.
Plastic Floats: Lightweight and durable, plastic floats are a personal favourite for fine finishing work. They don’t absorb water, so you won’t risk them warping or getting damaged during the job. I use a plastic float for detailed work on smaller walls or areas where precision is key. It helps to “float” the render and compress it to create a solid, uniform finish.
Wooden Floats: I started out with a wooden float and still use it for the initial layers when I’m applying plaster. It’s a more traditional tool, great for spreading and levelling during the early stages, and it can help create some texture on the plaster if needed. Wooden floats are tough, and their durability makes them an essential tool in any plastering kit.
6. Corner Trowels: Perfecting Internal and External Corners
Corners can be the trickiest part of plastering, but corner trowels are here to make your life easier. I remember spending too much time trying to perfect my corners with a regular trowel, only to find I was making a mess. Once I got my hands on a corner trowel, everything changed.
How They Work: Corner trowels are designed to perfectly apply plaster to both internal and external corners. Whether you’re working on sharp angles or curved surfaces, these tools allow you to get clean, crisp edges. For instance, when plastering around doorways or windows, a corner trowel is invaluable for achieving a professional finish.
When to Use: Whether it’s for the internal corners where two walls meet, or the external corners like those around window frames, this tool ensures that the plaster adheres cleanly and without bulging edges. It’s essential for both neatness and durability.
Specialised and Advanced Plastering Tools
As your plastering skills grow, so does your toolkit. For more complex plastering jobs or to increase your efficiency, a range of specialised tools will come in handy. These tools allow you to tackle more advanced tasks with greater ease and precision, ensuring a high-quality finish every time.
1. Speed Skims and Spatulas: Flattening Large Surfaces with Ease
In the world of plastering, Speed Skims and Spatulas are essential for flattening large surfaces quickly. These tools are the go-to when you need to cover large areas fast without compromising on finish quality.
Speed Skim: The Speed Skim is a tool I recommend for those times when you need to flatten a large surface in minimal time. It’s often used for ceilings and large walls, where traditional trowelling just takes too long. I found that using a Speedskim SF (steel version) allowed me to efficiently flatten the plaster and eliminate bumps without wearing out my wrists. A Speed Skim is typically attached to a pole, so you can easily use it while standing, saving both time and physical strain.
Spatulas: These tools are becoming more popular for finishing and smoothing plaster, particularly in areas where precision is required. I’ve used a spatula for polishing and finishing work, and it provides more flexibility than a traditional float. It’s lighter and works wonders on small jobs like patching up imperfections on the final coat.
2. Darbies and Straight Edges: Ensuring Flat, Straight Walls
When you’re plastering large surfaces, ensuring they’re straight and level is a must. Darbies and straight edges are crucial for this task.
Feather Edges: These long, flat tools (usually 1-2.5m) are ideal for levelling plaster over large areas. When I first used a darby, I was amazed at how easily it helped me create a perfectly level surface. The feather edge is particularly useful for “scraping” off excess material and smoothing out high spots on the wall.
Serrated Feather Edges: These specialised straight edges have a unique design, allowing you to manipulate render and plaster more precisely. I’ve used them to ensure even distribution and identify any low spots. They’re fantastic when you’re working with render or a thick coat of plaster.
3. Scarifier: A Tool for Stronger Plaster Bonding
The scarifier is a tool that many plasterers don’t realise they need until they’re faced with rendering external walls. This comb-like tool helps create a “key” for the plaster, improving its bond to the underlying surface.
How It Works: The scarifier is essentially used to scratch up the initial plaster or render layer. When I was rendering my own outdoor walls, I used a scarifier to roughen the surface before applying the next coat of render. It allowed the second layer to bond much better, preventing cracking and peeling down the line.
4. Automatic Taping Tools: Speeding Up the Jointing Process
For larger projects, automatic taping tools can significantly cut down the time it takes to finish plasterboard joints. If you’ve ever done the tedious work of taping and jointing by hand, you’ll understand how much of a time-saver these tools can be.
Flat Boxes and Taping Machines: One of the best investments I made was in an automatic taping machine. I was working on a large drywall job and found that using a flat box attached to a pole allowed me to apply compound over the joints quickly and efficiently. It reduced my workload and made the whole process smoother. For larger projects, bazookas (a more advanced version of these tools) take this efficiency to the next level by simultaneously applying the compound and tape. While these tools are a bit of an investment, they’re invaluable for reducing job time, especially on larger projects.
5. Plasterboard Lifter & Plasterer’s Stilts: Boosting Productivity
Plastering ceilings and higher walls can be physically demanding, especially when you’re constantly climbing ladders or scaffolding. A plasterboard lifter and plasterer’s stilts can drastically improve your efficiency and reduce fatigue.
Plasterboard Lifter: This tool makes lifting and positioning plasterboard sheets a breeze. I still remember my first major ceiling job—before I got a plasterboard lifter, I struggled to get the boards in place without help. A plasterboard lifter not only holds the sheet in position but also makes the installation process much faster and safer. I highly recommend this tool for anyone working on ceilings or large wall installations.
Plasterer’s Stilts: When I first saw a plasterer using stilts, I was a bit sceptical—how could they possibly be comfortable or safe? But once I tried them myself, I quickly understood their appeal. Stilts allow you to reach higher areas without needing scaffolding or ladders. It’s great for skimming ceilings or finishing higher walls. However, they do take a little getting used to, and you need to make sure your balance is up to the task. Still, they save a lot of time and effort compared to constantly moving a ladder.
6. Power Sanders & Dust Extraction: Finishing with a Smooth Touch
Sanding plaster can be a dirty job, but it’s essential for achieving that perfect, smooth finish. While I started with a simple hand sander, I quickly realised the benefit of investing in an electric power sander.
Electric Power Sanders: These sanders, such as an orbital sander, are a huge time-saver. I use mine with a dust extraction system, which collects most of the dust as I work. The last thing you want after a long day of plastering is to deal with a mountain of dust. The sander not only helps you finish your work quickly but also ensures that the plaster’s surface is smooth and even.
Pole Sanders: For jobs involving ceilings or walls in hard-to-reach areas, a pole sander is an affordable and effective alternative to electric sanders. The long handle allows you to reach high surfaces without overexerting yourself, and it’s ideal for smaller plastering tasks.
Safety Equipment Essentials for Plasterers
Plastering might seem like a straightforward trade, but it comes with its fair share of risks. I learned the importance of safety the hard way after a minor accident early in my career. Now, safety is a non-negotiable part of my daily routine, and these are the essential pieces of PPE (personal protective equipment) every plasterer needs.
1. Head and Eye Protection: Keeping Safe from Falling Debris
When I started plastering, I was hesitant about wearing a hard hat. But after a small incident where a bit of debris fell from the ceiling, I never worked without one again. A hard hat is a must, especially when you’re working with materials overhead or on a scaffold. It’s lightweight, comfortable, and protects your head from falling debris.
Eye Protection: Plaster dust and small particles can easily get into your eyes, causing irritation or even injury. Safety glasses or goggles should be worn at all times. I prefer a full-face shield, especially during the sanding process, to prevent any plaster dust from flying into my face.
2. Respiratory Protection: Protecting Your Lungs from Dust
One of the most important lessons I’ve learned in plastering is the long-term effects of inhaling dust. Fine silica dust is a major concern, particularly when mixing or sanding plaster. I’ve invested in FFP3-rated respirators (a higher grade than standard masks) to filter out harmful particles. It’s a small investment for the sake of my lungs.
I also make sure the job site is well-ventilated, and where possible, I use dust extraction systems to keep the air as clean as possible. Trust me, your lungs will thank you in the long run.
3. Hand and Foot Protection: Safeguarding Against Cuts and Falls
Hand Protection: Plastering is tough on your hands, especially when you’re using tools with rough edges or mixing plaster. I always wear abrasion-resistant gloves. My personal favourite are nitrile gloves, as they’re waterproof, flexible, and durable enough to withstand the rigours of plastering.
Foot Protection: Steel-toed boots are a must. These not only protect your feet from falling tools but also provide better traction, especially when you’re working on slippery surfaces. I’ve had my fair share of slips on wet floors, and a good pair of boots has kept me safe more times than I can count.
4. Hearing Protection: Minimising Noise Risks
With power mixers, sandblasters, and other loud equipment, hearing protection is essential. I learned this lesson early on when I experienced temporary hearing loss after a long day of sanding without ear protection. Now, I never work without earplugs or earmuffs. These reduce the risk of permanent hearing damage and make the job more bearable.
Factors to Consider When Choosing Plastering Tools
Choosing the right tools for the job can be overwhelming, especially with so many options out there. From personal experience, here are some things to consider before investing in plastering tools:
1. Frequency of Use: Investing for Durability or Occasional Use
For professionals, durability is key. You’re going to use your tools daily, so investing in high-quality, long-lasting tools is worth the upfront cost. For beginners or DIYers, lightweight and less expensive tools might be enough for the odd project. Over time, however, as your skills and projects grow, you’ll want to upgrade to more professional tools that can stand up to the test of time.
2. Material Quality: Stainless Steel vs. Plastic
When it comes to tools like trowels and hawks, stainless steel is the go-to material for professionals. It resists rust and is easy to clean, ensuring the longevity of your tools. On the other hand, plastic tools are often lightweight and cheap, making them suitable for beginners or infrequent use.
3. Experience Level: Tailoring Tools to Your Skill Level
As a beginner, lightweight tools with soft grips are easier to handle and provide better control. As you gain experience, you’ll likely prefer tools that offer more precision and durability, such as stainless steel trowels and higher-end float options. A tool that felt too heavy for you at the start will likely become your favourite as you gain strength and experience.