When it comes to achieving a smooth, flawless finish on your walls, understanding the quality of plasterboard is essential. Whether you’re painting directly onto plasterboard or opting for a skim coat, the quality of your surface will make all the difference between a lacklustre result and a stunning finish that lasts. From identifying common imperfections like cracks and uneven surfaces to understanding the importance of proper preparation, this guide will take you through every step to ensure your plasterboard is ready for a perfect paint job. With a bit of care, attention to detail, and expert craftsmanship, you can transform any room into a space that both you and your walls will be proud of.
Plasterboard: The Basics You Need to Know
Plasterboard, also known as Gyprock in Australia, is one of those unsung heroes in the building industry. I remember my first time working with plasterboard during a home renovation, and I couldn’t help but be amazed by how easy it made the process. In the past, walls used to take much longer to finish, but with plasterboard, tasks are completed in half the time. Made primarily from gypsum, this building material is a staple in both new builds and renovations, valued for its ability to quickly set and deliver a smooth finish.
It’s not just about speed – plasterboard’s versatility is key. Whether you’re renovating an old kitchen or adding a room to your house, plasterboard is likely to be part of the process. It’s commonly used for ceilings and internal walls, especially in homes across Australia, where climate conditions make it an ideal choice for creating stable, smooth walls.
When to Use Plasterboard and When Not To
Now, you might be thinking, “So, plasterboard is always the best choice, right?” Well, not exactly. It shines when you’re looking for an affordable, easy-to-apply solution. It’s the go-to material for new construction, where large sheets are used to cover vast areas quickly.
But don’t get too eager and throw it up everywhere. If you’re in a particularly humid area (think coastal regions like Sydney or Queensland), plasterboard can be prone to dampness over time. That’s when it’s crucial to consider moisture-resistant plasterboard (often referred to as blueboard) or apply additional treatments. In my own experience working on a beachside property in Byron Bay, the normal plasterboard simply didn’t hold up as well as it would have in a drier location. So, always factor in your local climate when choosing the right material for the job.
Is It Safe To Paint Directly on Plasterboard?
Painting directly on plasterboard might seem like a good idea at first. It’s a quick and easy option, especially for those who are trying to cut down on time. I’ve done it myself when renovating a rental property in Melbourne, thinking, “How hard can it be?” But trust me, if you don’t do the prep work properly, you’ll be regretting it later.
When you paint directly onto plasterboard, the first thing to deal with is the joints between the boards. These are sealed with joint tape and mud (joint compound), but even with a careful finish, you can sometimes still see slight imperfections after painting. In my case, I noticed the “wavy” look on the ceiling where the paint caught the light at different angles, and the board seams were visible. It wasn’t the clean, sharp finish I had hoped for.
This “wavy” effect comes from the way plasterboard and joint compound dry at different rates. The boards themselves can have a slight texture, and unless they’re skimmed properly, the paint will highlight these imperfections, leaving your work looking a bit less polished. If you’re going for a modern, smooth look, it’s worth considering another method.
The Risks of Painting Directly on Plasterboard
While it’s technically fine to paint directly on plasterboard, the risks are real, especially if you’re after a top-quality finish. Areas like cable chases (where wiring runs through the wall) might still be visible after the paint job is done. Even the slightest dip or bulge in the wall can cast a shadow under certain lighting, making the imperfections much more obvious.
This is especially true if you’re using a glossy or semi-gloss paint. That shiny finish tends to reflect light in a way that accentuates flaws, while matte finishes can be a bit more forgiving. So, if you want a “no flaws, absolutely smooth” effect, painting directly on plasterboard might not give you the results you want.
Skimming Over Plasterboard: Is It Worth the Extra Step?
When you’re striving for the perfect wall finish, sometimes the extra step of applying a skim coat makes all the difference. I can speak from experience here: I was working on a renovation project in Adelaide, and after a lot of debate, I decided to add that extra layer of plaster. The result was worth every bit of effort. The wall went from “functional” to “flawless” in one simple step.
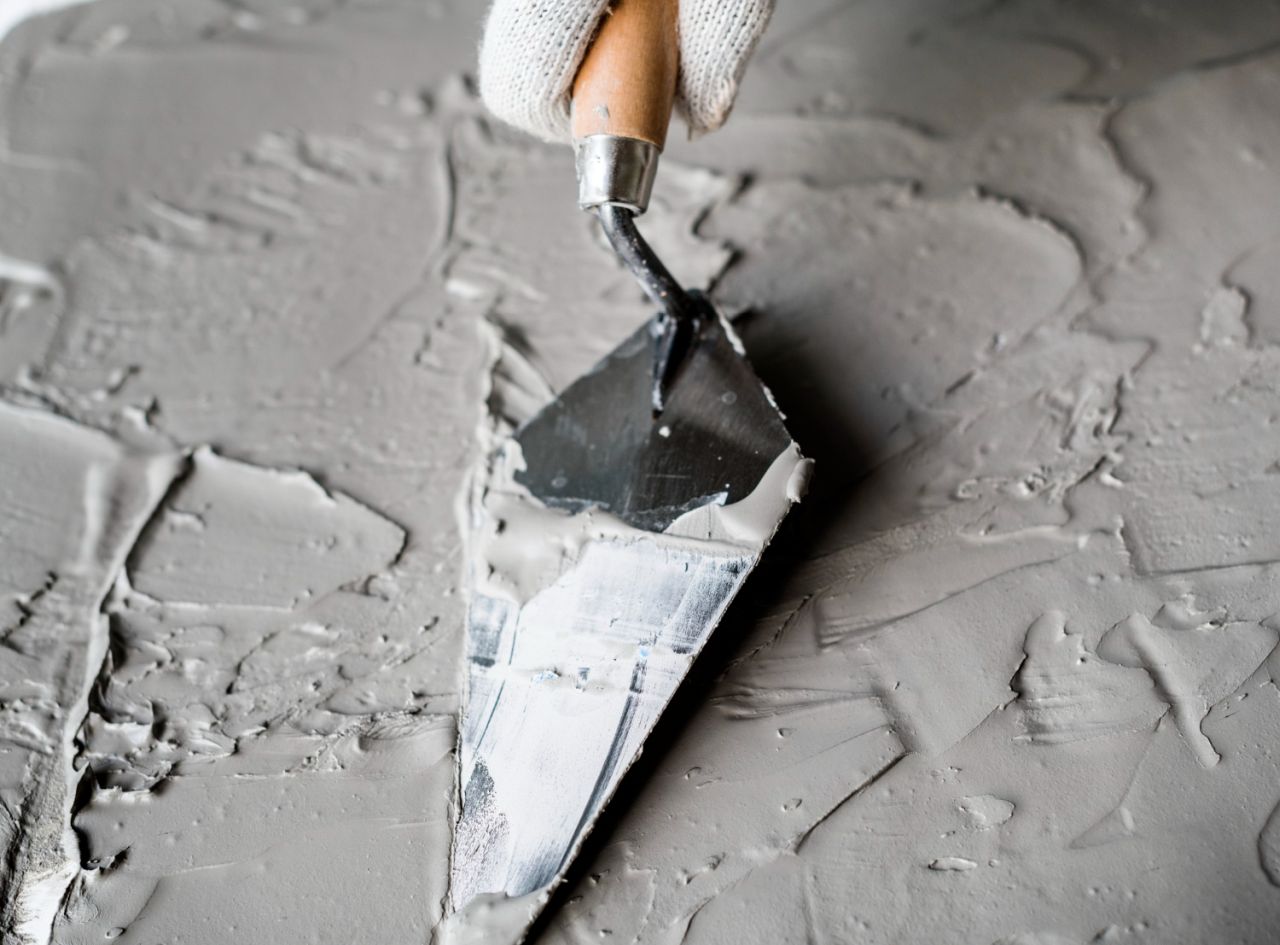
A skim coat is a thin layer of finish plaster applied over plasterboard. Think of it like smoothing out the rough spots on a canvas before you start painting. It’s essentially the best method for achieving that mirror-smooth surface you’ll want for a clean and consistent paint finish.
While applying a skim coat might take a bit longer than just painting over plasterboard, the outcome is far superior. When you apply a skim coat, you’re filling in those tiny dips, gaps, and imperfections that you wouldn’t even notice at first, but will definitely show up under the paint. It’s like investing a bit more upfront to save you time and headaches later on.
Benefits of Skimming for a Flawless Finish
The biggest advantage of skimming is that it creates a perfectly even surface. Whether it’s new plasterboard or an older wall that’s been patched up over time, applying a skim coat gives you a pristine base. I once worked on a heritage-listed home in the Blue Mountains, and even though the building was older with more wear and tear, skimming over the plasterboard made the surface so smooth, I couldn’t believe it was the same wall.
Skimming is particularly important if you’re planning on using a high-gloss paint finish. This type of paint will reveal every flaw, so getting the surface as perfect as possible is key. In fact, I’ve seen clients in the past think they could skip the skim coat and go straight for painting, only to come back months later with complaints about imperfections showing through. The extra investment in time and materials is worth it for the longevity and quality of the paint job.
Skimming: A Commonly Recommended Method for Internal Walls
When plastering over plasterboard, the standard recommendation is to apply a 12mm base layer of plaster followed by a 2-3mm finishing coat. It may seem like overkill, but as with any trade, it’s about getting the foundation right. Imagine you’re setting up the frame for a piece of furniture; if the frame is solid and stable, the rest of the process goes a lot smoother. This technique applies the same logic to your walls.
In my work, I’ve found that when you use this method, not only do you get a smooth surface, but you also help with the durability of the wall. It’s better equipped to handle the wear and tear of daily life, from children running around to the occasional bump or scuff from moving furniture. As the saying goes, “a solid foundation never goes out of style.”
How To Achieve a High-Quality Paint Finish On Plaster
When it comes to painting on plasterboard, preparation is everything. I’ve seen firsthand how skipping certain steps can lead to a disaster of cracked or peeling walls. So, before you even think about cracking open a can of paint, ensure you follow these essential steps:
- Surface Cleanliness and Roughness:
The wall must be spotless. Dust, dirt, and grease can prevent the paint from adhering properly. A quick wipe-down with a damp cloth can do wonders. In one of my projects in Melbourne, I had to spend extra time cleaning the walls before priming because the previous owners didn’t remove old wallpaper adhesive. It added more time to the job, but it saved me from dealing with peeling paint later. - Addressing Cracks and Holes:
Before painting, you want to fill any holes or cracks. I’ve always used a standard joint compound for small cracks, but for larger holes (like those from door handles or accident-prone pets), you’ll want to use plasterboard patches to ensure a seamless repair. If you don’t fill in these gaps, the cracks could reappear once the paint dries, and trust me, it’s a headache to fix them at that point. - Joint Treatment and Reinforcement:
When installing plasterboard, joints are often the weakest point. If you don’t properly treat these seams, they’ll stand out like a sore thumb once painted. I once worked on a room where the joints weren’t reinforced correctly, and we had to go back and re-mud them because they showed through the paint. - Curing (if skimmed):
If you’re skimming over plasterboard, let it cure naturally. I know it’s tempting to rush the process, but using a dehumidifier or cranking the heating can cause cracks in the skim coat. I learned this lesson the hard way while working on a winter renovation in Canberra—slapping the heating on high caused some of the skim to crack, and I had to go back and repair it all. - Priming/Sealing (Mist Coat):
Once your plaster or joint compound is completely dry, it’s time for a mist coat. This diluted emulsion paint is your primer, and it’s crucial for creating an even base for your paint. If you skip this step or apply it incorrectly, you might find that the final layer of paint looks patchy, or worse, peels off.
