Plaster walls frequently develop a network of microscopic fractures, too fine for patching plaster and too large for paint to disguise. Putting on a skim coat is the best option for repairing a wall.
During the skim-coating process, many, thin coatings of gypsum-based joint compound are applied to a surface.
Even after several coats, the total thickness is less than a sixteenth of an inch, a testament to how thin the layers are. Rough surfaces can also be smoothed out with the help of skim coating.
Is there any way you can tell whether your walls need some TLC?
Cracks and uneven surfaces may be difficult to paint over. You should instead skim plaster the walls per our specific guidance.
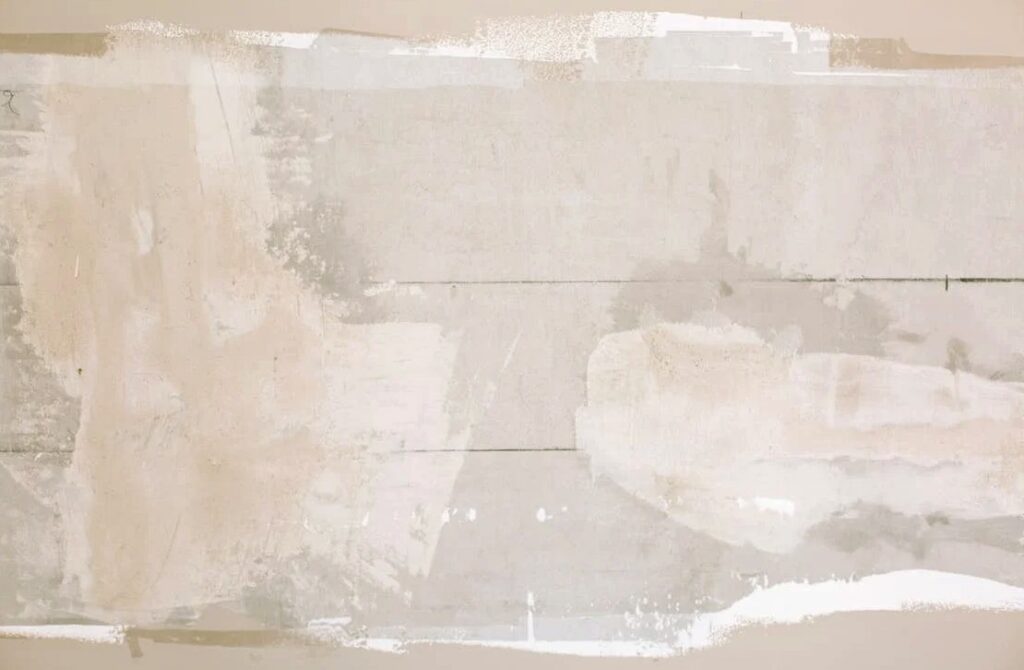
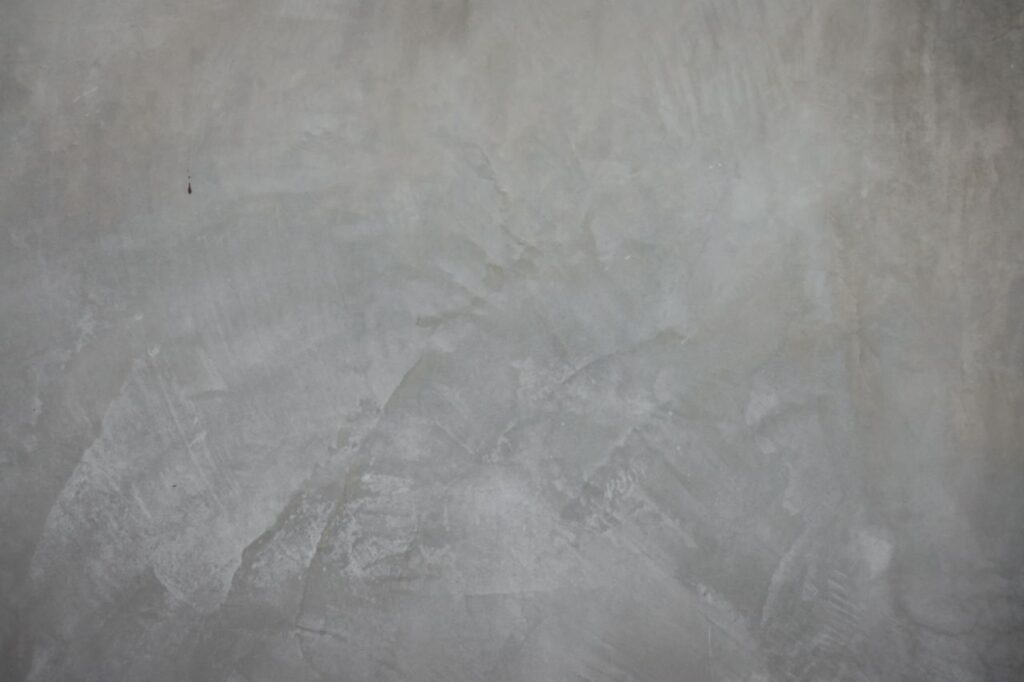
When walls are skim plastered, they change from being uneven and full of bumps to having a flat, smooth surface that is ready to be painted or wallpapered.
But don't rush in just yet. Wall skimming is a big job, so before you start, make sure you're prepared and happy with the results.
Skim coating does not require any special skills or knowledge to complete.
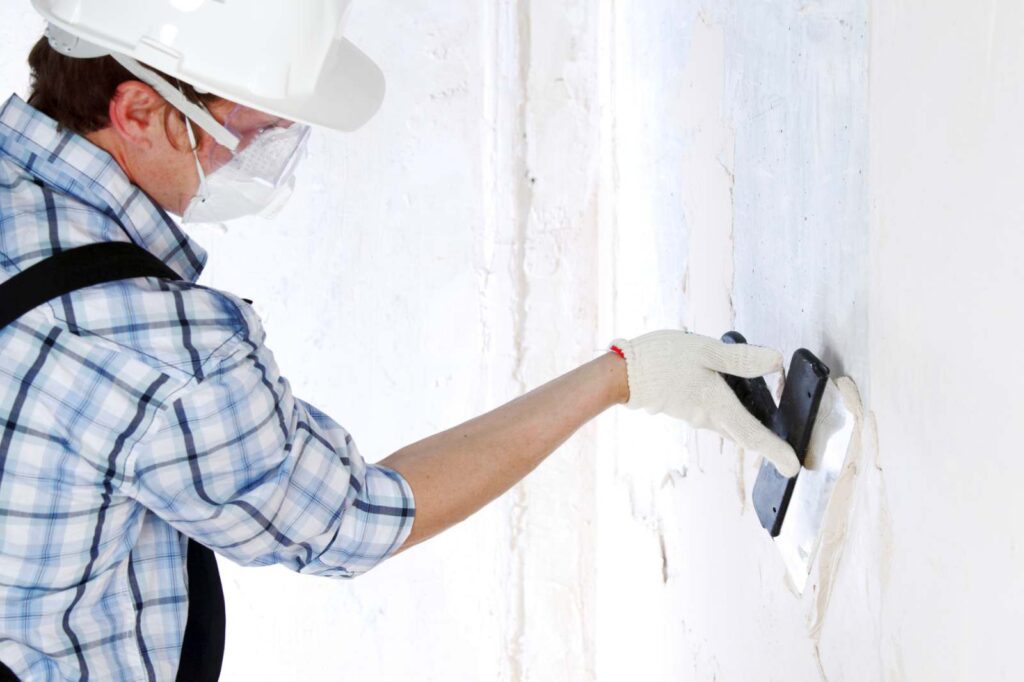
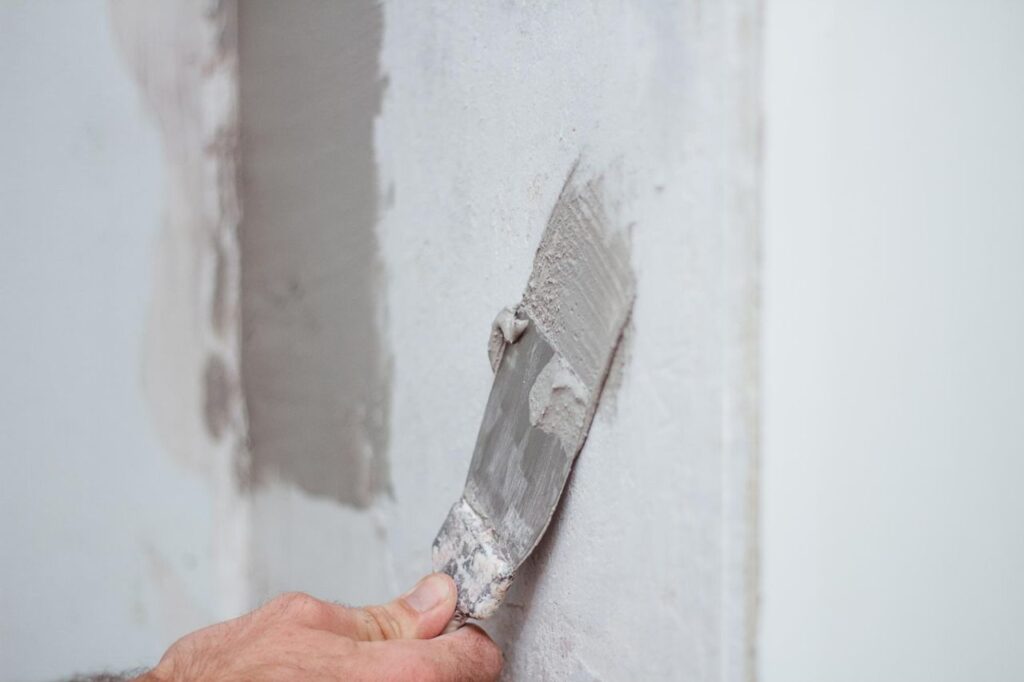
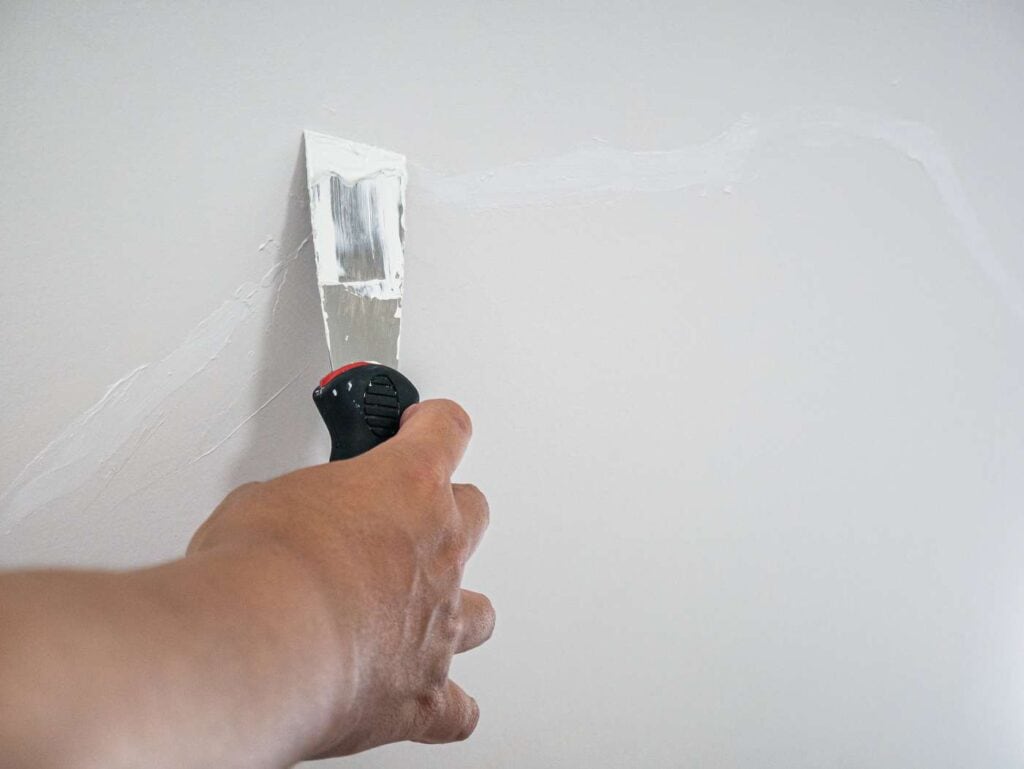
First, use a trowel to spread the coating, and then, using a wide drywall taping knife, smooth it out. Skim coating the walls of a typical room takes roughly three to four days. Moreover, it's quite dull.
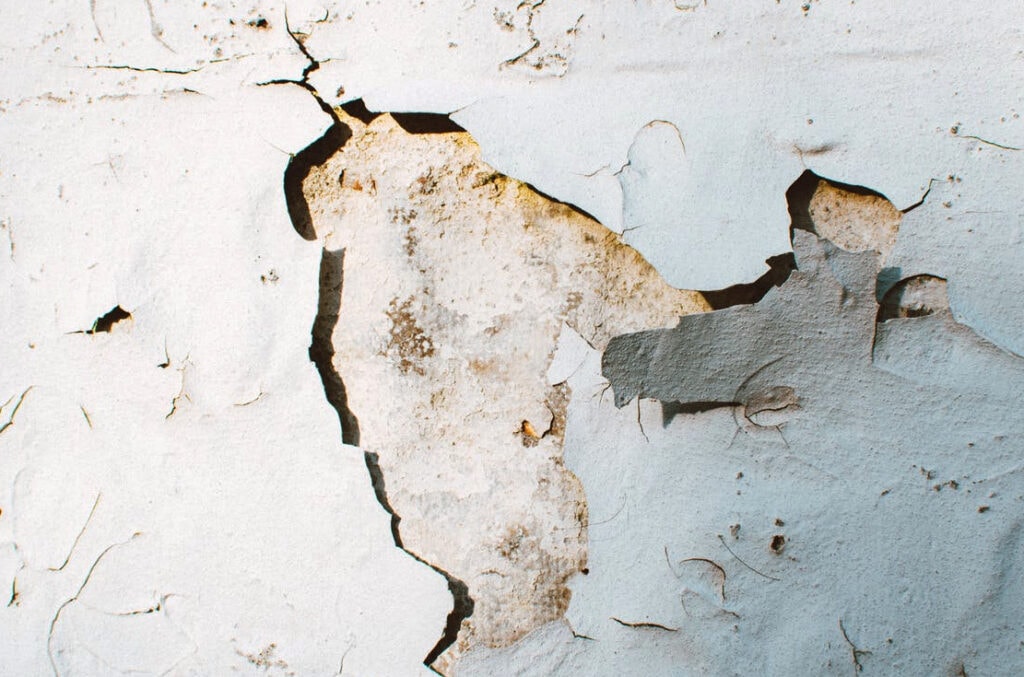
If the plaster is loose or otherwise damaged, skim coating won't be able to save a wall with several hairline fractures. Test the wall's steadiness by pressing your fingers against it.
If the surface is depressed, the plaster may have come loose from the lath keys behind it. The plaster will soon begin to flake and fall off in big sheets. The problem should be fixed by installing brand new drywall in place of the damaged sections, rather than just patching them up.
Techniques for Applying a Finish Coat of Plaster to a Wall or Ceiling
Methods for applying a skim coat of plaster. Plastering the ceiling, skimming a wall, or plastering around pipes? This project will show you how to do it right.
Find out how thick your skim coat plaster should be, what consistency it should be, and how to apply it with the help of a hawk. Spending effort on learning how to level and smooth skim plaster will pay dividends.
It takes a lot of time and effort to apply a skim coat of plaster, often called a topcoat.
It's easy to mount on a wall or ceiling, but it takes a lot of effort to ensure it's perfectly flat and smooth.
The best way to get better at something is to practise it often, just like you would with any other ability. In addition, your proficiency will increase with time and effort put into practise.
When and Why Is Skim Coating Used?
Only a thin layer of plaster was used. You should shoot for a gap of roughly 2 millimetres. To construct a straight wall, you must first combine a powder with water to produce a sticky slop, then toss this combination towards the wall (figuratively, of course), spread it out with some lovely tools, then wait for it to cure. Additional information is provided below.
Skim plastering is a skill that requires practise before you can attempt it on a real wall
If you're handy with a trowel, skim plastering is a great method to save money without sacrificing quality.
It can be very expensive to fix mistakes. Even if you plan to throw away the finished product, you should still purchase some plasterboard and topcoat plaster.
The drying time of topcoat plaster is often overlooked by DIYers. After the first coat has been "laid on," we always recommend trowelling it up and applying a second coat.
Time is of the key when skimming, and attempting a polished finish too soon or too late may result in a poor outcome.
Prepare a cup of skim before attempting the aforementioned. Mount it on some primed scrap wood using PVA glue.
Time how long it takes to reach a stiff but workable consistency.
It's now at the point where it can be trowel-finished without leaving any noticeable marks.
After the skim has dried, the only tool for polishing the surface is sandpaper.
Although mastery of a talent requires time and work, the payoff from preemptive practise is substantial.
Boundaries can be clearly drawn using beads that have a "stop end." Plasterable parts can be created by attaching galvanised or stainless steel beads to the wall.
You can rest assured that your work will seem polished and finished thanks to the flat top. The adornments cover their presence.
Solicit Necessary Resources
Skimming is only possible for those with lightning-fast reading speeds. Once you've started, you need to move swiftly to finish the job before it's finalised. Some of the most helpful ones are listed below.
- Safety glasses
- Taping knife
- Water-based primer
- Ladder (to reach high areas)
- Ready-mix joint compound
- Trowel
- Skimmer plate
- Plastic sheeting
- Large bucket
- Mixing rod (if using quick set)
- Drywall knife (optional)
- Hammer with a nail pry tool
- Sandpaper
- Quick-set joint compound (optional)
- Paint roller
- Drill (if using quick set)
Stationary Object / Desk
Take precautions to protect your back from serious discomfort or injury. Prepare a flat surface that can be covered with something you don't mind getting dirty and scraped. A window glazing firm in your area should be able to provide you with an acrylic sheet at a reasonable cost if you contact them.
I sized the sheet to fit using a hand saw (mine was 0.9m 1.1m). Your tools won't get knocked over if you set them on this board.
Advice You Can Use
Plaster can get everywhere, so make sure your tools are clean before you start working with it. Plastering can be a dirty task, but it will go more smoothly if you keep your tools and supplies clean.
Safeguard the Ground
Once plaster has dried, it will not come off with a simple mop and scrub. Similar phenomena occur with rugs.
Spend some time laying down thick, waterproof plastic. You can tape them down securely with masking tape. Plaster is messy and it's easy to make a mess as a beginner, especially since you have to cover the entire floor.
Before You Start, Double-Check the Plasterboard
Splotches of glue on the wallboard are possible. Clear the boards of any potential tripping hazards, including cables or stray furniture.
Get Your Walls Ready by Cleaning Them
Make sure the walls are clean and clear of holes and dust before you begin skimming. With just a few coats of this, you can make it look like a professional painted it.
Once the loose plaster has been removed, the cracks can be filled with pre-mix joint cement using a smaller drywall knife or a tape knife. When the nails are pulled from the surface, the next step is to patch the holes left behind.
After the holes have been patched and the damage assessed, the walls must be cleaned carefully so that the plaster will adhere.
Before moving forwards, make sure that all of the walls are thoroughly dry.
Putting Together Your Skim Coat
Skim plaster is notoriously difficult to mix properly, and most people fail miserably at it. Making a thick, creamy, and sloppy paste out of the plaster is the first step. There must not even be a hiccup.
The next step is to combine the dry plaster with water, albeit, unlike with mortar, the water shouldn't be put to the powder beforehand.
Keep the powder moving as you add it, as illustrated in the diagram, for optimal results. To achieve uniform texture, a combination of a specific "paddle" blade and a variable-speed electric drill is utilised.
For your convenience, our business offers the paddles for sale at a fair price.
To quickly and thoroughly combine an entire bag of skim, plasterers like those depicted above utilise enormous buckets. Skim plaster is sold in bags that cover around 12 to 13 square metres, making it problematic for a beginner to apply the full bag at once because it will cure and harden as they work.
As a first step, you may fill a 2-gallon bucket with clean, cold water until it is about a third full. Plaster is then applied gently to the top of the pile once it has reached the water level.
Mix the plaster by placing the paddle in the bucket and slowly moving it up and down and side to side. More plaster may be needed to get the desired thickness of the porridge.
A second bucket should always be on hand in case you need to quickly clean the paddle or other instruments. It's a great time saver to begin making a new batch of plaster while there is still some of the old one remaining on any equipment.
The mixing bucket should be thoroughly scrubbed before being used again.
Get Your Surfaces Ready
To finish prepping the walls for painting, a water-based primer must be used.
Spread the paint evenly on the areas you plan to plaster. Joint compound will stick better to primed walls, and any leftover loose paper can be sealed with the compound.
Always make sure the walls are dry before putting anything permanent on them.
Putting Up Skim Plaster on the Walls and the Ceiling
The hardest part is getting to the ceiling, but it has to be done. You still need to put in the time and effort to become proficient, even if photographs show you exactly what to do at each stage.
Once the plastering is complete, it should be dumped onto a board that has been lifted so high that a hawk can fly underneath it with ease. Plaster will now be used to trace the bird's lines.
The first step is to plaster the hawk lightly. You should face the hawk as you use the trowel to remove part of the scum off the top of the mound. This can be done with a single, simple gesture.
It takes time and practise to master even the most elementary components of plastering.
Get the plaster on the wall or ceiling as quickly as you can, but make sure it's uniformly spread out. Maintain your composure; the trowel poses no threat. Don't worry so much about getting the skim quite right just now.
Speed and consistency in coverage are crucial since one coat should be three millimetres thick or two coats should be roughly one and a half millimetres thick.
An Example of Plastering an Interior Corner
A good corner move can be executed with relative ease. You only need the correct tool, which, in this situation, is the only tool available. The flexible bristles of a painter's brush are excellent, although any brush will suffice. It just has to be about an inch wide.
Plastering takes careful attention to detail, as the initial coat needs to penetrate the studs and the scrim tape.
Apply water to a brush, then use it to skim and smooth the top layer. Similarly, it prefers not to be completely submerged.
Carefully manoeuvre the brush into the corner and out again. The angles made by the protrusions coincide with those of the walls. So, it's simple; just do it again and again until all four corners are finished.
Putting Up Exterior Corner Plaster
As opposed to trying to fit into a tight spot, this option is far more convenient. That the corner angle bead hasn't been put in yet is astonishing. Look at this thread and string the beads before you start skimming (opens in a new window).
For the initial skim coat, push the plaster through the Anglebead using your trowel.
This aids in maintaining its credibility. Always have one end of the trowel on the bead and the other against the wall as you go along the length of the bead.
Always keep one side of the trowel resting on the metal corner bead at a right angle to the angle bead.
After being attached using this method, the angle bead won't protrude from the wall.
Put on the Final Coatings
Two coats are the minimum requirement for professional results.
It is possible to apply a second coat as soon as the first has dried. Just drag your trowel across the next part of wall after you're done with the current one.
This is when you should worry about levelling the surface and getting rid of any trowel markings.
When the second coat has dried, if the grooves and indents are still visible, apply a third coat by trowelling it on and dragging it vertically so that each coat is at a right angle to the one below it.
To avoid trowel markings, trim the edges with a knife that can also be used as a squeegee.
Plastering the Surface with Skim Plaster and a Trowel
It is recommended to apply it twice; the second coat can be applied directly on top of the first as stated in the directions.
After the soil has been tamped down to an even thickness of about 3 millimetres, the process of "trowelling up" is initiated by reverting back to the original condition (either in a single coat or, preferably, in 2 coats of about 1.5mm each).
Plaster may now be smoothed out and the trowel traces erased because it has "set." In that instance, a third round of edits is required.
A good rule of thumb is to spread out before the show begins and not cluster around things like pipes or architraves.
Then, while keeping an eye on the "set rate," focus on the big sections so that you don't have to rush to get a good finish with a "little tool" around the pipes.
When working in areas where the float can't reach, you can get more plaster where it's needed by smearing it onto your hawk and trowelling higher.
For the final pass, if the plaster is quite dry, you can save time by brushing on clean water with a wide brush and then following the brush with your float.
When trowelling on plaster, many professionals utilise a rose spray cannon to spray huge amounts of water onto the surface.
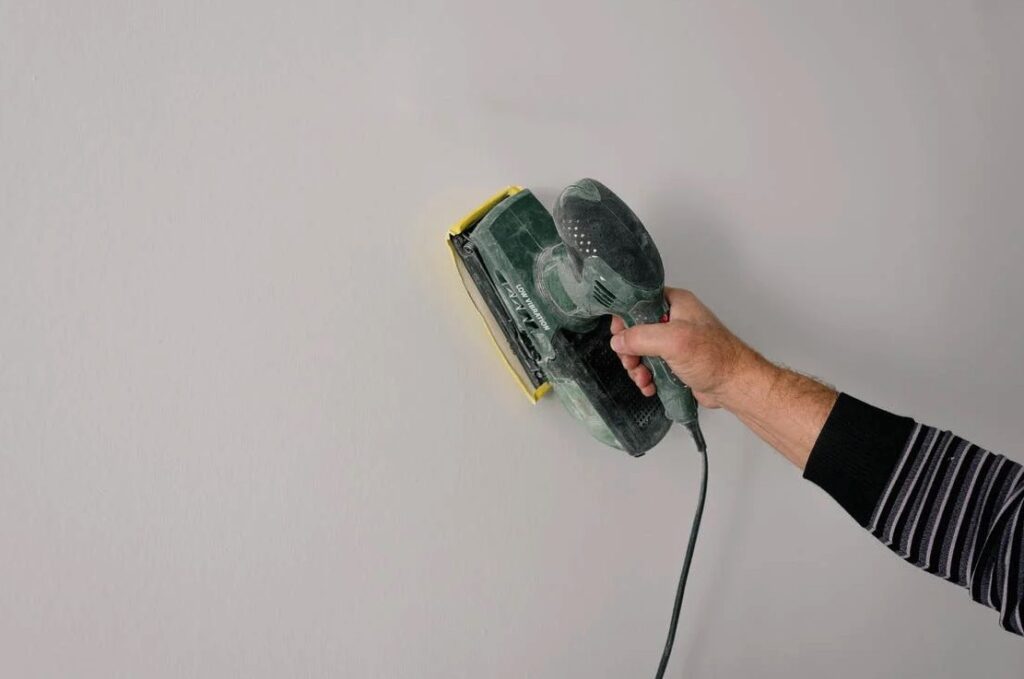
Get Rid of Flaws with Some Sanding
Before you start sanding the walls, make sure they are totally dry. This requires at least an entire day to complete. When the surfaces are completely dry, you can use fine-grit sandpaper to buff off any remaining rough patches, lumps, or divots (180-220 grit).
If there are any bumps, use coarser paper (100–120 grit) to smooth them out. To conclude, always wipe down your tools after usage. In the name of Success!
Cleaning off any lingering plaster dust when you're done is essential. Make use of the wand's extension to access high, out-of-the-way spots.
Wallpaper paste and paint will not adhere to a surface that is covered in dust. That being said, there it is. The walls can be decorated right away.
Conclusion
Skim coating requires no specific skills. Trowel and smooth the coating with a wide drywall taping knife.
Skim coating normal room walls takes three to four days. Skim plastering can only be learned on a false wall. It's great for decreasing costs without sacrificing quality.
Even if you trash the final product, buy plasterboard and topcoat plaster.
Most people cannot mix skim plaster. Cover a flat surface with anything that can be scratched and dirty.
Maintaining equipment makes plastering easier. Because skim plaster cures and solidifies as applied, a novice can only utilise part of the bag simultaneously.
Plastering takes time and practice. Corner moves are simple. Only the correct tool—conveniently the only one here—is needed. Protrusions match wall angles. Repetition completes all four corners.
Skim Plaster and a trowel are needed for trowelling walls and ceilings. Sanding with fine-grit sandpaper removes any leftover bumps, lumps, or divots (180-220 grit).
Content Summary
- Putting on a skim coat is the best option for repairing a wall.
- It would help if you instead skimmed plaster the walls per our specific guidance.
- Skim coating the walls of a typical room takes roughly three to four days.
- If the plaster is loose or otherwise damaged, the skim coating won't be able to save a wall with several hairline fractures.
- Please find out how thick your skim coat plaster should be, what consistency it should be, and how to apply it with the help of a hawk.
- It's easy to mount on a wall or ceiling, but it takes a lot of effort to ensure it's perfectly flat and smooth.
- The best way to get better at something is to practise it often, just like you would with any other ability.
- Skim plastering is a skill that requires practice before you can attempt it on a real wall.
- If you're handy with a trowel, skim plastering is a great method to save money without sacrificing quality.
- DIYers often overlook the drying time of topcoat plaster.
- A window glazing firm in your area can provide you with an acrylic sheet at a reasonable cost if you contact them.
- Plaster can get everywhere, so make sure your tools are clean before you start working with them.
- Plastering can be a dirty task but keeping your tools and supplies clean will go more smoothly.
- Plaster is messy, and it's easy to make a mess as a beginner, especially since you have to cover the entire floor.
- Ensure the walls are clean and clear of holes and dust before skimming.
- After the holes have been patched and the damage assessed, the walls must be cleaned carefully so that the plaster will adhere.
- Making a thick, creamy, sloppy paste out of the plaster is the first step.
- The next step is to combine the dry plaster with water; unlike with mortar, the water should be put to the powder after some time.
- As a first step, you may fill a 2-gallon bucket with clean, cold water until it is about a third full.
- Mix the plaster by placing the paddle in the bucket and slowly moving it up, down, and side to side.
- To finish prepping the walls for painting, a water-based primer must be used.
- Spread the paint evenly on the areas you plan to plaster.
- The hardest part is getting to the ceiling, but it has to be done.
- You should face the hawk as you use the trowel to remove part of the scum off the top of the mound.
- It takes time and practice to master even the most elementary components of plastering.
- Apply water to a brush, then use it to skim and smooth the top layer.
- That the corner angle bead has yet to be put in is astonishing.
- Push the plaster through the Angle Bead using your trowel for the initial skim coat.
- Always keep one side of the trowel resting on the metal corner bead at a right angle to the angle bead.
- After being attached using this method, the angle bead won't protrude from the wall.
- It is possible to apply a second coat as soon as the first has dried.
- To avoid trowel markings, trim the edges with a knife that can also be used as a squeegee.
- Plastering the Surface with Skim Plaster and a Trowel It is recommended to apply it twice; the second coat can be applied directly on top of the first as stated in the directions.
- After the soil has been tamped down to an even thickness of about 3 millimetres, the "trowelling up" process is initiated by reverting back to the original condition (either in a single coat or, preferably, in 2 coats of about 1.5mm each).
- When working in areas where the float can't reach, you can get more plaster where it's needed by smearing it onto your hawk and trowelling higher.
- For the final pass, if the plaster is quite dry, you can save time by brushing on clean water with a wide brush and following the brush with your float.
- When trowelling on plaster, many professionals utilise a rose spray cannon to spray huge amounts of water onto the surface.
- Please get Rid of the Flaws with Some Sanding. Before you start sanding the walls, make sure they are totally dry.
- Cleaning off any lingering plaster dust when you're done is essential.
- Make use of the wand's extension to access high, out-of-the-way spots.
Frequently Asked Questions About Plaster Wall
You can sand plaster walls. Plaster walls were often used in early 20th century homes. While this surface is very hard and durable, it is not the easiest wall material to apply. However, if you have done your plasterwork or have patched a section and have found the surface isn't even, you can fix it with a little work.
When the first coat (we always recommend two coats) is "laid on", it is usually ready to be trowelled up and the second coat applied. Skimming is as much about timing as anything else, and trying to get a polished finish too quickly or too late, can result in a horrible job.
The multi finish is ideal for (indeed, is manufactured for) using as a finishing plaster when there are a variety of backing surfaces to be covered. Board Finish: Board finish plaster is used on surfaces with low – medium suction. Plasterboard and Dry-Coat plaster will accept Board Finish well.
Before skim coating:
Make sure the surface is clean. Repair any water stained surfaces and seal them with primer-sealer before skim coating. If the paint is peeling or plaster and joint compound are popping off, remove all the loose material, wipe away all dust, and coat with primer-sealer.
Pour a small amount of textured paint into a plastic bucket. Use a 2- to 3-inch paintbrush to apply paint around the edges of plaster surfaces. Apply textured paint to the remainder of the surfaces with a roller. Use a series of overlapping, random strokes.