Plastering is an essential part of building construction, often going unnoticed until it’s not done right. As someone who’s been in the plastering game for over two decades, I can tell you firsthand that plastering isn’t just about creating smooth walls and ceilings. It’s about ensuring the longevity, protection, and aesthetic appeal of a structure. Whether it’s the cement plastering that shields buildings from harsh weather or the gypsum plaster that provides a clean, polished finish, plastering plays a key role in every project.
From historical restorations to modern high-rises, plastering techniques have evolved over time, but its importance has never changed. In this guide, I’ll break down the plastering process, the different types of plaster used, common defects, and what it takes to be a skilled plasterer, sharing my own experiences along the way to help you understand why plastering is more than just a finishing touch—it’s a vital part of the building process.
Why Plastering Is Crucial for Building Construction
Plastering is one of those things that often gets overlooked when you’re looking at a finished building. But, let me tell you, it’s as essential as the bricks that make up the walls. You might not give it much thought until you notice a rough patch or a crack in the wall, but plastering is the real unsung hero of any building project. I’ve spent over 20 years in the plastering game, and trust me, getting it right can make or break the look and longevity of a structure.
The Protective and Aesthetic Benefits of Plastering
In my experience, the first thing people think of when it comes to plastering is the smooth, glossy finish. Sure, plaster makes things look sleek, but it’s also got a real job to do. It’s not just about hiding brickwork or cement underneath; it protects the internal structure from all sorts of elements. A solid plaster coat can act as a buffer against moisture, extreme temperatures, and even knocks that would otherwise leave your walls looking like a wreck.
I worked on a commercial fit-out in the Melbourne CBD a few years ago where we used lime plaster as part of a heritage restoration. Not only did it give the place an old-school charm, but it also worked wonders in regulating humidity inside the building. When you’re dealing with plaster, you’ve got to consider its full functionality—it’s your first line of defence against the elements.
The Role of Plastering in Structural Integrity
When I worked on a renovation project out in St Kilda, the building was a good 60 years old. The original plaster had cracked and crumbled over time, but once we applied a fresh coat of cement-based plaster to the interior walls, it helped bind everything back together. It’s one of those things that you don’t notice until it’s too late. Plaster adds to the structural integrity of a building by preventing moisture penetration and even keeping out heat in the summer months. It’s like the wall’s protective skin. Without it, you might as well leave your house exposed to the elements.

Common Plaster Types and Their Uses in Construction
If you’re looking for plastering materials, you’ve got a few options depending on the job at hand. I’ve worked with all of them—from lime plaster for that classic finish in heritage restorations to modern cement renders for weatherproofing external walls. Each plaster type has its own purpose, so let’s break them down:
- Cement Plastering (Cement Rendering)
Cement plaster is the heavy-duty workhorse, perfect for external surfaces. It’s tough as nails and stands up to weather, making it ideal for areas exposed to the elements. I worked on a commercial building in Footscray where we used cement plastering on the external walls. It’s great for protection, and with the right texture, it can add a bit of character to the exterior too. - Gypsum Plastering (Plaster of Paris)
For the interiors, I can’t go past gypsum plaster. It’s smooth, quick-drying, and fire-resistant. When I did a fit-out for a medical clinic in Richmond, we used gypsum plaster on all internal walls. It made a big difference in creating a pristine finish, and with its fire-resistant properties, it was a no-brainer for a health facility. - Lime Plastering
This is the go-to for heritage restorations, and it’s a technique I’ve used countless times. Lime plaster is breathable, which is a massive bonus when you’re working with older buildings that need to adapt to moisture changes. I worked on a restoration project in Carlton where lime plaster was used to preserve the building’s historic character while ensuring it wouldn’t trap moisture inside. - Waterproof Plaster
If you’ve ever dealt with a wet bathroom wall or a leaky basement, you know the importance of waterproof plaster. This is a lifesaver when you need to keep water out and prevent mould. I’ve worked on a few home renovations in Melbourne’s eastern suburbs, where we used waterproof plaster in areas like the laundry and bathroom. It makes a huge difference in preventing water damage over time.
The Plastering Process: Step-by-Step Guide
Now that we’ve covered the different types of plaster and their uses, let’s get into the heart of the matter: the actual process of plastering. From my experience, every step counts, and a good finish starts with solid preparation.
Preparation of Work Area and Materials
I’ve lost count of how many times I’ve walked onto a job site and seen the plastering tools all over the place—dirty trowels, tools covered in leftover plaster from previous jobs, or bags of plaster mix left in the rain. It’s a recipe for disaster. The key to a smooth finish? Cleanliness and preparation. It’s like laying the foundation for a good job.
- Cleanliness is Paramount: Before you even think about applying plaster, make sure all your tools are clean. Any debris on your trowels or hawk boards can cause the plaster to mix incorrectly, leading to lumps or poor bonding.
- Protect the Area: Lay out drop-cloths on the floor to shield the surrounding area from dust and spills. Plaster is messy—trust me, I’ve been there! I once had a client in Glen Waverley who didn’t lay down proper covers and ended up having to clean plaster off their brand-new timber floors. Lesson learned.
- Prepare the Wall: Before applying plaster, make sure the wall is free of dust, grease, and any loose bits of old plaster. In one home renovation in Brighton, we had to scrape off old wallpaper and patch up several cracks before we could even begin. If the wall isn’t prepped right, the plaster won’t bond properly, and it’ll start peeling or cracking in no time.
Mixing the Plaster
Plastering is more of an art than it appears. Mixing the right amount of water and plaster is crucial for getting the perfect consistency. Over-mixing or under-mixing can lead to weak or uneven plaster.
- Get the Right Ratio: For cement plaster, the mix should typically be 1 part cement to 6 parts sand for internal walls and 1 part cement to 4 parts sand for external surfaces exposed to moisture. For gypsum plaster, a mix ratio of 12.5 liters of water per bag is ideal.
- Consistency: You want the mixture to be smooth and lump-free, with a consistency similar to peanut butter. Too runny and it’ll drip everywhere; too thick and it’ll be hard to spread evenly. I’ve worked on more than one job where the plaster didn’t set properly because someone added too much water. Always add plaster to water, not the other way around, to avoid the mix turning too thin.
I’ve also worked with a few large commercial projects where we mixed plaster in industrial-sized containers using an electric mixer. It’s faster, but it requires a lot of care—if the mixer speed is too high, you might get air bubbles, which can weaken the plaster. It’s a balancing act that comes with experience.
Applying the First Coat (Scratch Coat / Pricking Up)
Once you’ve got the mix just right, it’s time to start applying the plaster. The first coat, known as the scratch coat, forms the foundation. This layer is crucial because it bonds the plaster to the base wall.
- Application: Scoop the freshly mixed plaster onto your hawk board and use a trowel to apply it to the wall. Start from the bottom corner and move upwards in gentle, smooth arcs. The goal is to cover the surface evenly, making sure the plaster is about 3/8 inch thick.
- Keying: After applying the first coat, use a lath or a suitable tool to scratch the surface, creating small grooves. This gives the second coat something to grip onto, ensuring the plaster stays put and doesn’t peel off later. I remember a job in North Melbourne where we forgot to scratch the first coat properly—it caused issues later, as the second layer didn’t adhere well, and we had to redo parts of the job.
Applying the Second Coat (Float Coat / Browning)
Once the first coat has set just enough (but isn’t fully dry), it’s time to apply the float coat. This is the second layer that gives the wall most of its structure and smoothness.
- Smooth and Even: This coat should be about 1/4 to 3/8 inch thick. You want it finer than the scratch coat to smooth out any rough spots and create a stronger bond.
- Flat the First Coat: Before applying the second layer, you’ll need to flatten the first coat using a speed skim or trowel. Make sure the surface is level so that the second coat goes on evenly without any lumps or bumps.
- Finishing Touches: After the second coat, use a float to smooth the surface. This is where you can add a bit of water to help consolidate the plaster, prevent cracking, and ensure the surface is perfectly smooth.
One of the hardest projects I ever worked on was a large extension in Hawthorn. The wall surface was all over the place, and getting the second coat right took a lot of time and effort. But when it was finished, the surface was so smooth that the client thought we’d used plasterboard—sometimes, it’s the little things that make all the difference!
Spreading and Polishing the Finish Coat (Skim Coat / Setting Coat)
The final coat is where the magic happens. The skim coat gives the wall its flawless finish, so attention to detail here is key.
- Thin and Even: You want this layer as thin as possible, ideally around 3/8 inch or even thinner. The goal is to fill in any tiny imperfections left by the previous coats and to create a smooth, polished surface.
- Use Water for Lubrication: As the plaster firms up, you can use a water brush to lubricate the surface, especially in the corners and edges. This prevents the plaster from tearing or pulling up as you finish it.
- Final Smoothness: You’ll use a trowel to smooth over the entire surface, working the plaster in all directions. The result should be a flawless, glossy finish, perfect for painting or decorating.
I’ve done plenty of finishes like this in the past, but one that stands out was a high-end apartment in Docklands. The client requested a mirror-smooth finish on all the internal walls, and after several hours of meticulous work, the result was something I’d be proud to put my name on. It was a true test of skill, but once that last coat was done, it was all worth it.
Drying and Curing
After the plaster is applied, it’s crucial to give it time to set and cure properly. This part of the job is often underestimated. The plaster might look dry after a day or so, but curing it properly can take a week or more. For cement plaster, you need at least 7 days of curing. For gypsum plaster, the drying time is typically quicker, but make sure it’s fully set before applying paint or wallpaper.
On a recent project in Melbourne’s Fitzroy, we had to wait for a couple of days before painting. The waiting game isn’t always fun, but it’s necessary to ensure that the finish will last and look flawless in the long term.
Common Plastering Defects and How to Fix Them
Even with the best materials and a solid application process, plaster can develop defects over time. Over the years, I’ve encountered just about every plastering issue you can think of, from minor surface cracks to major plaster failures. But the beauty of plaster is that it’s not a lost cause—most problems can be fixed with the right approach.
Blistering
Blistering happens when air pockets or trapped moisture cause the plaster surface to bubble. It often occurs due to improper mixing, late slaking of lime plaster, or too much moisture in the mix. I’ve seen this crop up in older homes with lime-based plasters, where the moisture wasn’t allowed to dry properly before the next layer was applied. The air pockets create small bubbles that can eventually break open and expose the substrate underneath.
De-bonding
De-bonding occurs when the plaster separates from the wall due to insufficient bonding. It’s common in areas where the wall was not prepared properly before plastering—like greasy surfaces, dusty walls, or surfaces that weren’t wetted enough before plaster was applied. I once worked on a job in Richmond where the plaster kept peeling off the walls after a couple of months. Turns out, the surface prep wasn’t done right, and the plaster simply wasn’t sticking.
Cracking (Crazing, Separation, Hollowness)
Cracks are probably the most common plaster defect. They can appear in many forms, from fine hairline cracks (crazing) to more severe separation cracks or even hollowness where the plaster pulls away from the surface. These cracks can be caused by several factors—shrinkage during drying, excessive thickness of the plaster layers, or even structural movement. I’ve had to fix cracks on a few old properties in Collingwood, where the foundations had settled over time, causing the plaster to crack.
Efflorescence
Efflorescence occurs when salts from the plaster or the underlying material migrate to the surface and appear as white, powdery stains. It’s more common in areas with high moisture levels. I once worked on a project in Brighton where efflorescence developed on the internal plaster in the basement due to high humidity levels. It’s unsightly and can be a sign that moisture is getting trapped behind the plaster, which is a big concern in the long term.
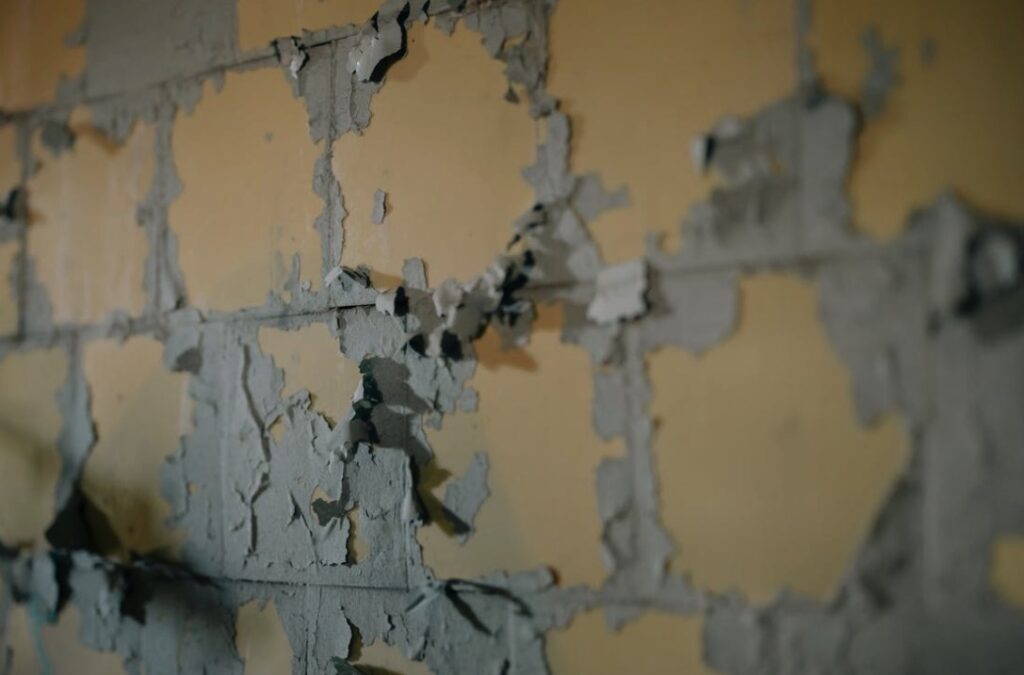
Flaking and Peeling
Flaking occurs when the plaster begins to separate from the surface, usually due to poor adhesion or the plaster drying too quickly. It’s often the result of applying plaster to a dry surface without adequate preparation. I’ve had to fix several cases of peeling in new homes where the walls were not properly primed, causing the plaster to lose its grip after a few weeks.
Popping
Plaster popping is a frustrating defect caused by foreign particles like burned lime or impurities expanding inside the plaster, creating small holes or cones in the surface. It’s more common with cheaper or poorly mixed plaster materials. I once worked on a building restoration in St Kilda where plaster popping kept happening due to poor-quality materials being used.
Loose Plaster
Sometimes plaster comes loose from the wall, usually as a result of poor bonding, moisture damage, or physical impacts. I recall a job on a commercial project in Melbourne where the plaster was lifting off the walls because the original contractor didn’t properly adhere the first coat to the surface. The client wasn’t happy, but we managed to get it sorted.

