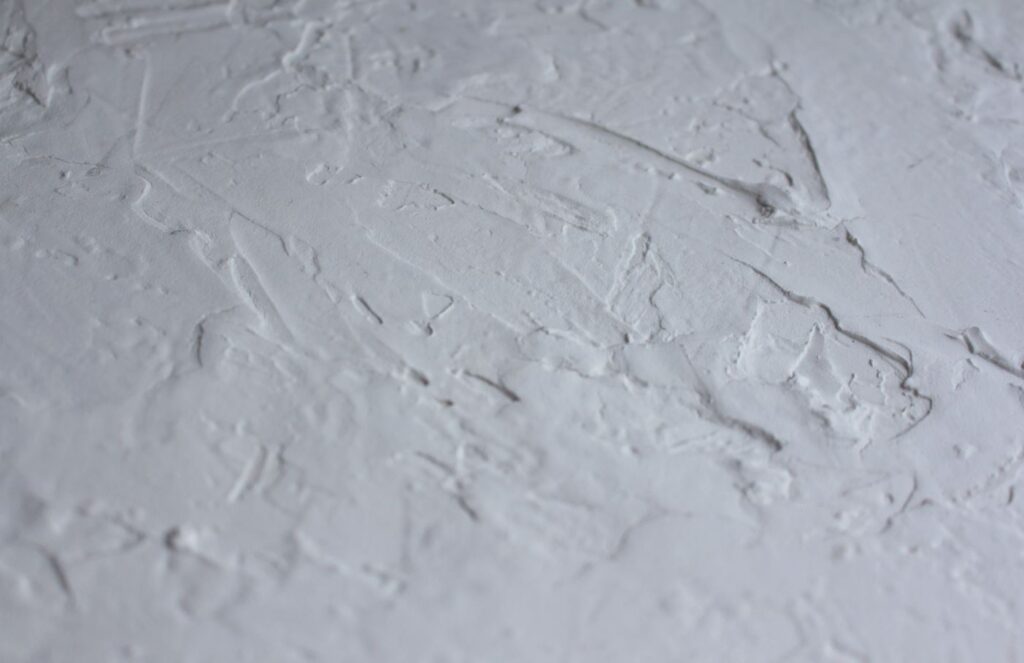
What Are The Methods Of Plastering?

Table of Contents

    A competent tradesperson applies a thin coat of plaster to ceilings and walls to make them smooth and uniform. Plastering can be done in a variety of ways, each optimised for a certain surface or finish. By “solid plastering,” we mean the practice of applying plaster directly to a solid surface, such brick or blockwork. Depending on the desired finish, one or two coats of solid plastering can be applied to interior walls and ceilings.

    The process of “dry lining,” in which plasterboard is fastened to the surface and a thin layer of plaster is applied on top, is another way to plaster. New construction and restoration projects frequently employ dry lining because it is a fast and efficient way of plastering. Walls’ insulating and soundproofing capabilities can be enhanced as a result.

    The third technique for plastering is “float and set,” which entails applying a float coat-the base coat-and a set coat-the finishing coat-in that order. Walls and ceilings can be made to look smooth and long-lasting with the help of float and set plastering. It is critical to select the appropriate plastering method for your unique requirements, as each has its own set of benefits and is best suited to certain kinds of jobs.

    What is a Plaster?

    A thin layer of mortar called plaster is spread over the surface to protect the brick masonry from moisture. Plastering improves the building’s aesthetics by creating a solid and smooth finished surface over the stonework.

    What is The Process of Plastering?

    Walls, both inside and out, can be adorned and protected through the plastering process. Plaster is firm and workable, making applying and providing the necessary strength easier.

    Several procedures involve plastering to get a smooth and complete surface on ceilings and walls. Explaining it simply:

    • First things first: fix any holes or cracks and clean the surface.
    • Step one in making plaster is to mix the powder with water until a smooth paste is formed.
    • Step one in applying the base coat is to level out the initial coat of plaster and give the surface a rough texture.
    • Finishing the coat: To get the desired effect, apply a thinner and smoother layer of plaster.
    • When working with plaster, give it enough time to dry and cure.
    • Last touches: Prime, paint or embellish the surface, and smooth out any irregularities.

    What is The Purpose of Plastering

    Plastering serves multiple vital purposes in building and finishing projects:

    • Finish off the walls and ceilings by making them flat and smooth.
    • Durability and protection: strengthen the substrate’s structure and add a protective layer.
    • For a more pleasing appearance, use a variety of patterns, textures, and decorative finishes.
    • Contribute to soundproofing while also offering some thermal insulation.
    • Protect against the spread of fire and provide other fire-resistant characteristics.

    plastering 1

    What Are The Types of Plaster 

    Various plasters are available, each tailored to certain plastering components.

    Clay Plaster

    The two main ingredients in clay plaster are sand and clay. Compared to traditional plaster, it is less harmful to the environment. Plaster made of clay has been around since the dawn of humanity. This material is beautiful, non-toxic, and made from natural ingredients. The pigments used to colour clay plaster are likewise derived from natural sources, in contrast to the harsh chemicals used in traditional paints. Improved acoustics and air quality are two additional benefits of using clay plaster, which reduces humidity. 

    Lime Plaster 

    You may make lime plaster by combining water, sand, and lime. Slaked lime is one example of a non-hydraulic lime that is commonly utilised. To make the paste of the desired consistency, sand and lime are mixed, and then water is mechanically added to the mixture. Lime plaster is best made using fine sand since the sand proportions govern many qualities, including strength, shrinkage, porosity, and adhesiveness.

    Cement Plaster

    Portland cement, sand, and water are the three main ingredients that make cement plaster. It creates a pleasant surface by making walls both inside and outside smooth, regular, homogeneous, clean, and visually pleasing. Applying a single coat of 12 mm, 15 mm, or 20 mm cement-a stronger material-depends on the strength needs. The only negative aspect of cement plaster is its potential to become expensive and time-consuming. Failure to wait at least seven days may result in efflorescence and shrinkage cracks.

    Gypsum Plaster

    Gypsum plaster is a more environmentally friendly alternative to sand-cement plaster for indoor plastering surfaces. Since there is no need to wait for the plaster to cure, this process is fast, unlike cement.

    What Are The Types of Plastering

    Plastering is typically divided into two main categories based on the location:

    Internal Plastering 

    Internal plastering, as the name implies, is applying a smooth and solid finish to walls within a building. Additionally, the plaster serves as a fire barrier and thermal insulator to a certain degree.

    External Plastering

    “External plastering” covers masonry or blockwork with cement-sand mortar to weatherproof it.

    FAQs About Plastering

    What Are The Key Benefits Of Spray Plastering?

    Spray plastering is known for its speed and uniform coverage. It can also reach areas needing help accessing traditional plastering methods.

    Is There A Specific Type Of Plaster Used For Each Method Of Plastering?

    The type of plaster used may vary depending on the method and project requirements. However, most plaster plasters contain gypsum or cement as their base material.

    Which Method Of Plastering Is Best Suited For Interior Walls?

    Both traditional and machine plastering are commonly used for interior walls, depending on the project size and the desired finish.

    Can The Choice Of Plastering Method Affect The Final Appearance Of The Surface?

    Yes, the choice of plastering method can impact the surface’s texture, smoothness, and overall appearance. Different methods may result in slightly different finishes.

    Are There Any Special Considerations When Selecting A Plastering Method For A Project?

    Factors such as the size of the project, the condition of the surfaces, time constraints, and budget considerations should all be considered when selecting a plastering method. Consulting with a professional plasterer can help determine the most suitable method for your needs.
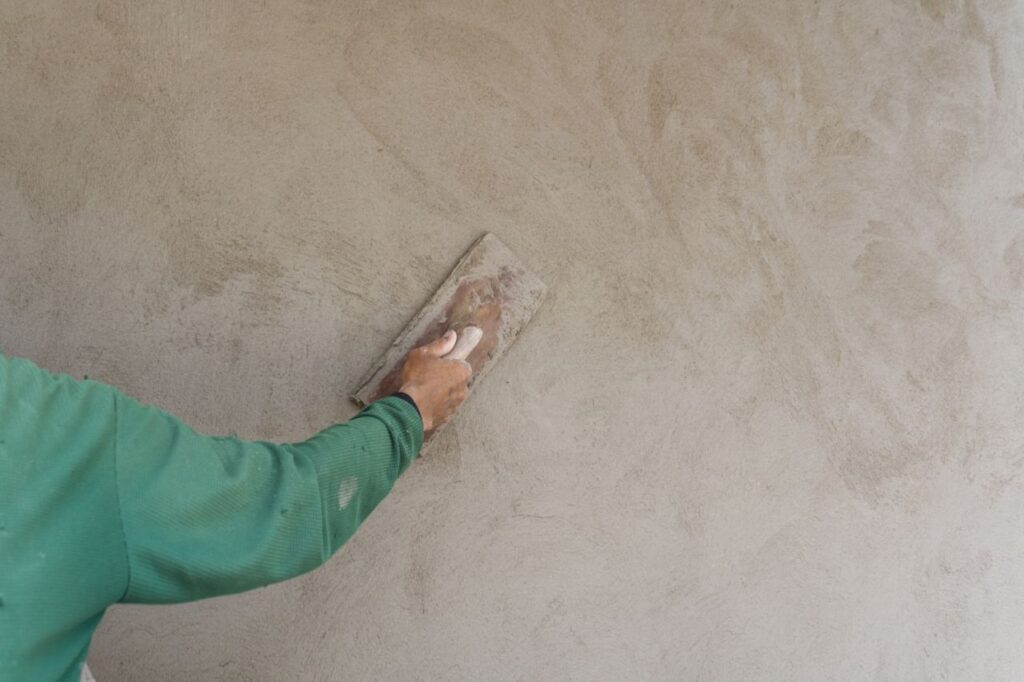
    Methods Of Plastering

    Lime Plaster

    You may apply two coats of lime plaster or three coats. It is important to prepare the background before applying plaster.

    Three-Coat Plaster

    The rendering coat is the first of three coats in a three-coat plaster system. The floating coat is the second coat. The setting coat or finishing coat is the third coat.

    Application Of Rendering Coat

    The mortar is pressed firmly into the joint and over the surface with a mason’s trowel. Coat thickness should be 12 mm or more to cover all surface irregularities. After it has set a little, you can use the edge of a trowel or devil’s float to scrape a crisscross pattern. Scratches can be spaced up to 10 cm apart. At the very least, seven days must pass for the surface to set. Keeping the surface moist and letting it dry entirely are the curing processes during this time.

    Application Of Floating Coat

    Remove any debris, dust, or loose mortar from the rendering coat: It has been thinly soaked. Apply patches measuring 15 cm x 15 cm or 10-centimetre-wide strips at appropriate intervals to serve as gauges. After that, using a mason’s trowel, the mortar is flung, distributed, and rubbed to the desired level of smoothness with a wooden float. All directions should be accurate to the surface that is thus obtained. Quickly apply the finishing coat if using lime-sand plaster. After the floating coat has set slightly, it is lightly beaten into a crisscross pattern with the floats’ edges spaced 4 cm apart in lime-surkhi plaster. After that, it’s let to dry out for ten days to cure and set. Regardless, the coat thickness ranges from 6 to 9 mm.

    Application Of Finishing

    The finishing coat is put immediately following the floating coat in lime-sand mortar. The final coat is a lime cream mixture known as neeru or plaster’s putty, made with a 4:1 ratio of lime cream to sand. It is trowelled with a steel trowel, rubbed until smooth, and polished. It is rubbed until it is completely dry. After the first day, it must be cured for at least seven days. The finishing coat of lime-surkhi mortar is applied seven days following the floating coat. Before this, the surface must be cleaned of any debris, dust, or mortar drops, and the surface of the preceding coat must be thoroughly wetted. The final coat is rubbed vigorously until it is smooth.

    Two-Coat Plaster

    The finishing coat of lime-sand mortar is a mixture of the floating coatings of “three-coat plaster,” except that the rendering coat is not scratched, as stated in the three-coat plaster. This is done in one continuous operation. About 12 mm is the maximum possible thickness. The finishing is applied using a process analogous to the three-coat plaster.

    Cement Plaster And Cement-Lime Plaster

    Two or three coatings of cement plaster are applied. One coat of plaster is occasionally supplied for subpar work.

    Two-Coat Plaster

    In two-coat plaster, the following method is used.

    • Racked the joint to a depth of 20 mm, cleaned the surface, and watered it thoroughly to prepare the background.
    • It is common practice to apply a preparatory coat to fill in any holes in an uneven surface before applying the first coat of plaster.
    • The prescribed thickness of plaster is subtracted by 2 to 3 mm while applying the first coat, also known as the rendering coat, of plaster. Plaster screeds are created on the surface of walls by fastening dots that are 15 cm x 15 cm in size. This ensures that the plaster remains constant in thickness. A plumb bob is used to plummet two dots constructed in a vertical line and spaced around 2 metres apart. Next, a mortar strip called a screed is created in a vertical orientation. At appropriate intervals, a series of these vertical screeds are created. The final step in finishing a surface is to apply cement mortar in the spaces between the screeds.
    • A mechanical key for the finishing coat can be worked in before the rendering solidifies. The rendering coat is pushed firmly into the joints and all over the surface, causing the mortar to flow. Keeping the rendering coat moist takes at least two days before it can dry entirely.
    • Finishing coats can range in thickness from 2 to 3 millimetres. It is necessary to dampen the rendering coat evenly before applying the final layer. After applying wooden floats, the last coat is smoothed with steel trowels. To minimise the appearance of joining marks, applying the finishing coat in a single operation, working from top to bottom, is recommended.

    worker building

    Three-Coat Plaster

    A floating coat is put between the two coats of plaster in a three-coat plaster method identical to the two-coat plaster procedure. Applying a second coat of plaster will level out the surface. The thickness of the rendering coat is maintained between 9 and 10 mm, that of the floating coat between 6 and 9 mm, and that of the finishing coat between 2 and 3 mm. It is roughened to make the rendering coat. You’ll apply the floating coat approximately four to seven days following the initial application. It is recommended to wait approximately 6 hours after applying the floating coat before applying the finishing coat.

    Single-Coat Plaster

    This is reserved for low-quality projects. The application is the same as two-coat plaster, except the rendering coat is put immediately after the first coat has hardened, as in two-coat plaster.

    Defects in Plastering

    • Splits: Splits, either narrow lines or bigger ones, show up on the plastered surface. Thick plaster shrinkage or shoddy construction is to blame. As long as the plaster is kept uniformly thick and cured properly, it will not crack.
    • Because the brick or mortar contains soluble salts, efflorescence occurs. A solution of zinc sulphate and water washed over the surface will remove this flaw.
    • Inadequate water bondage, or the dry wall’s inability to absorb water, is the cause of plaster falling off. To prevent this flaw, ensure the junction is clean and the wall is well-watered before applying plaster. It is recommended that the plastered surface be left to cure for at least ten days.

    Conclusion

    During the building process, plastering covers brick brickwork with a smooth, solid surface to keep it dry and make the building look better. Fixing holes or cracks, putting down the base coat, finishing the coat, letting it dry and cure, and then painting or priming the surface are all parts of the process. Plastering is used for many things in building and finishing projects, like covering up walls and ceilings, making things last longer and safer, adding style, blocking noise, keeping heat in, and being fire-resistant.

    There are different kinds of plaster, and each one is made to work with certain parts of the building process. Sand and clay are mixed together to make clay plaster, which is better for the climate and has been used since the beginning of time. Lime plaster is made by mixing water, sand, and lime. Fine sand is best for making lime plaster because it is strong, doesn’t shrink, has holes in it, and sticks well. Cement plaster is made up of three main ingredients: Portland cement, sand, and water. It makes walls smooth, even, clean, and aesthetically acceptable. For indoor sealing surfaces, gypsum plaster is better than sand-cement plaster because it is better for the environment.

    There are two main types of plastering: internal and external. Internal plastering gives the inside walls of a building a smooth, solid finish. External plastering covers brickwork or blockwork with cement-sand mortar to keep it weatherproof. There are different ways to plaster, such as lime plaster, three-coat plaster, and setting coat.

    Putting on finishing coats in painting takes more than one step. First, the floating coat is put on with lime-sand mortar. Next, the final coat is put on with neeru, which is a lime cream mixture that looks like putty. This mix is rubbed, troweled, and finished. It takes at least seven days for the last coat to dry. Seven days after the floating coat, the finishing coat of lime-surkhi mortar is put on.

    The top coat of lime-sand mortar is made up of the floating layers of “three-coat plaster,” but the drawing coat is not scratched. This is done all at once, and the thickest layer that can be used is 12 mm.

    There are two or three ways to use cement plaster and cement-lime plaster. In two-coat plaster, the joint is cleaned, racked to a depth of 20 mm, and wet well. Before the first coat is put on, a preparatory coat is used to smooth out any rough spots. Two to three millimetres are taken off of the rendering coat, and steel trowels are used to smooth out the last layer.

    A floating coat is put on between the two coats of three-coat plaster to keep the width between 9 and 10 mm. After six hours, the last layer is smoothed out. Single-coat plaster is only used for cheap jobs.

    Content Summary

    • Plastering is a construction method that creates smooth walls and ceilings.
    • Plaster is a thin layer of mortar that protects masonry from moisture and enhances aesthetics.
    • The plastering process involves applying mortar to walls and ceilings to create a durable and smooth surface.
    • Preparing the surface, mixing plaster, applying base coats, and finishing coats are steps in plastering.
    • Plastering serves to finish walls and ceilings, add durability, enhance appearance, and provide insulation and fire resistance.
    • Clay plaster, made from sand and clay, is environmentally friendly and has been used since ancient times.
    • Lime plaster, made from water, sand, and lime, is breathable and suitable for historic buildings.
    • Cement plaster, made from Portland cement, sand, and water, offers a smooth finish for interior and exterior walls.
    • Gypsum plaster is a quick and eco-friendly alternative to sand-cement plaster for indoor surfaces.
    • Internal plastering focuses on applying a smooth finish inside buildings.
    • External plastering involves covering masonry or blockwork with mortar for weatherproofing.
    • Lime plaster can be applied in two or three coats, depending on the project requirements.
    • The three-coat plaster system includes a rendering coat, a floating coat, and a finishing coat.
    • The rendering coat is applied first to level the surface and provide texture.
    • The floating coat is added to further smooth the surface and prepare it for finishing.
    • The finishing coat is applied for a smooth and complete surface.
    • Two-coat plaster involves a rendering coat and a finishing coat for simpler projects.
    • Cement plaster can be applied in two or three coats, offering durability and a pleasing appearance.
    • Single-coat plaster is used for lower-quality work and is applied similarly to two-coat plaster but without a separate finishing coat.
    • Defects in plastering include cracks, efflorescence, and plaster falling off due to various causes.
    • Cracks in plaster can result from thick plaster shrinkage or poor workmanship.
    • Efflorescence, a white powdery substance on plaster, is caused by soluble salts in brick or mortar.
    • Plaster falling off can occur due to inadequate water bondage or the wall’s dryness.
    • Proper curing and thickness consistency can prevent cracks in plaster.
    • Efflorescence can be removed by washing the surface with a solution of zinc sulphate and water.
    • Ensuring a clean junction and sufficient wall watering can prevent plaster from falling off.
    • Clay plaster offers enhanced acoustics and air quality by reducing humidity.
    • Lime plaster’s sand proportions affect its strength, shrinkage, porosity, and adhesiveness.
    • Cement plaster’s strength depends on the application thickness and the material’s inherent properties.
    • Gypsum plaster allows for faster project completion due to no need for curing.
    • The choice between lime, cement, gypsum, or clay plaster depends on project requirements and environmental considerations.
    • Plastering not only improves aesthetics but also adds a protective layer to buildings.
    • Various plaster types cater to specific needs, such as environmental friendliness or suitability for historic restoration.
    • Pre-mixed and one-coat lime plasters offer convenience but may have different material requirements.
    • Proper surface preparation is crucial for effective plaster adhesion and finish.
    • Plastering techniques have evolved, incorporating modern materials and methods.
    • The curing process is essential for the plaster’s durability and finish quality.
    • Final touches may include priming, painting, or applying decorative finishes to the plastered surface.
    • Each type of plaster has unique properties that make it suitable for specific applications.
    • Understanding the differences between plasters helps in selecting the right one for a project.
    • Plastering techniques range from traditional methods to those utilising contemporary materials.
    • The purpose of plastering extends beyond aesthetics to include building protection and insulation.
    • The process of plastering requires skill, attention to detail, and knowledge of materials.
    • The right plaster choice enhances the building’s overall performance and appearance.
    • Effective plastering contributes to the longevity and integrity of the structure.
    • Plastering is an art that combines technical skill with creative expression.
    • The historical context of a building may influence the choice of plaster.
    • Modern plastering materials offer improved performance and ease of application.
    • The durability of a plaster finish depends on proper application and maintenance.
    • Plastering remains a vital aspect of construction, blending tradition with innovation.
    Posted in
    Scroll to Top