Repairing plaster walls might seem like a daunting task, but with the right tools and a bit of know-how, it’s something anyone can tackle. Whether you’re fixing up cracks in an old heritage home in Melbourne or smoothing out some damage from a leaky roof, the key to success lies in having the essential tools plaster wall repair requires. Over the years, I’ve learned that the right plaster repair tools not only make the job easier but also deliver results that last.
In this guide, I’ll walk you through the essential tools you’ll need for plaster wall repair, share some insider tips, and help you avoid common pitfalls so your wall repairs are smooth, strong, and professional-looking.
Essential Tools for Successful Plaster Wall Repair: A Complete Guide
Repairing plaster walls might seem like one of those jobs that only the pros should tackle, but I’m here to tell you that, with the right tools and a bit of patience, anyone can do it. After all, I’ve seen my fair share of cracked walls—whether it was from the humidity in Melbourne’s winter or the usual wear and tear in old homes. It’s a job I’ve done hundreds of times, and I can tell you that getting the right plaster wall repair tools is key to making the process a lot smoother (and saving yourself a bit of cash).
Let’s go through the essential tools you’ll need for a successful plaster wall repair job. I’ll also toss in a few personal tips to help you avoid the mistakes I’ve made over the years.
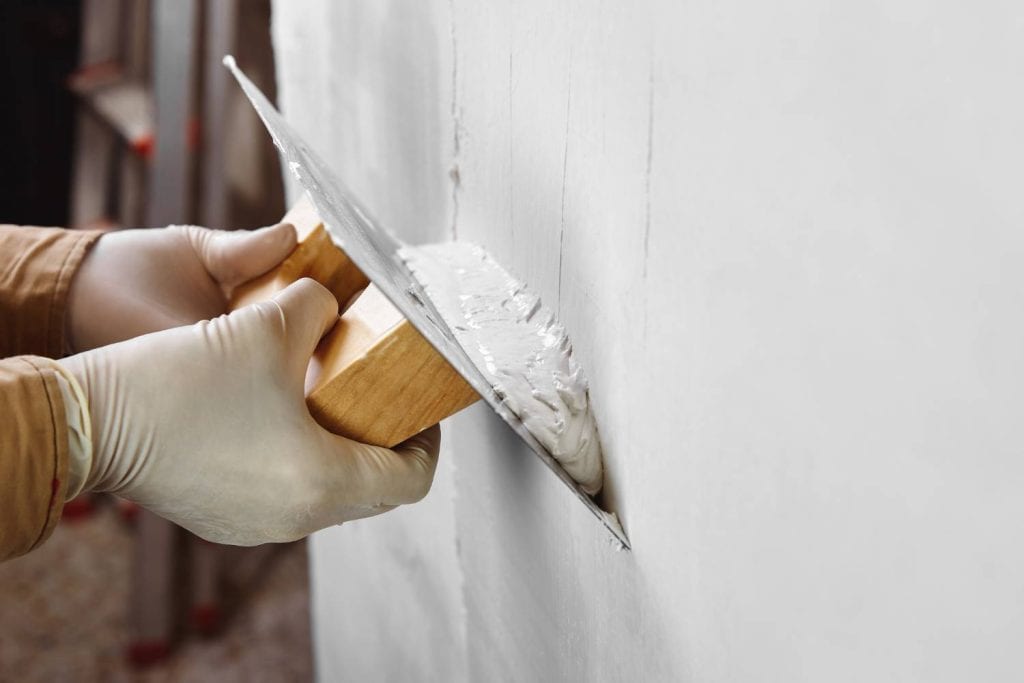
Plastering Trowel: The All-in-One Tool for Smoothing and Application
If you’re thinking of plastering a wall, the trowel is your best mate. It’s the tool I always grab first. Over the years, I’ve tried a few different types, but I’ve learned that a good trowel is worth its weight in gold.
My tip? Start with a 12-inch rectangular trowel. It’s sturdy and gives you good control, especially when you’re just starting. But, if you’re looking for something more versatile, I’d recommend going for a 14-inch trowel—it lets you spread plaster more evenly without overworking your wrist.
You’ll also want to “break in” your new trowel—sanding the corners a bit to smooth out any sharp edges. Trust me, this will help you avoid those annoying lines that show up on the wall when you’re trying to make a smooth finish.
Spackle Knife/Putty Knife: Achieving Smooth Surface Finish
When it comes to applying your patching compound and smoothing out the surface, a good spackle knife is crucial. I can’t tell you how many times I’ve had to knock down high points or uneven surfaces before applying the plaster, and the putty knife is my go-to tool for that.
Personal experience: One of my first big plaster repairs was in an old home in St Kilda, where the walls were all over the place. I had to scrape off the old plaster, fill the cracks, and then smooth everything out. Having a high-quality spackle knife meant I didn’t have to worry about lumpy patches. It made all the difference.
Taping Knife: The Tool for Thin Layers and Seamless Joints
Now, for those of you who are getting into more advanced repairs (or if you’re dealing with joints), the taping knife is a must-have. I use this tool when I need to apply a thin layer of compound or smooth out the veneer plaster over mesh tape.
The key here is to pick a knife that’s wider than the area you’re working on. This will help you avoid any unsightly ridges and give you that seamless finish that makes the wall look like it was never damaged.
Paintbrush: Ensuring a Smooth Finish
Once your plaster is applied, there’s one last thing that often gets overlooked: smoothing out the surface with a damp paintbrush. I’ll be honest, I didn’t realise how much of a difference this made until I started doing it. A 4-inch thick-bristled paintbrush is perfect for this job.
Here’s what I do: I lightly mist the wall with water before using the brush to smooth out the surface. This makes the trowel glide over the plaster more easily and helps avoid dragging, which can create rough patches. I prefer a high-quality brush like the Purdy all-paint brush—it holds water well and cleans up in a jiffy.
Gallon Bucket: Essential for Mixing Plaster and Compound
You might think any old bucket will do, but I’ve learned the hard way that a sturdy bucket is essential, especially when you’re working with wet plaster. A 5-gallon bucket is big enough to handle multiple mixes and is strong enough to withstand the heavy weight of plaster.
Pro tip: Get a bucket with pre-measured marks. It’s a small thing, but it makes the mixing process so much faster and more accurate.
Also, while hard plastic buckets might seem durable, I actually prefer flexible rubber tubs. They make cleaning up a breeze, as the dried plaster can easily be removed by just tapping the sides of the tub.
One thing I never skip is cleaning the bucket properly after each use. A dirty bucket will ruin your next batch of plaster with contaminants, so make sure it’s spotless.
Paddle Mixer: The Must-Have for Quick, Consistent Mixing
Now, let’s talk about mixing. Back in the day, I used to mix plaster by hand with a stick—let’s just say, that didn’t end well for my arms. If you’ve got a big project on your hands, you’ll definitely want a paddle mixer.
You can attach a paddle mixer to your drill, and it’ll save you a lot of time and effort. I’ve found that a drill with a good-quality paddle attachment makes mixing the plaster a lot quicker and ensures that you get the right consistency without any lumps. A cheap paddle might do the job, but if you’re planning on doing more plastering in the future, invest in something sturdy.
In my early plastering days, I once mixed a whole batch of plaster by hand and had to stop halfway because the consistency wasn’t right—it’s not something I’d ever recommend. The paddle mixer was a game-changer for me. It’s not just for plaster either; I’ve used it for all sorts of wall compounds over the years.
Mixing Stick: A Simple Tool for Perfectly Blended Plaster
If you’re just mixing small amounts or working in tight spaces, you might find a mixing stick useful. It’s nothing fancy—a simple wooden or plastic stick, but it’s perfect for stirring smaller batches of plaster or compound.
I’ve used mixing sticks in many tight spots where a paddle mixer wouldn’t fit, especially in confined areas like corners or small patches. It’s also great for when you need to mix just a small amount of plaster for quick touch-ups.
Preparation and Removal Tools for Plaster Repair Success
Before you can patch up the cracks and holes in your plaster, you’ve got to do a bit of prep work. You can’t just slap new plaster on top of the old; you need to remove any loose or damaged material first.
Hammer: A Versatile Tool for Chipping and Removing Plaster
A hammer is one of those tools you probably already have lying around, but it’s essential for this kind of work. I use two types of hammers regularly: a claw hammer and a drywall hammer.
The drywall hammer is especially useful because of its hatchet-style end and curved face, which helps with dimpling high spots and chipping out old plaster. When you’re trying to remove damaged plaster without disturbing the rest of the wall, this tool really shines.
I once worked on a place in Footscray where the plaster had loosened in big chunks after a water leak. I had to carefully chisel away at the damaged plaster. If I hadn’t had the right hammer, I would have ended up doing more damage to the wall.
Handsaw and Utility Knife: Cutting Plaster and Lath with Precision
When you’re repairing plaster, you may need to cut through the wooden lath that holds the plaster in place. For this, I recommend using a handsaw or a utility knife.
I’ve used a box saw with advanced tooth geometry to cut through narrow strips of lath, which works really well for more precise cuts. A jab saw is also helpful for making plunge cuts in sections of old plaster when you need to cut out the damaged areas.
Personal tip: A utility knife is perfect for scoring plaster or cutting smaller patches from drywall sheets. One time, I had to trim a piece of drywall to fit a small patch in a Richmond reno. The utility knife made it easy to get a clean cut, and it saved me from hauling out a big saw for such a small task.
Wall Scraper: Essential for Smoothing Edges and Removing Excess Plaster
The wall scraper is perfect for cleaning off excess plaster, smoothing edges, or removing any stubborn spots that you might’ve missed. When you’re trying to get a neat finish, you don’t want any rough edges or blobs of plaster sticking out.
A wall scraper is one of those underrated tools that makes all the difference. I’ve had countless jobs where it’s the final step before the plaster goes up smoothly. I use it to clean the edges of a patch and make sure there’s no excess material, especially in corners.
Drill/Driver: Securing Lath and Drywall Patches with Precision
For securing lath or drywall patches, you’ll need a drill/driver. This tool is great for driving screws into the wall to hold everything in place while the plaster sets.
Pro tip: When working with lath, it’s best to drill pilot holes before driving screws in to avoid splitting the wood. I’ve had to deal with a lot of cracked lath when I didn’t take this extra step early on—learn from my mistakes!
Stud Finder: Avoiding Damage When Cutting into Plaster
A stud finder is a great investment to avoid hitting the studs when cutting into plaster. The last thing you want is to accidentally damage your studs while you’re trying to repair the wall. I always use a stud finder before cutting or drilling to ensure I’m only going through the plaster, not the structural framework.

Finishing and Blending Tools for a Professional Look
Once the plaster is applied and your patches are set, the real work begins—smoothing, blending, and finishing the surface to make everything look seamless. This is where the quality of your tools really shows.
Sanding Block and Sandpaper: Perfecting the Smoothness of Plaster
After your plaster has dried, the key to a professional finish is in the sanding. I use a sanding block with medium-grit sandpaper (120-150 grit) to get rid of any rough edges or high spots. For a smooth, polished finish, I finish off with a fine-grit sandpaper (220-grit or 320-grit).
Personal tip: Always sand in circular motions to avoid deep scratches, and make sure not to sand too much. I’ve ruined plenty of plaster repairs in my earlier days by over-sanding and accidentally exposing the underlying mesh tape.
Feather Edge Plastering Tool: Achieving a Level Surface
The feather edge plastering tool is ideal for smoothing out large areas of plaster. It helps you level the surface and remove any excess plaster without leaving marks.
This tool is a real lifesaver when you’re working on large patches. On one big commercial job in Carlton, I used a feather edge tool to smooth out a massive wall repair, and it helped me get that perfect, professional finish in half the time it would have taken with just a trowel.
Corner Trowel (Optional): Ensuring Perfect Corners in Plaster Walls
If you’ve ever struggled to get a clean corner on a plaster wall, you’ll appreciate the corner trowel. While not essential, it’s handy for achieving sharp, smooth corners—especially if you’re working on an intricate repair or restoration.
I’ve used it on smaller repairs, but I’ll admit, most experienced plasterers (myself included) prefer using a regular trowel to finish corners once the plaster starts to set. But if you’re new to plastering, this tool can definitely help.
