Plaster walls, known for their durability and aesthetic appeal, are prone to cracks over time. These cracks can occur for various reasons, such as temperature changes, building movement, and regular wear and tear.
Fortunately, repairing plaster cracks is straightforward and can be done using tools and materials commonly available at hardware stores. This guide will walk you through how to repair cracks in plaster walls, ensuring a long-lasting and seamless finish.
Let’s get straight to the point.
Repairing cracks in plaster walls is a straightforward process that helps maintain their durability and aesthetic appeal. Cracks can result from temperature changes, building movement, or structural issues.
Small cracks can be filled with spackle or joint compound, sanded, and painted for a seamless finish. Larger cracks require drilling holes, applying plaster in layers, and reinforcing with fibreglass tape.
For missing sections, a bonding agent and multiple layers of plaster help restore the wall. Proper sanding and priming ensure a smooth blend with existing surfaces. Most plaster repairs can be done efficiently with the right tools and techniques.
Why Do Plaster Walls Crack?
Plaster walls crack for several reasons. Understanding these reasons can help you prevent future cracks and choose the best repair method. Common causes include:
- Temperature and environmental changes: Extreme temperatures can cause plaster to expand and contract, leading to cracks.
- Building movement: As buildings settle over time, plaster may shift and crack, especially around windows, doors, and chimneys.
- Structural issues: Rotting sills, weak floors, or insufficient framing can cause movement, leading to cracks in the plaster.
- External forces: High-traffic areas, nearby construction, or train vibrations can stress plaster walls and cause them to crack.
- Lack of heating: The expansion and contraction of materials can lead to cracks in buildings that aren’t heated during cold months.
Preparing For The Repair
Gathering the right materials and tools before starting any plaster repair is essential. This will ensure that the repair process is efficient and effective.
Tools and Materials You’ll Need:
- Dust mask and safety goggles
- Ladder
- Putty knife
- Utility knife
- Sandpaper (fine grit)
- Joint compound or plaster
- Fibreglass wallboard tape (optional)
- Drill with masonry bit (3/16-inch)
- Rag for cleaning
- Plastic drop cloths
- Painter’s tape
- Sanding block
Protect Your Workspace
Before starting the repair, lay down plastic drop cloths to protect the floor. Secure the drop cloths with painter’s tape.
Sanding plaster creates dust, so seal off the work area with plastic sheeting to prevent dust from spreading into other parts of the house.
Inspect The Damage
Examine the cracks closely. Small hairline cracks can usually be repaired with spackle or joint compound, while larger or deeper cracks may require plaster.
Assess whether there is any underlying structural issue, such as moisture or rotting wood that may be causing the cracks, and address these issues before proceeding with the repair.
How To Repair Small Cracks In Plaster Walls?
The process is relatively simple for small cracks and doesn’t require extensive materials.
1. Clean And Prepare The Crack
Using a utility or putty knife, scrape away any loose plaster around the crack. Wipe the area with a damp rag to remove dust and debris.
Ensuring the crack is clean will help the new plaster or compound adhere properly.
2. Apply Spackle Or Joint Compound
Spackle works well for minor cracks. Use a 2-inch putty knife to fill the crack with spackle, pressing it firmly into the crack. Smooth the surface to match the surrounding wall.
Allow it to dry according to the manufacturer’s instructions.
3. Sand And Reapply If Necessary
Once the spackle has dried, sand the area lightly with fine-grit sandpaper to smooth the surface. If the crack is still visible, apply a second layer of spackle and repeat the process.
Repairing Larger Cracks Or Damaged Plaster
Larger cracks or damage may require more effort, especially if the plaster has started to come away from the lath (the wooden structure behind the plaster).
1. Drill Into The Plaster
Using a 3/16-inch masonry bit, drill holes every 3 inches along the crack. Be careful to stop drilling once you reach the lath.
These holes help anchor the plaster back to the wall. It’s important to avoid using adhesives or primer in these holes.
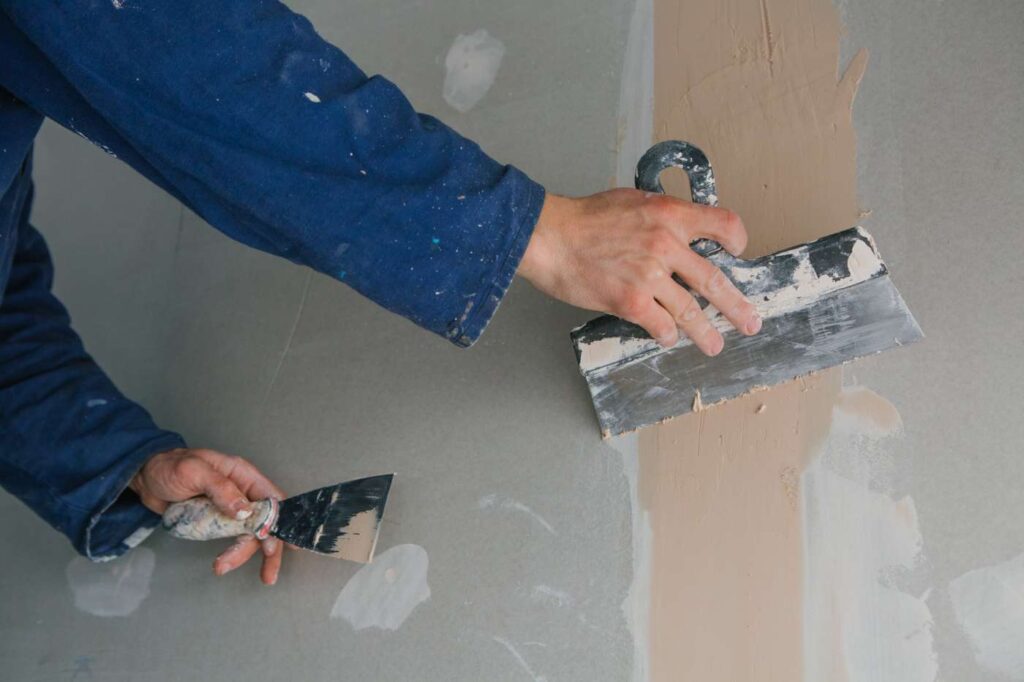
2. Apply Plaster
Mix the dry plaster according to the instructions and apply it over the crack using a putty or plaster knife. Start by filling the holes you drilled, then spread the plaster smoothly over the surrounding area.
Ensure the new plaster is level with the existing wall. Let the first coat dry for 24 hours before applying a second coat.
3. Sand And Smooth
After the plaster has dried, sand the area with a fine-grit sandpaper. For a smooth finish, apply a final layer of joint compound and feather it out 6 to 12 inches from the original crack.
Sand again once dry.
Repairing Plaster Cracks In Corners
Corner cracks are common due to movement and regular wear and tear. Repairing corner cracks requires a slightly different approach.
1. Fill The Crack
Begin by cleaning and filling the crack with plaster, just like a flat wall crack. Use a putty knife to shape the corner.
After the plaster has dried, apply fibreglass wallboard tape to reinforce the corner and prevent future cracking.
2. Sand And Refinish
Once the plaster and tape have dried, sand the corner lightly to smooth it. Apply a thin coat of joint compound over the tape, feathering it on both sides of the corner.
Sand again for a seamless finish.
Patching Missing Sections Of Plaster
The plaster may be missing entirely due to damage from a door frame installation or accidental impact. Patching these areas requires a slightly more involved process.
1. Remove Loose Plaster
Use a hammer and chisel to remove loose plaster around the damaged area. Clean out the debris with a vacuum to ensure the surface is ready for repair.
2. Apply Latex Bonding Agent
Brush a latex bonding agent onto the exposed lath or drywall. This helps the new plaster adhere properly.
Once the bonding agent is applied, mix the plaster and apply it in thin layers, allowing each layer to dry before applying the next.
3. Build Up The Plaster
Build up the plaster to the level of the surrounding wall, using a cross-scratching method to help each layer bond. The final coat should be smooth and even with the rest of the wall.
Final Steps: Sanding And Painting
Once the plaster is fully dry, it’s time to sand the area to achieve a smooth finish. Use fine-grit sandpaper and a sanding block to lightly sand the surface.
After sanding, wipe the wall down with a damp sponge to remove dust. Prime the area before painting.
Use a good-quality primer to ensure the new plaster blends seamlessly with the surrounding wall. After priming, paint the area to match the rest of the wall.
Conclusion
Repairing plaster walls doesn’t have to be difficult. With the right tools and techniques, you can quickly fix cracks and damaged areas, ensuring your plaster walls remain in good condition for years.
While plaster repairs can be done by anyone with the right approach, larger cracks or more extensive damage may require the assistance of a professional.
However, by following this guide, you can handle most plaster repairs yourself, saving time and money while maintaining the character and integrity of your plaster walls.
Frequently Asked Questions About Plaster Wall
Is It Normal for Plaster Walls to Crack?
Old lath and plaster walls are prone to cracking. This is because, over time, the plaster separates from the lath, creating structural cracks. Plaster is also prone to thinner spider-web cracks, which occur when the top coat of the plaster degrades. It’s common to have both kinds of cracking – and both types can be repaired.
What Is the Best Filler for Cracks in Plaster?
Gyproc light is probably the best all-around filler on the market. You can make deep holes with it without any issues, and there is never any flashing. It’s hard to ignore Toupret fillers, though.
How Can I Fix My Cracked Walls Permanently?
Cover the crack with either mesh joint tape or joint compound and paper tape, followed by a thin layer of joint compound, extending about 2 inches on each side of the tape. Allow drying. Apply a second coat of joint compound, feathered approximately 6 to 7 inches on either side of the crack. Allow drying overnight.
How Do You Get Rid of Hairline Cracks in Plaster?
How to repair hairline cracks in plaster
- Widen it. The first step to fixing a small crack is to widen it.
- Brush off the dust. Clear the affected area of dust or any dirt sticking to it.
- Cut strips of tape.
- Apply the joint compound.
- Apply the joint tape.
- Apply another layer of joint compound over the tape.
- Prime it.
How Do You Stop Plaster Cracks From Reappearing?
The secret to ensuring that the crack doesn’t reappear is just down to using jointing tape. This method works every time, and it doesn’t matter if you’re plastering over it, using a filler like we did here or even if you’re installing plasterboards (where you have to tape the join to ensure it doesn’t crack).
