In-home improvement, plastering stands out as a skill that marries precision with creativity, turning ordinary spaces into masterpieces of smoothness and durability. In this blog, we will discuss the meticulous process of ceiling plastering. From the initial stir of plaster to the final, satisfying sweep of the trowel, we’ll navigate together through the layers of preparation, application, and finishing touches that promise to elevate the look and feel of any room.
Whether you’re looking to refresh an old, tired surface or embark on a complete renovation, this blog will arm you with the knowledge, techniques, and confidence needed to achieve a professional-quality ceiling without needing expensive contractors. So, roll up your sleeves and turn that daunting task into a rewarding project, transforming your ceiling into a testament to your DIY prowess and a focal point of pride in your home.
The Essence Of Plaster
Plaster, primarily made from gypsum, lime, or cement, is applied over lath (a supportive framework) or directly onto surfaces to create a smooth or textured finish. Historically, it served as the go-to choice for wall and ceiling finishes due to its ability to mould into any shape, providing a seamless and elegant look. Its application involves a meticulous process that includes preparing the mix, applying several coats, and ensuring a smooth finish.
Benefits Beyond Beauty
The advantages of using plaster for ceilings extend beyond its visual appeal. It offers superior durability and fire resistance, making it a safer option than other materials. Plaster’s sound-dampening qualities also create quieter, more serene indoor environments. Moreover, its ability to accommodate intricate designs and textures allows for customised decorative finishes, catering to diverse aesthetic preferences.
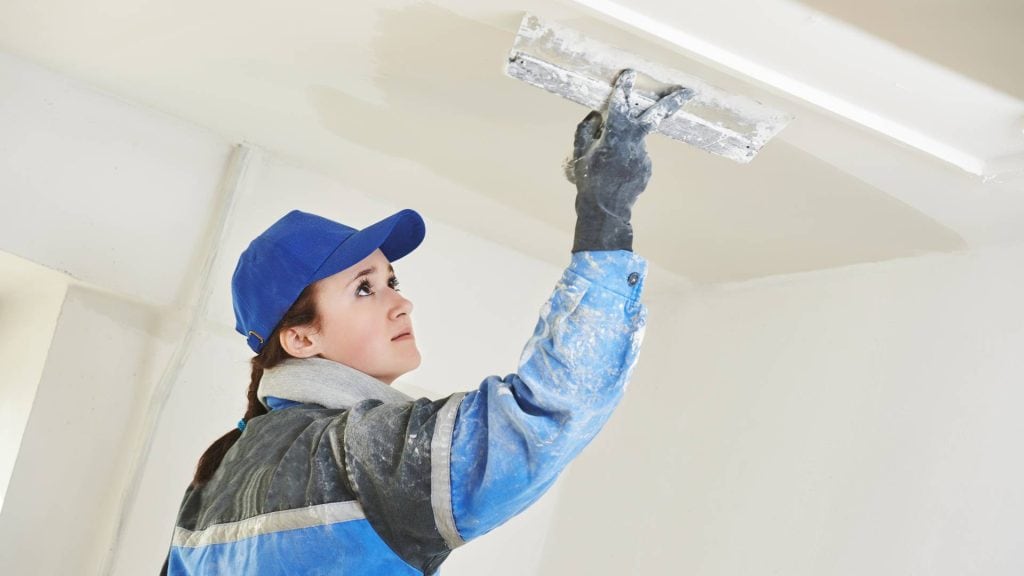
Application Techniques
The application of ceiling plaster is an art that requires precision and skill. It begins with preparing the surface, followed by applying a base coat or scratch coat. This initial layer is crucial for achieving a strong bond with the surface.
Subsequent layers, including the finish coat, are applied to achieve the desired texture and smoothness. Modern advancements have introduced materials that mimic the look and feel of traditional plaster, offering easier application and maintenance.
Challenges And Solutions
Despite its many benefits, plaster can present challenges, such as developing cracks over time due to structural movement or environmental factors. However, with proper techniques and materials, these issues can be effectively addressed, restoring the plaster’s integrity and appearance. In cases where the preservation of historical features is a priority, skilled professionals can employ specialised restoration techniques to maintain the original character of the plasterwork.
Preparation For Ceiling Plastering
Transforming your ceiling with plaster can dramatically change the appearance of any room, making it look fresh and new. However, the key to a successful plastering job lies in thorough preparation.
Assessing The Ceiling’s Condition
Before you begin, it’s crucial to assess the current state of your ceiling. Look for any signs of damage, such as cracks, holes, or uneven areas needing repair. Identifying these issues early on will allow you to address them properly, ensuring a solid foundation for the new plaster. Use a torch or flashlight to help spot less visible imperfections, and consider the type of plaster that will best suit your ceiling’s needs.
Gathering Your Tools And Materials
The right tools and materials are essential for a successful plastering project. Your toolkit requires plastering, a hawk board, a bucket trowel, a power mixer, and a high-quality paintbrush. Each tool plays a specific role in the plastering process, from mixing to application, and choosing tools that feel comfortable and balanced in your hand will make the job easier.
Preparing The Ceiling Surface
A clean and stable surface is vital for plaster adherence. Start by removing any loose plaster, dust, or debris from the ceiling. If there are any stains or grease marks, clean them thoroughly with a mild detergent solution. Use a suitable filler or patching compound for cracks or holes to create a smooth, even surface. This step ensures that the new plaster will adhere properly and last longer.
Mixing And Applying The Plaster
Mixing the plaster to the right consistency is crucial. Follow the manufacturer’s instructions carefully, aiming for a smooth, lump-free mixture. When applying the plaster, start from one end of the ceiling and work in small sections. Use your trowel to spread the plaster evenly, employing techniques like feathering and cross-hatching to minimise lines and achieve a smooth finish.
Smoothing And Leveling The Plaster
After applying the plaster, the next step is to smooth and level it to perfection. Techniques such as wet trowelling and using a clean sponge can help eliminate imperfections and create a uniform texture. Fine-grit sandpaper can be used to sand down any stubborn bumps or rough patches.
Finishing Touches
Once the plaster has dried completely, it’s ready for painting or any other finishing touches you have in mind. Choose a high-quality paint that complements your room’s decor and apply it evenly across the ceiling. This final step will seal the plaster and give your ceiling a professional, polished look.
Mixing The Plaster For Ceiling
Achieving a smooth, flawless ceiling starts with the perfect plaster mix. Whether you’re a seasoned DIY enthusiast or a first-timer, understanding how to mix plaster correctly is crucial for a successful ceiling plastering project.
Understanding Plaster Components
Plaster is a versatile material used for giving ceilings a smooth finish. It typically consists of gypsum, lime, or cement, mixed with water to create a spreadable paste. The key to a good plaster mix is achieving the right consistency and texture, which requires precision and attention to detail.
Step 1: Preparing The Mix
Start by reading the manufacturer’s instructions on your plaster bag. Different types of plaster require specific water-to-plaster ratios. Generally, you’ll want to start with water in your mixing bucket to prevent the plaster from clumping when added.
Step 2: Adding Plaster To Water
Gradually add plaster to the water, sprinkling it in slowly while stirring. This method helps prevent lumps from forming. The plaster should be added to the water, not the other way around, to ensure a smooth consistency.
Step 3: Achieving The Right Consistency
The ideal plaster consistency is similar to thick yogurt or peanut butter. It should be smooth and creamy but not too runny or stiff. If the mix is too thick, add more water; if it is too runny, add more plaster. However, do this cautiously to keep the mix manageable.
Step 4: Mixing Thoroughly
A drill with a mixing paddle is the most efficient way to achieve a lump-free mixture. Mix at a moderate speed to avoid introducing too much air into the plaster, which can cause bubbles. If mixing by hand, use a sturdy mixing tool and mix thoroughly until the consistency is even throughout.
Step 5: Letting The Plaster Rest
After mixing, let the plaster sit for a few minutes. This resting period allows air bubbles to rise to the surface and pop, resulting in a smoother mix. It also allows the plaster components to integrate fully, ensuring consistent texture.
Step 6: Final Stir And Application Readiness
Give the plaster one final stir before applying it to the ceiling. This ensures any sediment that may have settled is reincorporated into the mix. Once mixed, plaster begins to set quickly, so it’s important to start applying it to the ceiling as soon as possible after mixing.
Applying The Plaster On Ceiling: A Step-By-Step Guide
Applying The First Coat (Scratch Coat)
Start by applying a thin, even layer of plaster across the ceiling. Use the hawk to carry a manageable amount of plaster and the trowel to spread it. Work in sections, moving systematically across the ceiling to ensure even coverage. This first coat will act as a base for the subsequent layers.
The Second Coat (Floating Coat)
Apply the second coat once the scratch coat is slightly set but not completely dry. This layer helps to level the surface and fill in any imperfections. Use a clean trowel to apply the plaster, maintaining a steady pressure to create a flat and even surface.
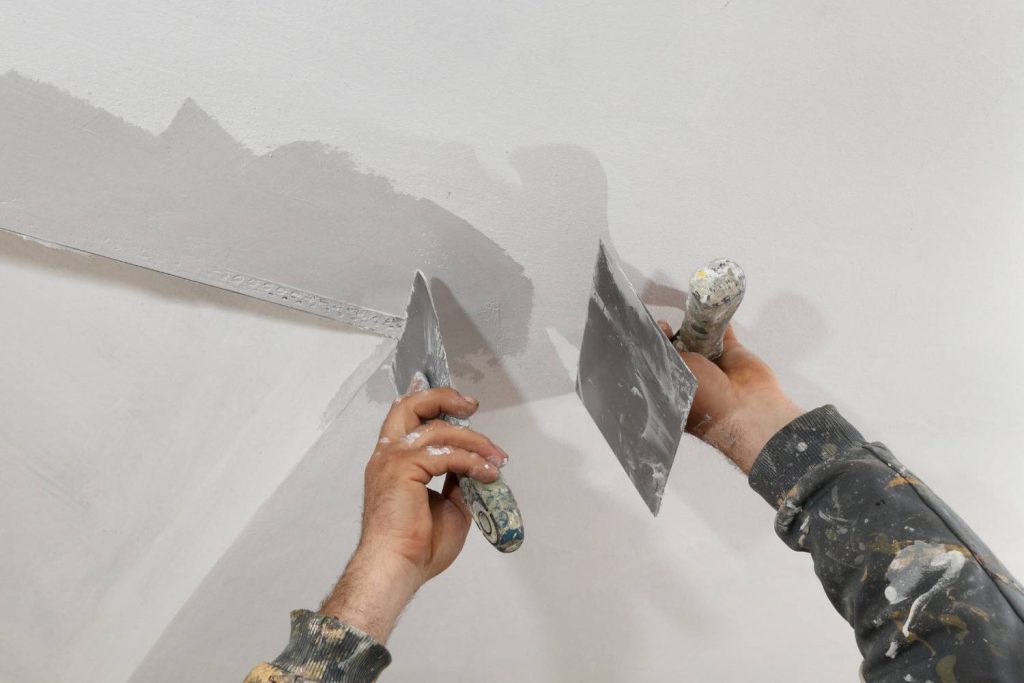
Smoothing The Surface
After applying the second coat, focus on smoothing the plaster. This can be achieved by running the trowel over the plaster in gentle, sweeping motions. The goal is to eliminate any trowel lines and create a seamless surface. If necessary, a damp sponge can smooth out any stubborn areas.
The Final Coat (Finishing Coat)
The final coat is all about achieving that perfect finish. Apply a thin layer of finely mixed plaster over the entire ceiling. This layer should be smooth and consistent, paying extra attention to areas that need more work to achieve perfection.
Polishing And Perfecting
Once the final coat is applied, polish the surface with a clean, slightly wet trowel. Gentle, broad strokes will help compact the plaster and bring out a natural shine. This step is crucial for achieving a professional-grade finish.
Drying And Sanding
Allow the plaster to dry thoroughly, which can take several days, depending on the environmental conditions. Once dry, lightly sand the surface to remove minor imperfections and prepare it for painting or wallpapering.
Tips For Success In Plastering Ceilings
- Preparation is Key. Before you begin plastering, thorough preparation of the ceiling surface is crucial. A well-prepared surface ensures better adhesion and a smoother finish.
- Choose the Right Materials. Selecting the appropriate plaster for your ceiling is essential. Before starting your project, ensure you have all the necessary tools, such as a plasterer’s hawk, trowel, mixing bucket, and step ladder.
- Mix to Perfection. Achieving the right consistency in your plaster mix is critical. Follow the manufacturer’s instructions carefully, and allow the mix to sit for a few minutes after mixing to eliminate air bubbles.
- Apply in Stages. Plastering a ceiling is typically done in two or three coats: the scratch coat, the floating (or second) coat, and sometimes a finishing coat. Each layer serves a purpose, from providing a base to smoothing the surface for a polished finish. Allow each coat to be slightly set before applying the next one.
- Keep Your Tools Clean. Clean tools are essential for a smooth application. Ensure your trowel and hawk are free from old plaster and debris. A clean trowel edge is important for achieving a smooth finish without lines or marks.
- Work in Manageable Sections. Avoid trying to plaster the entire ceiling in one go. Work in sections you can comfortably reach and finish before the plaster begins to set.
- Master the Trowel Technique. The angle and pressure you apply with the trowel significantly affect the finish. Keep the pressure consistent, and always lead with the trowel’s leading edge.
- Monitor the Drying Process. Plaster drying too quickly can lead to cracking. Ensure the room is well-ventilated, but avoid direct drafts on the freshly plastered ceiling.
- Sand for Perfection. Lightly sand the surface once the plaster is completely dry to eliminate minor imperfections.
Conclusion
The article “How to Plaster a Ceiling” walks both new and experienced do-it-yourselfers through the whole process of plastering a ceiling. Plaster, which is mostly made of gypsum, lime, or cement, can be put on top of lath or directly on surfaces to give them a smooth or rough finish. It lasts longer, doesn’t catch fire, blocks out noise better, and comes in a variety of artistic styles that can be customised.
Putting up ceiling plaster takes skill and accuracy. The surface needs to be prepared first, and then a base coat or scratch coat is applied. New technologies have made it possible to make materials that look and feel like traditional clay. These materials are easy to use and keep up. But clay can be hard to work with because it can crack over time because of changes in the surroundings or the structure.
Check out the state of the ceiling, get the right tools and materials, and clean up the ceiling surface to get ready for painting. To clean the ceiling, get rid of any loose plaster, dust, or other waste. If there are cracks or holes, fix them with filler or patching cement. To get the right density, mix the plaster and spread it out evenly with a shovel. To make the plaster smooth and level, use tools like wet trowelling and fine-grit sandpaper to get rid of any flaws and make the structure uniform.
Apply high-quality paint or other finishing touches, like a high-quality paint that goes with the rest of the room’s style, to finish the plaster. This guide shows you how to mix plaster step by step, so you can have a smooth, perfect ceiling.
Plaster can be used for many things, and it is often used to make walls smooth. It is usually made of gypsum, lime, or cement mixed with water to make a paste that can be spread. Read and follow the directions on the plaster bag to get the right consistency and structure.
Step 1: Get the mix ready: First, read the directions that came with your plaster bag. Sprinkle the clay into the water slowly while stirring it in. Get the right level of consistency: It’s best for plaster to be smooth and creamy, but not too runny or stiff.
Step 2: Mix Well. To get a smooth blend, use a drill with a mixing paddle. After mixing the clay, let it sit for a few minutes so that air bubbles can rise to the top and pop. This will make the mix smoother.
Step 3: Stir the plaster one last time before putting it on the ceiling to make sure that any lumps are mixed back in. It’s important to start putting down plaster as soon as possible after mixing it because it starts to set quickly.
For the ceiling, you need to put on the first coat, which is called the “scratch coat,” the second coat, which is called the “floating coat,” and sometimes a “finishing coat.” For a smooth application, make sure the tools are clean and work in small areas before moving on to the next one. Learn how to use a trowel and keep an eye on the drying process to keep the concrete from cracking. Lastly, to get rid of any small flaws, lightly sand the surface after the plaster is dry.
Content Summary
- Plastering a ceiling is an artistic endeavour that transforms spaces into smooth, durable masterpieces.
- The blog serves as a comprehensive guide for both novices and seasoned DIY enthusiasts on ceiling plastering.
- Preparing the mix, applying several coats, and achieving a smooth finish are key steps in plastering.
- Plaster offers benefits beyond aesthetics, including durability, fire resistance, and sound dampening.
- The application of plaster requires precision, starting with surface preparation and ending with the finish coat.
- Modern materials offer easier application and maintenance while mimicking traditional plaster’s look.
- Addressing plaster cracks and employing restoration techniques can maintain its integrity and appearance.
- Successful plastering relies on thorough preparation, ensuring a smooth and flawless finish.
- Assessing the ceiling’s condition is crucial to address any damage or uneven areas.
- The right tools, including a plastering trowel and hawk board, are essential for a successful project.
- Preparing the ceiling surface involves cleaning and repairing to ensure plaster adherence.
- Mixing plaster to the right consistency is critical for a smooth application and finish.
- Applying plaster starts with a base or scratch coat to achieve a strong bond with the surface.
- Smoothing and levelling the plaster involves techniques such as wet troweling and sanding.
- Final touches like painting seal the plaster and give the ceiling a professional look.
- Understanding plaster components is essential for achieving the desired finish.
- Preparing the mix requires following manufacturer instructions for water-to-plaster ratios.
- Gradually adding plaster to water while stirring prevents lumps and ensures a smooth mix.
- Achieving the right consistency is akin to thick yogurt, which is crucial for easy application.
- Mixing thoroughly, preferably with a drill and paddle, ensures a lump-free mixture.
- Letting the plaster rest allows air bubbles to rise and pop, resulting in a smoother mix.
- A final stir ensures consistency before application, which is critical as plaster sets quickly.
- Applying a thin scratch coat provides a base for subsequent layers and ensures even coverage.
- The floating coat levels the surface and fills imperfections, applied with steady pressure.
- Smoothing the plaster involves eliminating trowel lines for a seamless surface.
- The finishing coat is applied thinly for perfection, focusing on smooth and consistent application.
- Polishing the plaster with a wet trowel brings out a natural shine and professional-grade finish.
- Drying and sanding the plaster prepares it for painting or wallpapering, completing the project.
- Preparation, including a well-prepared surface, is key to successful ceiling plastering.
- Choosing the right materials and achieving the correct plaster mix consistency is crucial.
- Applying plaster in stages, allowing each coat to set before the next, ensures a polished finish.
- Clean tools are essential for a smooth application and a flawless finish.
- Working in manageable sections prevents the plaster from setting too quickly.
- Mastering the trowel technique affects the finish, with consistent pressure being crucial.
- Monitoring the drying process helps prevent cracking and ensures even curing.
- Sanding the dried plaster eliminates minor imperfections, readying it for finishing touches.
- Thorough assessment and preparation of the ceiling’s surface underpin a successful plastering job.
- Addressing any signs of damage early ensures a solid foundation for new plaster.
- The right toolkit simplifies the plastering process, making the job easier and more efficient.
- A clean and stable surface is vital for the new plaster to adhere properly and last longer.
- Mixing the plaster to the right consistency is fundamental for a smooth application.
- Techniques like feathering and cross-hatching minimise lines and achieve a smoother finish.
- Wet trowelling and using a clean sponge help eliminate imperfections and create a uniform texture.
- High-quality paint applied evenly across the ceiling seals the plaster and enhances the room’s decor.
- Plaster’s versatility and ability to mould into any shape offer seamless and elegant finishes.
- Proper techniques and materials effectively address issues like cracks and restore plaster’s appearance.
- Skilled professionals can maintain the original character of plasterwork through specialised restoration.
- Identifying ceiling imperfections with a torch or flashlight aids in proper repair and preparation.
- The plaster mix’s right water-to-plaster ratio is key to preventing clumping and achieving smoothness.
- Systematic application of plaster, starting with the scratch coat and ending with the finishing coat, ensures a strong bond and desired texture.
Frequently Asked Questions
Can I Plaster A Ceiling Myself, Or Should I Hire A Professional?
Yes, you can plaster a ceiling yourself, especially if you’re comfortable with DIY projects and follow the steps and techniques outlined in this blog. Plastering requires patience and practice to achieve a smooth finish, so if you’re new to plastering, you should start with a small, less visible area. However, hiring a professional might be more practical to ensure a high-quality finish for large projects or ceilings with significant damage.
How Long Does It Take For Ceiling Plaster To Dry?
The drying time for plaster can vary based on several factors, including the type of plaster used, the thickness of the application, and the room’s humidity and temperature. Generally, plaster can take 2 to 3 days to dry enough to be sanded or painted. However, it’s best to wait at least a week before applying any heavy finishes to ensure the plaster is fully cured.
What Type Of Plaster Should I Use For My Ceiling?
For ceilings, using a multi-finish or board finish plaster is recommended, as these types are easier to work with and provide a smooth finish. If you’re plastering over Artex or repairing a damaged area, you might need a backing plaster or bonding coat first to ensure proper adhesion. Always check the manufacturer’s recommendations for your specific project needs.
How Do I Prevent My Plastered Ceiling From Cracking?
To prevent cracking:
- Ensure your ceiling surface is properly prepared, cleaned, and primed before applying plaster.
- Avoid applying plaster too thickly in one go; gradually build up layers.
- Control the room’s environment by avoiding extreme temperatures and humidity levels during drying. If cracks do appear, they can often be filled in with a fine surface filler before sanding and finishing.
Can I Plaster Over An Existing Painted Ceiling?
Yes, you can plaster over an existing painted ceiling, but you’ll need to prepare the surface properly to ensure the new plaster adheres well. This preparation may include sanding the painted surface to create texture, cleaning it thoroughly to remove dust and grease, and applying a bonding agent or diluted PVA glue to provide a suitable base for the plaster. If the paint is peeling or flaking, it should be scraped off, and the area should be prepared as if it were a new surface.
